Are you interested in FFmpeg live streaming on Dacast under Mac OS with FFmpeg? This guide provides a step-by-step explanation to get you started! To stream on Dacast under Linux with FFmpeg, click here.
Requirements:
You will need to compile FFmpeg with the help of brew (https://brew.sh/) and specific librtmp parameters detailed below.
Development tools:
Before getting started, please make sure to install the brew package manager and have an updated version of Xcode Command Line Tools included for free with your Mac OS distribution. For more information on how to install Xcode Command Line Tools, please click here. To install brew, just copy-paste in your terminal:
/usr/bin/ruby -e “$(curl -fsSL https://raw.githubusercontent.com/Homebrew/install/master/install)”
Then, follow the instructions.
FFmpeg Installation:
Install FFmpeg using Homebrew by pasting this command in your Terminal:
brew install ffmpeg
Usage
Open your Web Browser, navigate to the Dacast website, and then access your live Stream Tab, click on a channel to access the channel’s settings. Once there, please click the Encoder Setup button on the right, as pictured below:


At this point, you should see the following information on your screen:


Once here, you’ll need the following data, it can be found once you click the encoder setup button, please refer to the image above:
| Username | 4578494364 |
| Password | d24345c484 |
| Server | rtmp://rtmp-live-ingest-us-east-1-singularity.dacast.com/ABR1080v1 |
| Stream Key | 54b0a1101e8a48dbb1ae33e4dd31ed25_3500 |
Important Notes (Please Read Carefully)
Note 1: If your credentials are rejected
You must have followed all the steps above and the librtmp manual compilation or this is not gonna work: your credentials will be rejected by the server.
Note 2: Common errors
A recurring typo in fdk aac usage is that, during the installation process, you need to enter “–enable-fdk–aac” but when you use it in the command it is: “-c:a libfdk_aac”
Note 3: Insert your source path
You want to replace:
-f lavfi -i testsrc
With:
-i /your_source_path
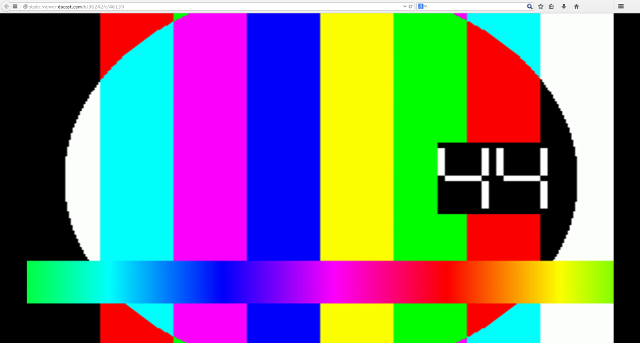
Otherwise, you will just have the test screen (as shown below), not your live stream. If you have not replaced “-f lavfi -i testsrc” with “-i /your source path”, you will see the following test screen: 

Note 4: Increase buffer for smoother playback
If your playback is not smooth enough, you can increase the size of your buffer by replacing:
-b 900k
With:
-bufsize 3000k
Your command will look like this:
$ ffmpeg -re -i /your_source_path -c:v libx264 -b:v 1600k -preset ultrafast -bufsize 3000k -c:a libfdk_aac -b:a 128k -s 1920X1080 -x264opts keyint=50 -g 25 -pix_fmt yuv420p -f flv “rtmp://6aafb613-23xa-dcf1-3f83-55795616da6b.dacastmmd.pri.lldns.net/dacastmmd flashver=FMLE/3.020(compatible;20FMSc/1.0) live=true pubUser=4578494364 pubPasswd=d24345c484 playpath=54b0a1101e8a48dbb1ae33e4dd31ed25_3500“
Note 5: Better quality for a more powerful system
If you want better quality and your system is powerful enough, you may replace
-preset ultrafast
With:
-preset fast
Your command will look like this:
$ ffmpeg -re -i /your_source_path -c:v libx264 -b:v 1600k -preset fast -b 900k -c:a libfdk_aac -b:a 128k -s 1920×1080 -x264opts keyint=50 -g 25 -pix_fmt yuv420p -f flv “rtmp://6aafb613-23xa-dcf1-3f83-55795616da6b.dacastmmd.pri.lldns.net/dacastmmd flashver=FMLE/3.020(compatible;20FMSc/1.0) live=true pubUser=4578494364 pubPasswd=d24345c484 playpath=54b0a1101e8a48dbb1ae33e4dd31ed25_3500“
Note 6: Lowest latency for a very powerful system
If your goal is to get the lowest latency and you have a very powerful system, you may add the following to the initial command:
-tune zerolatency
Your command will look like this:
$ ffmpeg -re -i /your_source_path -c:v libx264 -b:v 1600k -preset ultrafast -tune zerolatency -b 900k -c:a libfdk_aac -b:a 128k -s 1920×1080 -x264opts keyint=50 -g 25 -pix_fmt yuv420p -f flv “rtmp://6aafb613-23xa-dcf1-3f83-55795616da6b.dacastmmd.pri.lldns.net/dacastmmd flashver=FMLE/3.020(compatible;20FMSc/1.0) live=true pubUser=4578494364 pubPasswd=d24345c484 playpath=54b0a1101e8a48dbb1ae33e4dd31ed25_3500“
Feel free to get in touch with Dacast directly if you need further support with this process. Any questions or need help/access to this feature? Please contact us directly if you need further support with this process. Not yet a Dacast user, and interested in trying Dacast risk-free for 14 days? Sign up today to get started.
Additional Resources
- Intro to Live Streaming: A Walkthrough
- Live Stream Recording Tutorial
- Is My Live Stream Auto-Recorded or Saved on the Video Platform?
- Live Streaming on the Dacast Platform with FFmpeg for Linux
- FFmpeg Live Streaming – What Professional Broadcasters Need to Know
- Video Streaming Software: Top 6 Apps for Professional Live Streaming


