


FFmpeg Live Streaming on the Dacast Platform for Linux

Are you interested in streaming on Dacast under Linux with ffmpeg? This guide provides a step-by-step explanation to get you started!
To stream on Dacast under Mac with ffmpeg, click here.
Note: this guide covers the following Linux distributions:
- Ubuntu 18.xx
- Arch Linux
Requirements:
You will need to compile ffmpeg yourself so that you can access RTMP support through the librtmp library.
Development tools:
Before getting started, make sure that you install the tools necessary to compile ffmpeg, librtmp, and their dependencies.
- Ubuntu 18.xx
$ sudo apt-get update
$ sudo apt-get install build-essential git libssl-dev
- Arch Linux
# pacman -Sy base-devel git
Installation:
1. librtmp
- First, retrieve the librtmp source code on the official git repository.
$ git clone git://git.ffmpeg.org/rtmpdump
- Next, browse to the local repository’s folder, and then run the compilation process.
$ cd rtmpdump
$ cd librtmp
$ make
- Finally, install the library in your system’s root directory.
# DESTDIR=/usr make install
2. ffmpeg
Dependencies
You may need to retrieve some additional libraries, such as the audio and video codecs required to broadcast your media content.
Ubuntu 18.xx
Please note that you’ll need to manually compile libaacplus.
$ sudo apt-get install libfftw3-dev pkg-config autoconf automake
libtool libtool-bin unzip
$ wget http://tipok.org.ua/downloads/media/aacplus/libaacplus/
libaacplus-2.0.2.tar.gz
$ tar -xzf libaacplus-2.0.2.tar.gz
$ cd libaacplus-2.0.2
$ ./autogen.sh --enable-shared --enable-static
$ make
$ sudo make install
$ sudo ldconfig
# apt-get install yasm libfaac-dev libfdk-aac-dev libfreetype6-
dev libmp3lame-dev libopencore-amrnb-dev libopencore-amrwb-dev
libopenjpeg-dev libopus-dev libschroedinger-dev libspeex-dev
libtheora-dev libvo-aacenc-dev libvorbis-dev libvpx-dev libx264-
dev libxvidcore-dev
Arch Linux
Some dependencies are located on the ArchLinux User Repository. Therefore, you must first retrieve their source code and then compile these dependencies manually.
You also have the option to automate this process by installing a useful tool called yaourt.
You can access an installation guide at this address: http://archlinux.fr/yaourt-en.
You can retrieve the required dependencies with the following commands:
# pacman -Sy yasm freetype2 lame opencore-amr openjpeg opus
schroedinger speex libtheora libvorbis libvpx x264 xvidcore
faac libfdk-aac
$ yaourt libaacplus
$ yaourt vo-aacenc
Compilation
- Retrieve the ffmpeg source code on their official git repository :
$ git clone https://github.com/FFmpeg/FFmpeg.git
- Browse to the local repository’s folder, then run the compilation process:
$ cd FFmpeg
$ ./configure --enable-gpl --enable-version3 --enable-
nonfree --enable-postproc --enable-libaacplus --enable-
libfaac --enable-libfdk-aac --enable-libfreetype --enable-
libmp3lame --enable-libopencore-amrnb --enable-libopencore-
amrwb --enable-libopenjpeg --enable-openssl --enable-libopus
 --enable-libschroedinger --enable-libspeex --enable-libtheora
--enable-libvo-aacenc --enable-libvorbis --enable-libvpx --enable-
libx264 --enable-libxvid --prefix=/usr/local --enable-librtmp
$ make
- Install ffmpeg in your system’s root directory:
# make install
Usage
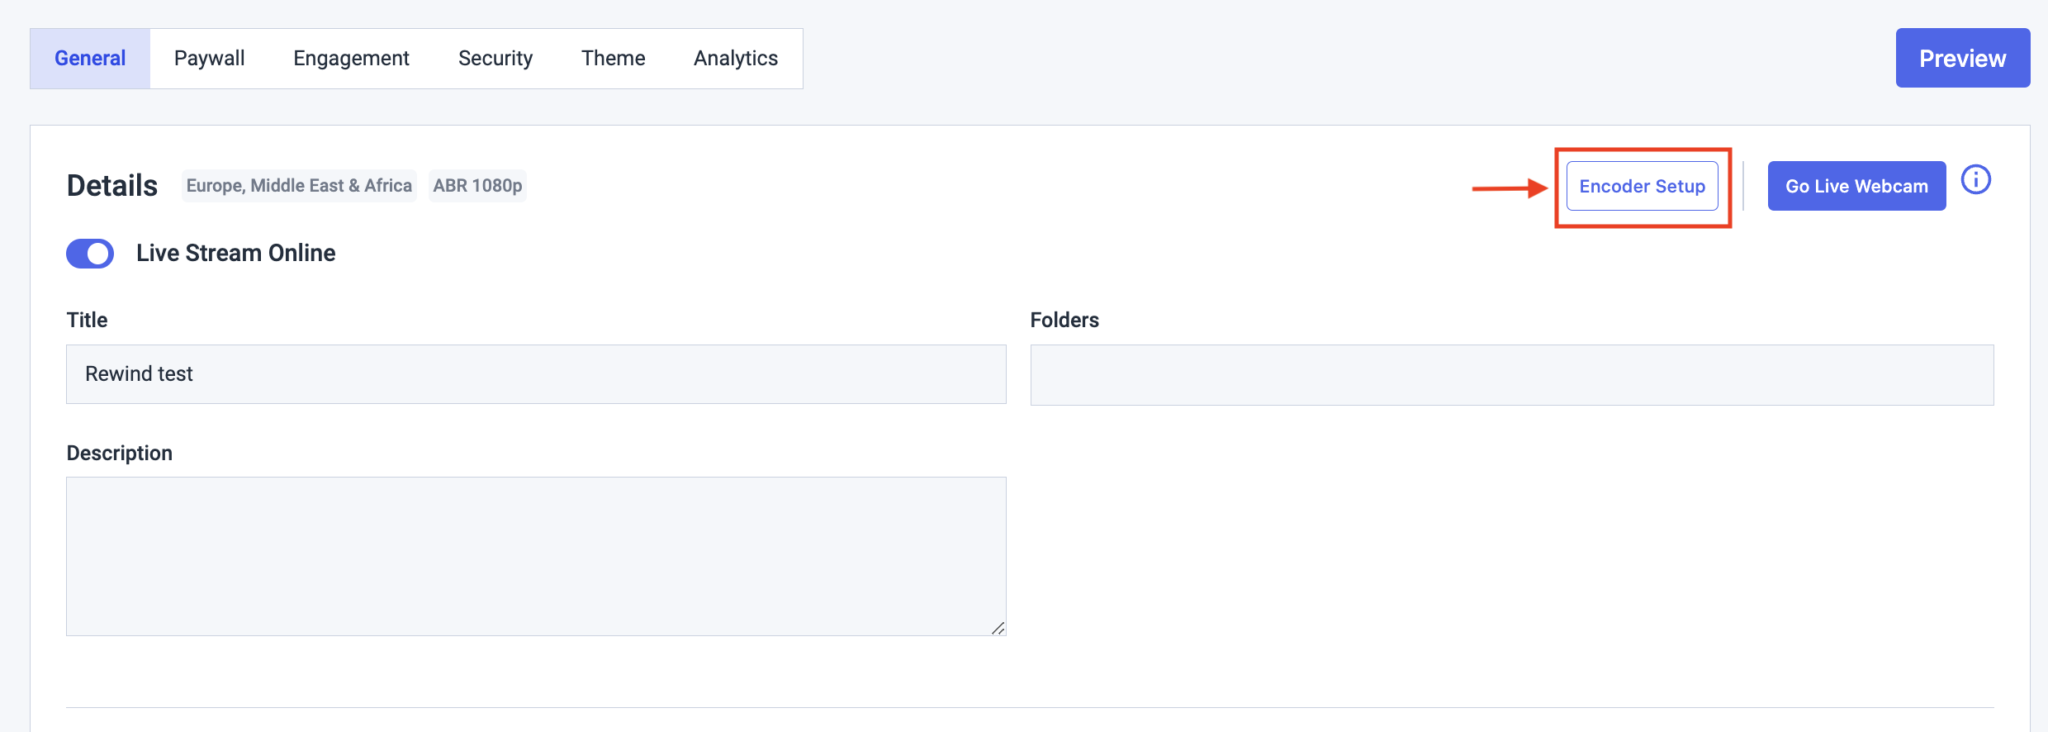
Open your Dacast account and create a new channel from the Live Stream Page.

Once created, select Encoder Setup from the General Tab:
Make sure that Generic RTMP Encoder is selected. You’ll need the following credentials:
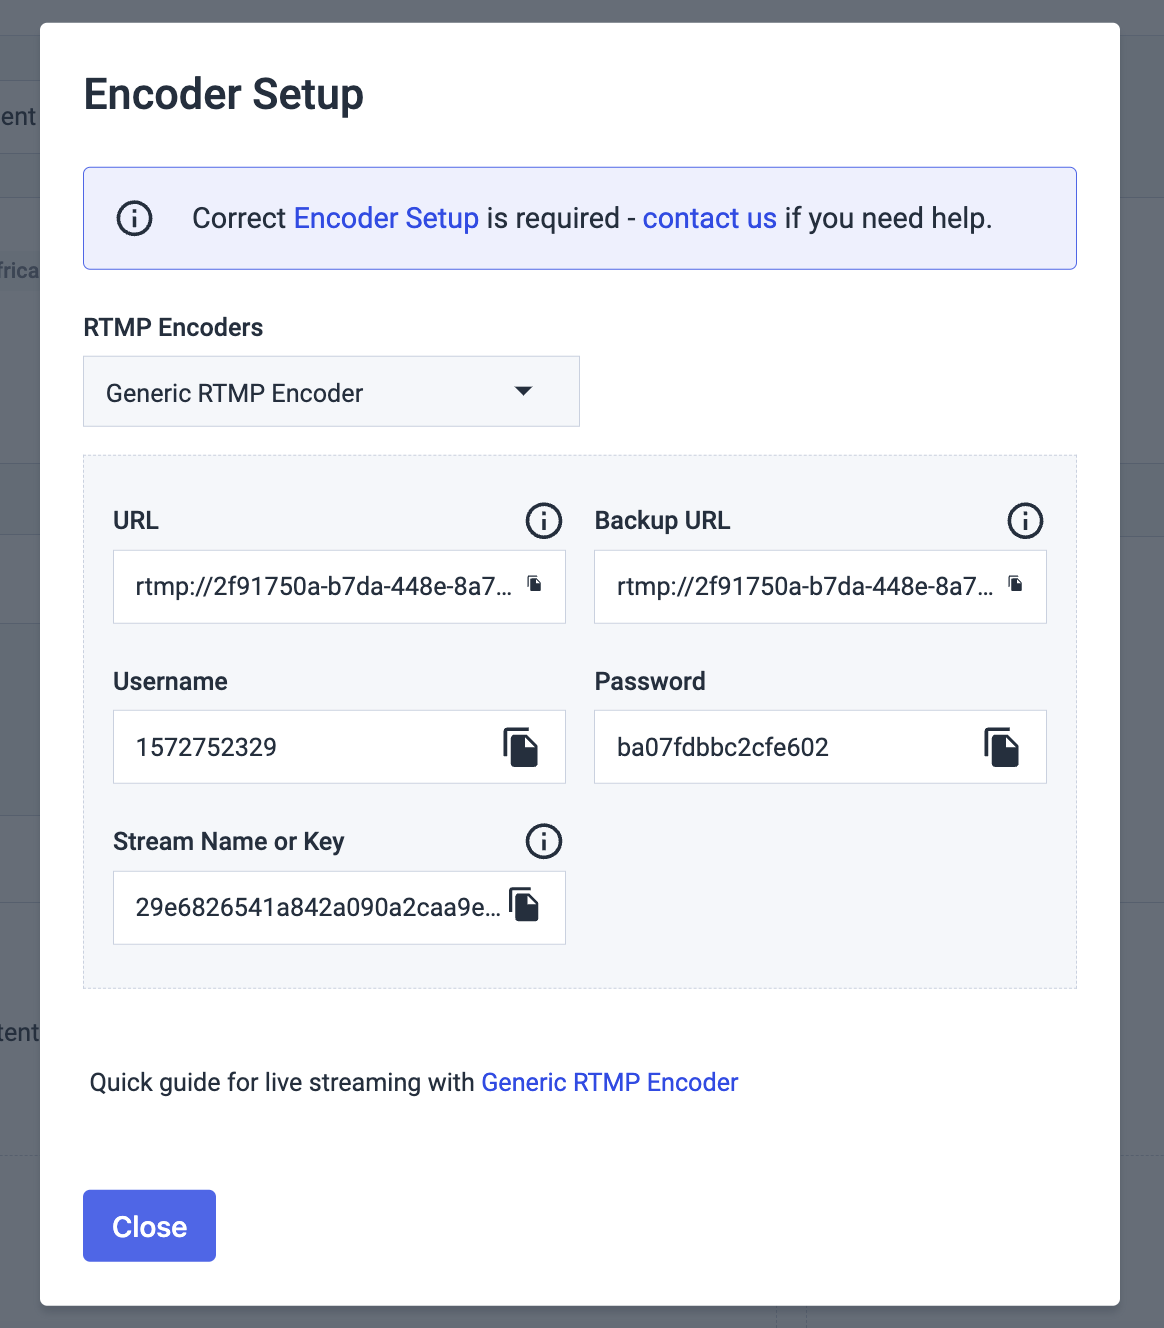
Next, please run the following command:
$ ffmpeg -re -f lavfi -i testsrc -c:v libx264 -b:v 1600k -preset
ultrafast -b 900k -c:a libfdk_aac -b:a 128k -s 1920x1080 -x264opts
keyint=50 -g 25 -pix_fmt yuv420p -f flv
"rtmp://p.ep246802.i.akamaientrypoint.net/EntryPoint flashver=
FMLE/3.020(compatible;20FMSc/1.0) live=true pubUser=123456
pubPasswd=789123 playpath=dclive_1_1@246802"
Important Notes (please read carefully)
Note 1: if your credentials are rejected
You must have followed all the steps above and the librtmp manual compilation or this is not gonna work: your credentials will be rejected by the server.
Note 2: common error
A recurring typo in fdk aac usage is that, during the installation process, you need to enter “–enable-fdk–aac” but when you use it in the command it is: “-c:a libfdk_aac”
Note 3: insert your source path
You want to replace
-f lavfi -i testsrc
with
-i /your_source_path
Otherwise, you will just have the test screen (as shown below), not your live stream. If you have not replaced “-f lavfi -i testsrc” with “-i /your source path”, you will see the following test screen:

Note 4: increase buffer for smoother playback
If your playback is not smooth enough, you can increase the size of your buffer by replacing:
-b 900k
with
-bufsize 3000k
Your command will look like this:
$ ffmpeg -re -i /your_source_path -c:v libx264 -b:v 1600k -preset ultrafast -bufsize 3000k
-c:a libfdk_aac -b:a 128k -s 1920×1080 -x264opts keyint=50 -g 25 -pix_fmt yuv420p -f flv
“rtmp://p.ep246802.i.akamaientrypoint.net/EntryPoint flashver=FMLE/3.020(compatible;20FMSc/1.0)
live=true pubUser=123456 pubPasswd=789123 playpath=dclive_1_1@246802″
Note 5: better quality for powerful system
If you want a better quality and your system is powerful enough, you may replace
-preset ultrafast
with
-preset fast
Your command will look like this:
$ ffmpeg -re -i /your_source_path -c:v libx264 -b:v 1600k -preset fast
-b 900k -c:a libfdk_aac -b:a 128k -s 1920×1080 -x264opts keyint=50 -g 25
-pix_fmt yuv420p -f flv “rtmp://p.ep246802.i.akamaientrypoint.net/EntryPoint
flashver=FMLE/3.020(compatible;20FMSc/1.0) live=true pubUser=123456 pubPasswd=789123
playpath=dclive_1_1@246802″
Note 6: lowest latency for very powerful system
If your goal is to get the lowest latency and you have a very powerful system, you may add the following to the initial command:
-tune zerolatency
Your command will look like this:
$ ffmpeg -re -i /your_source_path -c:v libx264 -b:v 1600k -preset ultrafast
-tune zerolatency -b 900k -c:a libfdk_aac -b:a 128k -s 1920×1080 -x264opts
keyint=50 -g 25 -pix_fmt yuv420p -f flv “rtmp://p.ep246802.i.akamaientrypoint.net/EntryPoint
flashver=FMLE/3.020(compatible;20FMSc/1.0) live=true pubUser=123456 pubPasswd=789123
playpath=dclive_1_1@246802″
Feel free to get in touch with Dacast directly if you need further support with this process.