


How To Use the Teradek VidiU Live Stream Encoder

In the past, live streaming video over the internet has required either a computer or a bulky dedicated live stream encoder. Today, there are a number of compact, portable, camera-mounted live stream encoder units that can completely change the way you operate a live stream.
This blog will take a look at the VidiU live stream encoder from the Teradek corporation. This small, compact unit provides an entry-level mobile live streaming solution for an affordable price. The unit has been well-reviewed and is regarded as a solid tool in the live video arsenal. In this post, we’ll go over the features of the VidiU, review differences between the VidiU and VidiU Pro, discuss the pros and cons of this device, and also show you how to connect a VidiU to Dacast.
Introduction to the Teradek VidiU live stream encoder
The TeraDek VidiU, originally released in 2013, is an extremely compact live streaming H.264 video encoder. It encodes video via RTMP which makes the device compatible with nearly every streaming solution around, including Dacast.
With an affordable price ($699) and excellent functionality, the VidiU is a compelling device. Let’s take a look in more detail at the VidiU’s features.
Shoe-mount
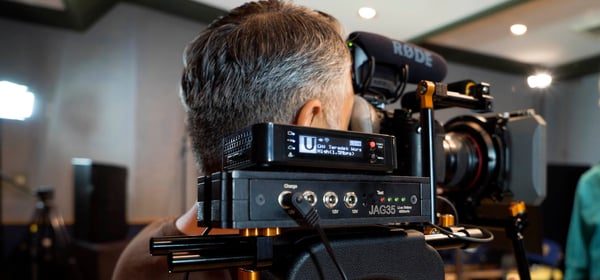
Perhaps the most striking thing about the VidiU is its size. The encoder is about three inches wide, four inches long, and an inch thick. That’s about the size of a deck of cards. It’s a highly portable system and is designed to be mounted on the cold-shoe of a camera.
This design, combined with the battery that lasts for around an hour of continuous streaming, makes the VidiU one of the most portable options around. This is ideal for mobile cameras in an event setting. Sports, graduation ceremonies, concerts, festivals, trade shows, conventions, and other similar events make a great setting for using a VidiU live stream encoder.
Internet connection options
 The VidiU can connect to the internet via a few different methods. The most reliable method is the hard-wired Ethernet cable. This is the fastest and most stable connection available. The encoder also supports Wi-Fi connections via dual-band MIMO 802.11 a/b/g/n. However, it doesn’t support the latest and fastest Wi-Fi protocols.
Finally, the VidiU also includes a USB port that can be used for a 3G/4G LTE cellular modem.
Video resolution and bitrate
The VidiU supports a range of resolutions. On the low end, the “mobile” setting streams video at 360 x 200 resolution and a bitrate of 273 Kbps. On the high end, full HD streaming at 1920 x 1080 requires 5 Mbps or more.
The VidiU settings window includes a “Suggest Quality” function. Selecting this option launches a quick bandwidth test that shows the speed of your connection and recommends a setting. This tool can be useful for quick spot-checks of your internet connection speed.
Connectivity
The VidiU accepts video input via mini HDMI. This will allow you to plug into any camera directly that uses an HDMI output. There are also adapters available that should make most cameras compatible with the VidiU. The device includes a male-to-mini HDMI cable with purchase.
It also includes a headphone jack for monitoring audio and a mic-in jack for an alternative to audio over HDMI.
Battery and power
The VidiU includes a small, internal lithium-ion battery. This is an advantage over similar units from Livestream, which require AA batteries that must be regularly swapped out (and are only compatible with their service). The main advantage here is that the VidiU battery is rechargeable. The unit also includes an AC power adapter for charging, or when you need to stream continuously for a longer span of time.
Monitoring via a mobile device
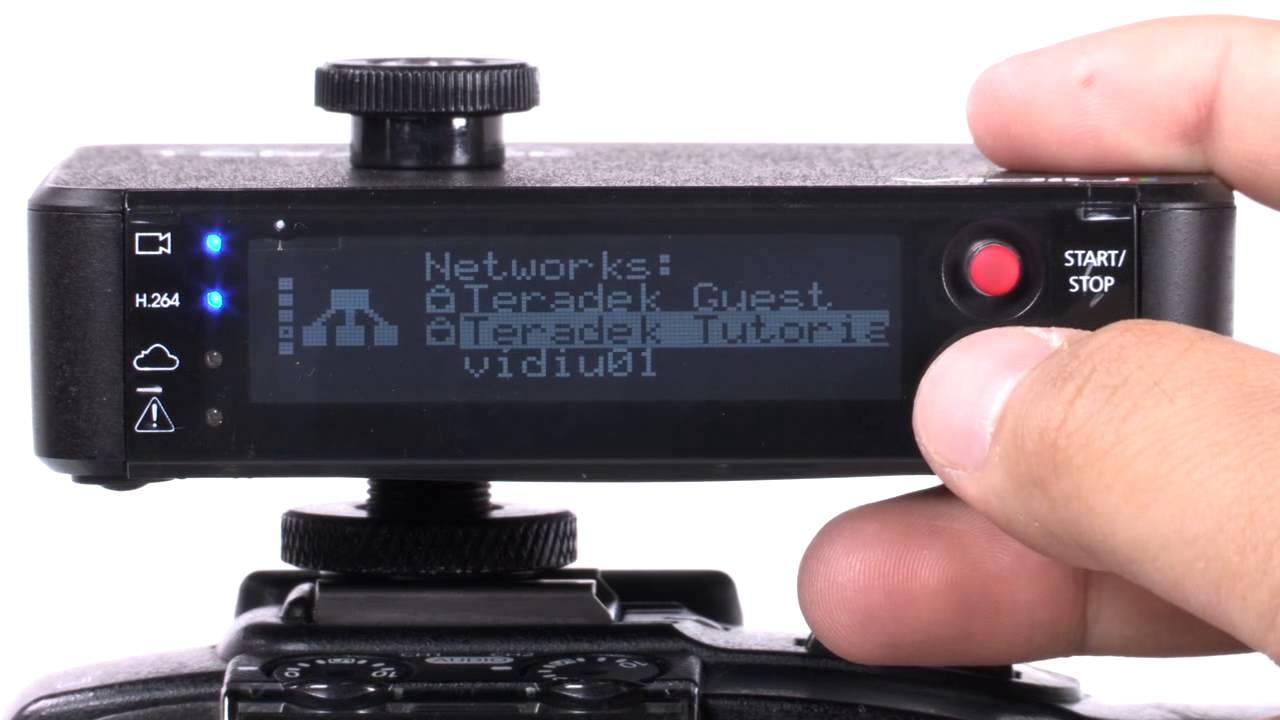
One consequence of the tiny VidiU form factor is that the OLED screen and joystick combination makes it hard to configure the device.
However, you can easily circumvent this potential problem with Teradek’s VidiU apps for Android and iOS. When connected to the same network, these apps connect to your VidiU live stream encoder automatically. They then allow you to configure your settings via a simple touchscreen interface. Once you begin streaming, you can also monitor the feed from your device.
Differences between the VidiU and VidiU Pro
 Alongside the VidiU, Teradek also produces the VidiU Pro. This device is an upgraded VidiU with a few extra features.
The headline feature is “ShareLink,” a proprietary Teradek protocol for network bonding. This technology allows you to combine up to six network connections simultaneously. For example, you could combine Ethernet, Wi-Fi, USB cellular modems, and up to four connections via iPhone all at once.
The VidiU Pro is also slightly larger in size, at 4.7 x 3 x 1.2 inches, has a longer battery life, and includes an SD card slot for recording live streams as they occur.
Advantages of using an on-camera encoder
The primary advantage of using an on-camera encoder is mobility. Instead of being tethered to a central location, videographers are free to roam. This is ideal for gathering footage at sprawling events, finding unique angles, and so on.
The cable-free operation also reduces the risk of tripping someone or accidentally unplugging a key cable. This is greatly advantageous when shooting in the field.
Pros and cons of the Teradek VidiU
Let’s list a few specific pros and cons of the VidiU live streaming encoder.
Pros:
- Small form factor
- Portable and battery-powered
- Easily mounts to almost every camera
- Easy to use
- Monitoring via smartphone or tablet is convenient and easy
- Compatibility with Teradek’s Live:Air mobile mixing apps
Cons:
- Battery life is a concern at longer events, and there is no battery indicator
- Doesn’t support the latest 802.11ac/n Wi-Fi standards, which limits speed
- Unit start-up time is somewhat slow (a few minutes)
- Hardware is starting to show its age
How to link VidiU live stream encoder to Dacast
It’s easy to link a Teradek VidiU or VidiU Pro to Dacast. Here’s how to get started.
- First, log in to your Dacast account. If you don’t have a live channel already, you will need to create one by clicking on “Add” and selecting “Live Stream”.
- In your new list of live channels, click the “Edit” button, recognizable by the pencil icon.
- Navigate to “Encoder Setup” in the top right-hand corner of the window.
- The window that opens will show the necessary details to connect your live streaming encoder, in this case, the VidiU Teradek, to Dacast
- Leaving the Dacast window for a moment, open your VidiU settings either on the built-in OLED screen or via the wireless configuration/monitoring app.
- Select “Settings,” then “Broadcast.”
- Select “Platform,” then “Manual.” This will allow you to enter the Dacast live channel information.
- Copy the “Stream URL” from Dacast and enter it into the “URL” box in the VidiU settings. Copy the “Stream Name” from Dacast and enter it into the “Stream” box. You’ll also need to select the “Agent” setting in VidiU and change it to “FMLE.” Finally, copy the login and password over as well.
- In the VidiU settings, save the profile, navigate one step back to “Platform” using the back arrow, then hit the “Apply” button. Your VidiU or VidiU Pro is now set up and ready to stream with Dacast.
Conclusion
The VidiU is a powerful live stream encoder. It’s a great mix of professional-grade features in a compact, affordable package. This makes it appealing to a wide range of users. We’ve found that many Dacast customers use the VidiU, so we hope this article makes it easier to get started.
Any questions or ideas? Let us know in the comments! Thanks for reading, and as always, good luck with your live streams.