



Live Streaming Classroom – How to Live Stream Classes Online (2026)

By Dacast Editorial Team | Reviewed by Jon Whitehead, COO at Dacast | Updated August 2026
Live streaming for education means broadcasting a class, lecture, or training session in real time to remote students, using a streaming platform for education instead of an in-person-only setting. It lets students participate, ask questions, and interact with peers much as they would in a physical classroom.
Educators now use it to stream lectures, share course materials, and run assessments, all from one platform. It’s moved from a stopgap measure into a standard delivery method for many schools and training programs, reaching students who couldn’t otherwise attend in person.
Setting up a classroom stream is straightforward once you know the steps. Whether you’re teaching computer science, photography, cooking, music, or a professional skill, this guide covers the equipment, platform choice, and setup process for a live-streamed class, along with tips to keep it running smoothly.
By the end, you’ll know how to livestream a class and share the content online.
TL;DR:
- Live streaming a class takes five steps: gather equipment, choose a platform, check your connection, prepare your content, and go live.
- A basic camera, microphone, and encoder (free options like OBS Studio work fine) cover most classroom setups.
- A stable upload connection, at least twice your target streaming bitrate, keeps the stream from buffering.
- Small habits (a test run, pre-recorded clips to break up long sessions, a bit of on-camera confidence) make the biggest difference in student engagement.
- Choosing which platform to use is a separate decision. See our comparison of the best online learning platforms for features and pricing.
Table of Contents
- Live Streaming Classrooms: The Future of Education
- The Importance of Live Streaming Classes
- How to Live Stream a Class
- Tips for Successful Live Stream Classes
- FAQs
- Conclusion
Live Streaming Classrooms: The Future of Education
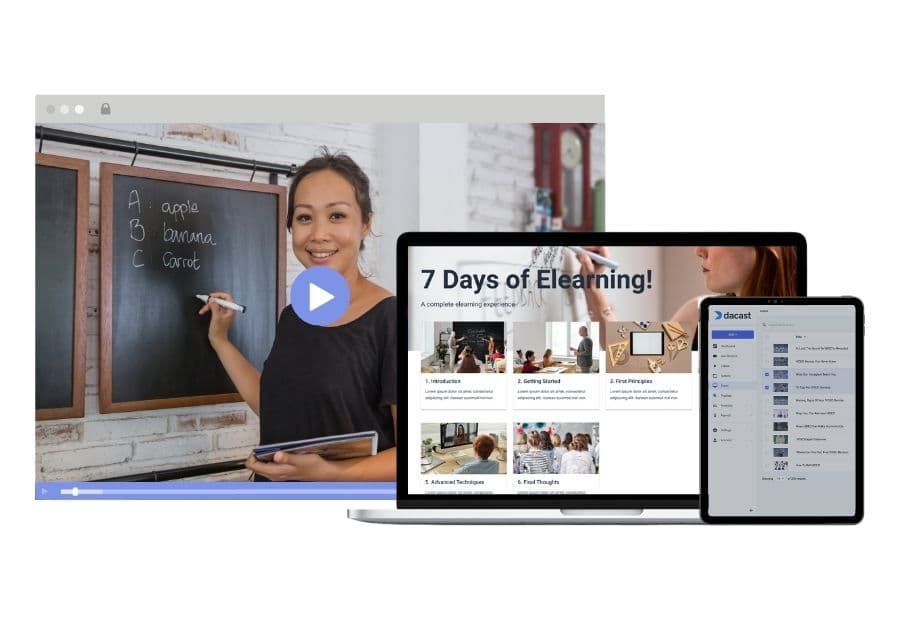
Over the past year and a half, the importance of education has become very clear. The pandemic forced many educators to jump into the realm of virtual lectures and remote learning.
Although many schools have resumed their in-person classes, the value of live-streamed courses and virtual classrooms still needs to be improved. Teachers, students, and administrators recognize that virtual live streaming can be effective with proper planning and preparation. Live streaming paid or free online certificate courses open up access to the content for learning new skills allowing schools to reach more students through professional certificate programs.
Even schools that return to in-person learning will likely continue incorporating live-streaming courses in their classes. Allowing additional students to attend using a live classroom is vital. Subjects such as entrepreneurship and computer science are just as good candidates for remote learning as creative fields such as photography or graphic design courses.
The Importance of Live Streaming Classes
There are many benefits of teaching professional certificate programs via online courses instead of in-person courses. One of the main benefits is that remote learning makes education accessible, even in the face of natural disasters.
Virtual learning also provides flexibility for students who want to attend schools far from their homes, even if they cannot afford to move. Accessibility like that creates new job opportunities for learners worldwide to follow their dreams. Access to education is the key to economic growth, and schools that offer live streaming help facilitate economic growth and personal success.
Live streaming classes are also great for students who thrive without the distraction of other students. But unfortunately, the traditional classroom environment isn’t the best learning environment for everyone.
Some other exciting benefits of remote learning via live streaming classes are that it saves time for all parties involved and conserves energy. Both teachers and students have to travel to school for in-person lectures. Between the commute and finding parking on campus, the time adds up. Live courses save everyone time.
Avoiding travel to and from campus also cuts back on energy consumption. Although the conservation may seem small for one person, looking at it through a wide lens shows that the combined effort is significant.
Choosing the right platform is a big decision on its own. See our comparison of the best online learning platforms for a full breakdown of features and pricing across leading options.
How to Live Stream a Class
Physical limitations no longer restrict learning. With the support of a professional streaming platform, educators like you can easily host live courses.
You need to tick a few boxes before you start your first live-streaming classroom or online lecture. Then, we will help you quickly learn how to livestream a class.
Here’s the rundown:
- Collect the proper equipment.
- Choose an online video education platform.
- Check your internet connection.
- Prepare your content.
- Start your live stream class.
As long as you carefully follow each step, you’re bound to learn how to create educational materials that make your student’s virtual streaming experience feel like they are attending a live lecture.
Now that we’ve covered the basics, we will discuss the five significant steps of conducting live online classes. At the end of completing this tutorial, you will know how to livestream lectures and other educational content.
1. Gather Your Equipment
You will need a camera and a microphone to host live stream classes. Since an online live-streaming classroom replaces real-world learning, the quality should match that of a real classroom.
Here are a few pieces that you will need to invest in:
- Streaming video camera or webcam
- Capture card (if using an external camera)
- An external microphone
- Proper lighting equipment (if necessary for filming location)
- An encoder
- A tripod
Unlike many professional live streaming verticals, investing in professional-grade recording equipment is necessary practice for education. If you have 100 teachers recording live courses and course material from their homes, providing everybody with thousands of dollars of equipment will get both expensive and complicated.
However, note that some online courses don’t even have presenters on screen. Sometimes an online class will only have a slideshow presentation on-screen and live audio commentary. You only need good audio equipment if you don’t plan to present yourself on camera.
You can also use the Wirecast Desktop Presenter plug-in which facilitates the live audio stream with screen-sharing capabilities, perfect for capturing and lecturing with a visual presentation.
There is no single best way to livestream a class; the key is to create an educational environment that is best for the material you are presenting.
How to Choose a Streaming Encoder
A high-quality camera and audio-capturing equipment are self-explanatory. However, if you are new to live streaming, you may need to learn what an encoder is.
A video encoder is either a device or hardware that creates compressed versions of your teaching video clips as they are recorded. The purpose of having a compact version is to stream it without buffering or getting grainy, especially if a viewer needs a strong internet connection. In addition, low-latency streaming is essential for a positive viewer experience.
Using encoding software or a hardware encoder depends on your budget and computer speed. Hardware encoders are much more expensive. That’s because they are independent of your computer and run on their processor. However, they are compelling.
We recommend several streaming encoders, including the free and open-source OBS Studio software encoder. Other RTMP options work with Dacast, including VMix and Vidblaster. Telestream’s Wirecast is one of the best available for a more professional software encoder. You can download a free trial before purchasing. Dacast also accepts SRT ingest, which recovers from packet loss more gracefully than RTMP, worth considering if you’re streaming from a school Wi-Fi network or a less reliable home connection.
For more information on setting up live encoders, check out the Dacast Encoder Configuration guide.
2. Choose a Live Streaming Classroom Platform
With that equipment in place, an essential part of live education broadcasting is selecting the right streaming provider. You want to choose a reliable streaming solution with a
Video CDNs guarantee that your content is distributed all over the globe without clogging your own servers. Dacast partners with the Akamai CDN, one of the best and largest CDNs in the industry, to provide you with a multi-CDN network. Akamai also works with famous and successful companies like Apple and Facebook.
You want to pick a streaming platform that is affordable and easy to use if you’re new to live streaming, choose a provider that doesn’t require any technical knowledge to use their system.
Streaming platforms like Dacast help you start live education broadcasting with just a few clicks. With our highly affordable platform, you can easily stream live video on your website while maintaining control of and rights to your content. Additionally, we have a Zoom live integration which gives you unlimited access to peer-to-peer streaming and opens up the possibility of dialogue with students. When video streaming classes, interaction can help improve the learning experience.
A powerful streaming solution also provides a monitoring and business analytics feature. You want to have access to viewer numbers, behaviors, and engagement. For example, when teaching an online class, it’s helpful to know if your students stayed on the stream the whole time or left before the end. With the right live streaming platform, you will get access to analytics that will allow you to learn how to create the best live stream class.
Also, you want to know if your lesson or material is engaging enough for your students and tailor your lesson plans to your student’s needs and preferences. Video streaming analytics can improve your educational content.
It is a good idea to think beyond the livestream. Determine whether you plan to make the videos available for playback after they have finished. If that’s a capability that you’re looking for, make sure your online video platform has video-on-demand (VOD) capabilities.
Another thing you should take into consideration is the degree of privacy and security capabilities of your OVP. Some broadcasters choose to publicize their live streams; others only give access to specific students. The decision ultimately comes down to whether a public or private live-stream classroom makes sense for you.
3. Tailor Your Educational Content
Convert your lesson plan to make them work on the camera.
Educators work hard on their lesson plans. They use their years of training and experience to create engaging materials and lectures that resonate with their students. However, switching from traditional lessons at school to live-stream courses takes a little extra work.
Think about the way you present information. If you use whiteboards or smartboards, you’ll have to figure out how to get that all in the camera’s view without distorting it. You could do screen-recorded lectures with voice-overs, or maybe you need to adjust your whiteboard so that the camera captures it.
Only minor tweaks are required, but these things should be tested and prepared before you go live.
In addition to preparing the content, it is vital to remain confident. The uncharted territory might be intimidating, but you must present confidently because your students will feed off your attitude. When video streaming classes, your confidence in your material enhances the classroom experience.
For example, video in an educational context can facilitate learning and improve collaboration. It can also increase student engagement and the teacher’s effectiveness.
According to the American Public Broadcasting Service’s (PBS) annual teacher survey on media and technology, the majority of teachers believe that video is an effective excellent learning tool:
- 68% believe that video stimulates discussions
- 66% believe that video increases student motivation
- 41% believe that video increases student achievement
4. Secure Your Internet Connection
A stable internet connection is vital for any live stream. Live education broadcasting is no exception. Therefore, you want to ensure your content reaches your audience without glitches or latency issues.
Blank screens, lagging, and sudden interruptions to the stream can be a source of great distraction for both students and educators.
Your internet connection needs to reach certain speeds to stream at a high quality. Therefore, we recommend that you reach at least 750Kbps to 2Mbps. We also advise that your internet connection be twice as fast as the speed you want to stream.
For example, if you want to stream at 1Mbps, your upload speed should at least be 2Mbps. You can test your internet speed at SpeedTest.net for free. A quality internet connection is essential for a low-latency classroom live-streaming experience.
5. Start the Live Classroom Stream
Once you have collected and set up your gear, please set up your online video education platform, check your internet connection, and prepare your lesson. It’s time to start your livestream.
Here are some broadcasting tips for how to conduct live online classes:
- Speak slowly and clearly
- Consider simultaneously running a discussion board so students can ask questions and participate.
- Pause to check interactions
- Use the restroom before you get started
- Have water nearby
- Make sure your devices are charged
- Wear a plain shirt (no stripes, plaids, or anything distracting)
Once the technical setup is confirmed, focus on delivery: a relaxed, natural presenting style tends to keep students more engaged than a rigid script.
Tips for Successful Live Stream Classes
Once you’ve chosen an online video platform to host your live-streaming classroom and get everything set up, streaming a lecture is quite simple.
That said, there are a few things you can do to enhance the experience for all parties involved. First, let’s review the top tips for successful live-streaming courses.
1. Plan Ahead
Planning is critical when it comes to live-streaming classes. You’re probably used to lesson planning as an educator, so this should come naturally to you.
Outline the points you’d like to cover during your lecture. Sticking to bullet points rather than creating a detailed script is a good idea.
2. Incorporate Pre-Recorded Content
Although you’re hosting a live lecture, your stream could benefit from incorporating pre-recorded content. That could be pre-recorded content from another source or slides you made beforehand.
Doing so helps break things up, especially if your class lasts an hour or more. In addition, using pre-recorded content can help to keep your students engaged. That’ll help you keep your live classroom moving smoothly.
No student wants to listen to someone talk for an hour, regardless of whether the class is taught online or in person. So instead, incorporate best practices into your online learning environment.
3. Do a Test Run
Consider blocking off sometime earlier to run through your lesson. It is a good idea to record the video so you can go through it and make any changes or additions when you livestream to your students.
While preparing for your first live stream, it is wise to check the lighting at the filming location about 24 hours before you plan to go live. For example, let’s say you’re live-streaming at noon on Tuesday. Then, set up your camera on Monday between 11:00 AM and 1:00 PM to ensure adequate lighting.
Doing a test run before you start the semester or quarter will ensure that you don’t have any technical issues when your live classroom starts.
4. Have Fun
Camera nerves are common, even for experienced in-person lecturers. Presenting the same way you would in a physical classroom, rather than adopting a different on-camera persona, tends to feel more natural for both the teacher and the students.
FAQ
What equipment do I need to live stream a class?
At minimum, a camera or webcam, a microphone, and an encoder. Some classes only need a slideshow and audio commentary, in which case good audio equipment matters more than a camera.
Do I need a hardware encoder, or is software enough?
Software encoders like OBS Studio are free and work well for most classroom setups. Hardware encoders cost more but run independently of your computer, which can help with larger or more complex broadcasts.
What’s the minimum internet speed for streaming a class online?
Aim for an upload speed at least twice your target streaming bitrate. A stable wired connection is more reliable than Wi-Fi for this purpose.
Should I show my camera, or is audio with slides enough?
Either works. Some educators present on camera for a more personal feel, while others use a slideshow with voiceover, especially for content-heavy lessons where the material matters more than seeing the presenter.
How do I keep students engaged during a live-streamed class?
Break up longer sessions with pre-recorded clips or slides, run a discussion board or chat alongside the stream, and do a test run before the first real session to catch any technical issues early.
What platform should I use to live stream a class?
That depends on your institution’s size, budget, and need for features like monetization or VOD. See our comparison of the best online learning platforms for a full breakdown.
Conclusion
Live video streaming in education has revolutionized the way teaching and learning occur. It provides a flexible and engaging environment for both teachers and students. Live streaming lets teachers reach students regardless of location, while keeping the interactivity of a traditional classroom.
Choosing the right software matters: features like real-time discussion, screen sharing, and recording capability directly affect how engaged students stay.
For teachers building out a full online course, picking the right platform early makes setup and delivery simpler, freeing up more time for the content itself.
Why not start with Dacast’s free trial? You can live stream with Dacast’s online video education platform for free for 14 days. Create an account today to get started. No credit card is required.
