


Video Encoding: The Definitive Guide [Updated for 2025]

Video technology in 2025 is moving faster than ever, driven by AI-assisted encoding, low latency formats, and next-generation codecs like AV1 and VVC. Today, online video accounts for more than 82% of global internet traffic, with audiences expecting flawless playback on any device. At the center of this evolution is video encoding, a process that makes it possible to compress, deliver, and stream video at scale.
This video encoding guide 2025 explains how to encode a video for modern streaming, comparing the best video codecs 2025 and future-proof practices for broadcasters. As a leading streaming platform, Dacast adapts to emerging encoding standards, making it easier for businesses and creators to deliver professional-quality streams. From video compression methods and transcoding workflows to adaptive bitrate streaming and live video optimization, this definitive resource equips you with the knowledge to stay ahead in the rapidly changing world of digital video.
Table of Contents:
- Video Encoding Basics
- 2025 Trends in Encoding
- Integration with Other Streaming Technologies
- What Transcoding is and Video Encoding vs. Transcoding
- Video Quality vs. Video Resolution (Size)
- How to do Multi-Bitrate Encoding on Dacast
- Common Video Encoding Challenges
- Streaming Video Encoding Glossary
- FAQs
- Conclusion
Video Encoding Basics
What is Video Encoding?

Also called video conversion, video encoding converts a given video input into a digital format that is compatible with most types of Web players and mobile devices.
In the most basic sense of the term, video encoding is the process of converting RAW video files to digital files so that they are not saved as individual images but as fluid videos.
Encoding can also be used as an umbrella term to describe similar processes relating to altering the size of a video file. Both video encoding and encoding often refer to the same process.
Here’s a definition of video encoding that summarizes this well:
“In video editing and production, video encoding is the process of preparing the video for output, where the digital video is encoded to meet proper formats and specifications for recording and playback through the use of video encoder software.”
What Does Encoding a Video Mean?
It is easier to understand what encoding is when you think about it in terms of a more tangible comparison.
Imagine a basic flip book. Photos are put together in a way that seems to move when you flip through the page quickly. That’s similar to how RAW video files work.
In the early days of digital video, video files were all RAW videos. This means that video files were a collection of still photos. For a video recorded at 30 frames per second, you had 30 photos per second of footage. That’s 1800 images per minute of video. As a result, video file sizes were massive.
The only sensible solution was to compress these videos, but the quality was lost through this process. Engineers developed video encoding which provided a way to compress these files without compromising the quality.
So what does encoding mean? It is a way of compressing large video files into more manageable chunks.
What is Decoding?
Decoding is an important part of encoding. Decoding is the opposite of encoding since it is the process of unpacking the data that has been compressed for transmission.
In the context of online video streaming, the video player serves as a video decoder. Box top sets and consoles are also considered decoders.
The efficiency of your decoder largely contributes to the latency of your stream. Video encoders need to work with video decoders to create your online video stream.
What is Video Compression?
Video compression is using encoding to reduce the size of a digital video file.
It analyzes the content of a full video frame to reduce the overall file size by determining which frames are essential and which can go. If two frames are identical, you can get rid of the data for one frame and replace it with a reference to the previous frame. In this simple example, you can reduce your video file size by approximately 50%.
All types of video compression use variations of this process to reduce file sizes. When we talk about video encoding, however, we’re referring to a specific type of video compression. Video encoding is a way of reducing video file sizes.
How Does Video Compression Work?
Video compression typically happens at the camera level. For example, smartphones, consumer-grade camcorders, and most professional camcorders record video in the H.264 video codec
This means that, as the camera is recording, the RAW images from the video sensor are encoded in real-time, typically using the H.264 codec. This compressed (or encoded) video is then recorded to the storage on the camera.
What are Encoding Formats?
An encoding format is a type of technology that is used to facilitate the encoding process. It is made up of codecs and containers. The format that you use dictates how the input video should be processed. It defines how it is stored, transmitted, and viewed. Video encoding basics happen behind the scenes.
Some of the most popular encoding formats include:
- MP4
- FLV
- MOV
- MKV
- LXF
- MXF
- AVI
- WebM
- QuickTime
The encoding format that you use will depend on what’s compatible with both your online video platform and your chosen The best video encoding format depends upon your needs.
What are Containers?
A container is the part of the encoding format that holds together the audio and video codecs and the metadata for the video that is being encoded. The container stores all of this information in one file.
Different containers are compatible with different codecs and video players. That said, is important that broadcasters choose containers that are compatible with their entire streaming setup.
Typically, the names of the file formats correspond with the types of containers that they use. For example, the MOV encoding file format simply means that it is using a MOV container.
Common Video Containers and Streaming Relevance (2025)
| Container | File Extension(s) | Pros | Cons | Streaming Relevance 2025 |
| MP4 | .mp4 | Universal support, works with most codecs, efficient | Limited metadata support compared to MKV | Standard for OTT, adaptive bitrate streaming, mobile video |
| MOV | .mov | High quality, professional workflows, editing-friendly | Large file sizes, less efficient for streaming | Editing, production pipelines, archival use |
| MKV | .mkv | Supports almost any codec, multiple audio/subtitle tracks | Not universally supported on devices | Archival, advanced OTT workflows, VOD libraries |
| WebM | .webm | Open-source, optimized for web, supports VP9/AV1 | Limited codec support (no HEVC) | Browser-based streaming, low-cost distribution |
| FLV | .flv | Lightweight, historically common for Flash | Obsolete, poor modern support | Rarely used—legacy live streaming only |
| TS/MPEG-TS | .ts, .m2ts | Handles errors well, good for broadcasting | Larger file size, not efficient for VOD | Live streaming encoding settings, broadcast workflows |
| ASF | .asf | Microsoft ecosystem, supports DRM | Limited compatibility outside Windows | Niche enterprise streaming |
| OGG/OGV | .ogg, .ogv | Open-source, supports Theora/Opus | Limited adoption in commercial streaming | Specialized use, free software environments |
What are Codecs?
The tools that are used for video file compression and playback are called codecs. Codec stands for coder and decoder (co/dec). Usually, a hardware device or computer software, a codec is a video encoder that encodes or decodes a digital data stream or signal. They compress raw video and audio files between analog and digital formats and make them smaller.
Different devices have different types of support for various streaming codecs. Have you ever downloaded a video and then tried to play it only to find that the playback failed? You might not have had streaming software capable of playing back video encoded with that codec.
Today, the most common and best video codec is H.264. Just about every device in existence supports this codec, and it remains the default for most online video. However, there are several other codecs available in 2025, including MPEG-2, HEVC (H.265), VP9, AV1, VVC/H.266, EVC, LCEVC, QuickTime, and WMV. Each has different strengths, weaknesses, and ideal use cases.
Quick-Reference Codec Chart (2025)
| Codec | Pros | Cons | Best Use Cases 2025 |
| H.264 (AVC) | Universal support, reliable, low CPU demand | Larger file sizes compared to newer codecs | General streaming, compatibility across all devices |
| HEVC (H.265) | High efficiency, good for 4K, widely used in OTT | Licensing costs, not fully supported on browsers | OTT streaming, encoding for sports, 4K broadcasting |
| VP9 | Open-source, royalty-free, good YouTube support | Slower encoding, less efficient than AV1 or VVC | YouTube, browser-based streaming, mobile video |
| AV1 | Royalty-free, excellent compression, growing support | Higher compute demand, slower to encode video | OTT, mobile-first, future-proof encoding for streaming |
| VVC (H.266) | Up to 50% better compression than HEVC, great for 8K | Licensing model unclear, limited device support | 4K and 8K OTT, professional video streaming codecs |
| EVC | Flexible licensing, efficient compression | Limited adoption so far, emerging ecosystem | Enterprise OTT, long-term future workflows |
| LCEVC | Boosts efficiency of existing codecs, lowers latency | Requires base codec, still gaining adoption | Low latency video streaming, live encoding optimization |
| MPEG-2 | Legacy format, still used in broadcast | Inefficient, large files, outdated | Broadcast TV, archival workflows |
| QuickTime/WMV | Legacy, specific ecosystem use | Limited compatibility today | Niche playback or archival |
Practical Implementation Guidance
Choosing the right codec depends on the use case. For encoding for OTT or professional streaming, HEVC and VVC provide efficiency, while AV1’s royalty-free model is attractive for cost-conscious workflows. For mobile-first or gaming, the best codec for low-latency live streaming in 2025 may still be H.264, given its universal support.
Live streaming encoding settings should be adjusted per platform. YouTube Live prefers VP9 or AV1, while Twitch focuses on H.264 with multi-bitrate encoding for adaptive delivery. Troubleshooting quality issues can often be solved with AI-assisted video encoding best practices, such as upscaling or noise reduction. This video encoding guide 2025 encourages testing workflows across devices to future-proof delivery.
Performance Benchmarks
When comparing streaming codecs in 2025, speed and quality trade-offs are clearer than ever. AV1 vs H.265 remains a key question. AV1 offers higher compression efficiency but can be slower to encode video, while HEVC is faster yet limited by licensing.
VVC promises up to 50% better video file compression methods compared to HEVC, making it attractive for high-resolution OTT streaming. For adaptive bitrate streaming, broadcasters should build an optimal bitrate ladder for adaptive streaming 2025 that balances smooth playback with cost efficiency. Performance benchmarks in digital video encoding now include side-by-side charts of encoding speed, visual quality, and bandwidth usage to guide codec choice.
2025 Trends in Encoding
Video encoding in 2025 is shaped by smarter, faster, and greener workflows. AI-assisted video encoding now enables content-aware compression, reducing bandwidth while maintaining quality across devices. Broadcasters are watching the rise of AV1 vs H.265 and VVC (H.266), with forecasts showing broader compatibility for AV1 in browsers and mobile, while VVC emerges for 4K streaming and OTT services.
Cloud-based video transcoding with GPU acceleration makes real-time encoding for live video possible at scale. Low latency video streaming is also improving through optimized encoding formats, vital for sports and interactive experiences. Finally, energy-efficient video encoding solutions are gaining traction as sustainability becomes a key business priority.
Integration with Other Streaming Technologies
Encoding no longer works in isolation, it is deeply connected to the full video delivery pipeline. DRM integration protects content, while closed captioning formats like WebVTT and IMSC must be synchronized at the encoding stage. Multi-CDN delivery relies on efficient video transcoding to create multiple renditions for adaptive bitrate streaming.
Cloud-based video transcoding also powers server-side ad insertion, ensuring ads adapt to different encoding formats for video streaming. For broadcasters, a future-proof video encoding workflow for broadcasters must account for OTT requirements, live video encoding optimization, and seamless integration with professional video streaming codecs.
Platforms like Dacast streamline this by combining encoding, security, and distribution in one solution.
What transcoding is and Video Encoding vs. Transcoding
What is Transcoding?
Transcoding is another important technology related to encoding. It is often considered a type of encoding.
Video transcoding is the process of compressing a video to create multiple renditions of different sizes. Broadcasters create these renditions so that they deliver the one that makes the most sense based on viewers’ internet connections.
Another name for transcoding is “multi-bitrate encoding” because it refers to changing the bitrate of the video file.
Typically, transcoding tools are built into professional online video platforms. However, if your online video platform does not offer support for this process, you’ll need to use an encoder that supports transcoding.
Cloud Transcoding
Cloud-based video transcoding moves the workload off local hardware and into powerful cloud servers. This enables broadcasters to encode video at scale, quickly producing multiple renditions for adaptive bitrate streaming. Cloud transcoding reduces infrastructure costs, supports global delivery, and integrates seamlessly with platforms like Dacast for professional-grade workflows.
Edge Transcoding
Edge transcoding is designed for ultra-low latency video streaming. Instead of transcoding centrally, the process happens closer to the viewer—at the network edge. This reduces delays, improves responsiveness for interactive events, and helps optimize live streaming encoding settings for gaming, auctions, or real-time sports. It’s an emerging method for broadcasters needing sub-second delivery.
Video Encoding vs. Transcoding: What’s the Difference?
It’s fairly common to hear the terms video encoding and transcoding used interchangeably. However, encoding and transcoding are not the same.
As a refresher:
- Transcoding is the process of creating copies of video files in different sizes.
- Encoding refers to either the initial process of compressing RAW video or the process of re-encoding a video into a different format.
Transcoding is always encoding, but encoding is not always transcoding. There are a variety of reasons why you might want to transcode or encode a video:
- Reduce file size
- Reduce buffering for streaming video
- Change video resolution or aspect ratio
- Change audio format or quality
- Convert obsolete files to modern formats
- Meet a certain target bitrate
- Make a video compatible with a certain device (computer, tablet, smartphone, smartTV, legacy devices)
- Make a video compatible with certain streaming software or service
The common purpose of all of these reasons is generally to create the best experience for viewers or to make the video content more easily accessible. What is encoding? It can compromise everything in the list above.
Video Quality vs. Video Resolution (Size)
When it comes to streaming video, there is a trade-off between size and quality. High-quality video files are larger, take longer to upload, and require more bandwidth for viewers. Low-quality video files are smaller, take less time to upload, and require less bandwidth for viewers.
Imagine that your internet connection is a tube. The faster your connection, the larger the tube. Low-speed Internet connections have narrower pipes. Those large files need to be squeezed through them. As a result, you run the risk of subjecting your clients to stuttering and buffering streams.
On the other hand, opting for lower-quality videos means they’re available immediately, no matter where your clients are watching them. However, the footage won’t look as good.
If you have your target bitrate in mind but are struggling to achieve desirable streaming video quality, you’ll need to cut back in some respect.
All else being equal—for example, the same codec—four main contributing factors determine video file size to quality. These include:
- Time: longer = bigger files
- The number of pixels (resolution): larger = bigger files
- The frame rate: higher = bigger files
- The amount of motion present in the video: more = bigger files
What you cut back on will depend on what your audience needs and what you’re willing to cut back on.
Recommended Bitrate Ladder for Adaptive Streaming (2025)
| Resolution | SDR Bitrate Range | HDR / 10-bit Bitrate Range | Notes & Use Cases |
| 240p (426×240) | 300–500 Kbps | N/A | Entry-level fallback for low bandwidth |
| 360p (640×360) | 600–800 Kbps | N/A | Mobile users on 3G or constrained networks |
| 480p (854×480) | 1–1.5 Mbps | 1.5–2 Mbps | Standard definition baseline |
| 720p (1280×720) | 2–3.5 Mbps | 3–5 Mbps | Mobile-first HD, casual streaming |
| 1080p (1920×1080) | 4–6 Mbps | 6–9 Mbps | Full HD for OTT and sports |
| 1440p (2560×1440) | 8–12 Mbps | 12–16 Mbps | High-motion content, esports |
| 4K (3840×2160) | 14–20 Mbps | 20–30 Mbps | UHD VOD, OTT, premium sports |
| 8K (7680×4320) | 40+ Mbps | 60+ Mbps | Early adoption, cinematic workflows |
Note: HDR and 10-bit color depth significantly increase bitrate requirements because they carry more data per pixel. Broadcasters should balance HDR benefits against delivery costs and viewer connection speeds, especially when building an optimal bitrate ladder for adaptive streaming in 2025.
How to do Multi-Bitrate Encoding on Dacast
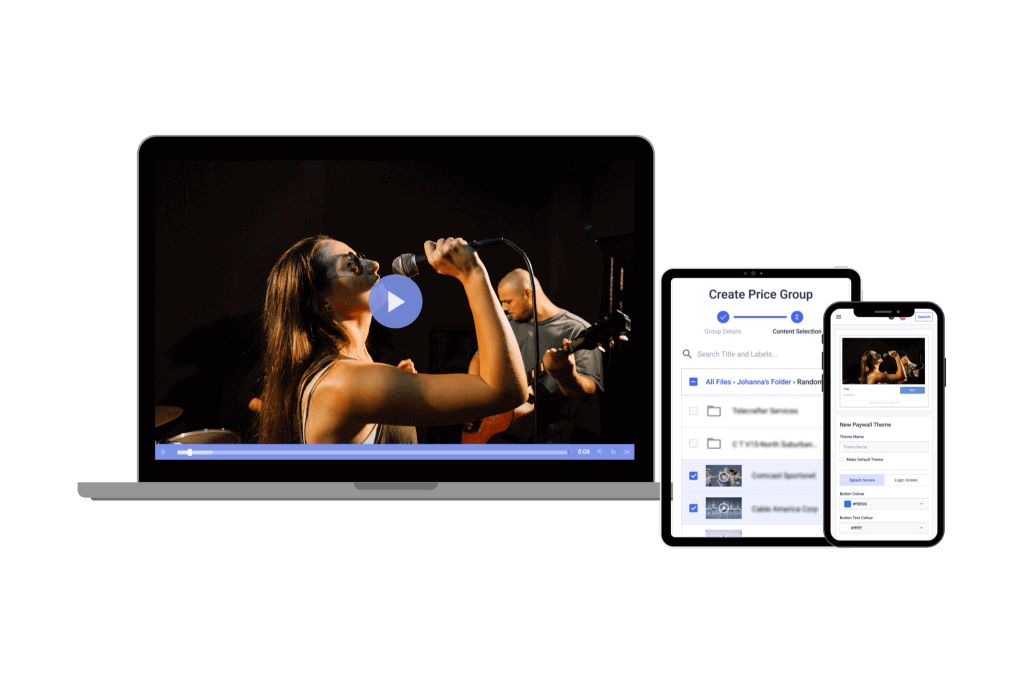
Dacast’s VOD hosting solution includes all the features you need to encode your videos. The platform supports automatic transcoding (multi-bitrate encoding), so you simply choose your preferred settings when uploading, and Dacast generates the additional renditions for you. For a step-by-step walkthrough, see the Dacast guide on multi-bitrate encoding.
Step 1: Create an “Ingest Recipe”
An ingest recipe is a set of encoding presets that determine which renditions Dacast creates for your video. You can create and save recipes in your online portal, then apply them to future uploads.
Below are recommended configurations to ensure smooth playback across different devices and connections:
| ULD | LD | SD | HD | FHD | |
|---|---|---|---|---|---|
| Name | Ultra-Low Definition | Low Definition | Standard Definition | High Definition | Full High Definition |
| Video Bitrate (kbps) | 350 | 350 – 800 | 800 – 1200 | 1200 – 1900 | 1900 – 4000 |
| Resolution Width (px) | 426 | 640 | 854 | 1280 | 1920 |
| Resolution Height (px) | 240 | 360 | 480 | 720 | 1080 |
| H.264 Profile | Main | Main | High | High | High |
Resolution Best Use Cases:
- 360p – Smooth playback for slow connections, but low visual quality.
- 720p – High quality, but not ideal for full-screen playback.
- 1080p – Best for HD devices; requires more bandwidth.
- 2160p (4K) – Ultra-high quality, but limited by most viewers’ bandwidth.
Step 2: Apply Recipes as Needed
You can create different ingest recipes for various formats (e.g., HLS, RTMP). For example, if your source content is 1080p/30fps with H.264/AAC, you can create a recipe that outputs 720p, 480p, and 240p renditions in addition to the original. This ensures optimal playback for each viewer through adaptive bitrate streaming.
Step 3: Upload Video Files
Dacast’s bulk uploader handles hundreds of uploads, including large files (50+ GB). Features include:
- Automatic pause/resume if your connection drops.
- Dropbox integration for easy automation.
- Options to create audio-only versions, add watermarks, and generate thumbnails.
Note: Encoding cannot retroactively improve poor-quality video. Always upload the highest-quality master file available.
Real-World Use Case
A sports broadcaster using Dacast relies on multi-bitrate encoding to stream games to fans worldwide. Viewers on fiber connections enjoy smooth 1080p playback, while those watching on mobile data still get uninterrupted coverage at 480p or 360p. By combining ingest recipes with adaptive bitrate delivery, they maximize audience reach without sacrificing reliability.
What is Adaptive Bitrate Streaming?
Adaptive bitrate streaming, which is also known as “variable bitrate streaming,” refers to delivering an appropriate rendition of a video to the viewer based on the strength and speed of their internet connection.
If you’ve ever watched YouTube videos or Netflix on a smartphone in a moving vehicle, you’ve likely experienced adaptive bitrate streaming without realizing it. When the cellular signal is good, video quality is high. When signal strength drops, you’re automatically switched to lower video quality to avoid buffering. That is why the quality of the image changes as you move.
The underlying technology behind dynamic adaptive streaming is transparent to you and your users. Dacast simply delivers the best version of your video to your viewers based on the ingest recipe that you’ve created. This is known as multi-bitrate streaming, and it’s a very valuable feature in the online video industry.
In 2025, Dacast enhances this with advanced adaptive bitrate streaming built on low-latency HLS(LL-HLS) and CMAF packaging. These technologies reduce delay while maintaining smooth playback, making them ideal for live sports, auctions, and other interactive broadcasts. Combined with cloud-based transcoding, Dacast ensures that your viewers always receive the most reliable stream—whether they’re watching in 240p on mobile data or 4K HDR on a home connection.
Common Video Encoding Challenges

There are seven common video encoding challenges that broadcasters find themselves facing. Here are a few modern solutions that may help you navigate encoding roadblocks in 2025.
1. My viewers tend to have slow Internet connections.
Video files tend to be large, so they require fast internet speed with sufficient bandwidth to display properly. When the internet connection is slow, video often stutters or drops in quality.
With Dacast, you can use analytics to determine where most of your viewers live and match that information with average internet speeds. Then, adjust your ingest recipe accordingly. AI-powered bitrate optimization can also automatically fine-tune renditions based on historical playback data.
You can run short trial-and-error tests to find the lowest bitrate that still maintains quality. Start with 720p at ~512kbps and adjust bitrate or frame width as needed. Always encode multiple versions of your video—adaptive bitrate streaming will ensure each viewer gets the best quality their connection supports.
Mobile-first tip: Since most viewers stream on smartphones, always create renditions optimized for mobile screens (480p and 720p) alongside HD profiles.
2. I want to save bandwidth.
The more often your videos play—and the higher their quality—the more bandwidth you will need. Every Dacast plan includes a set bandwidth allocation. You can enable Playback Protection to avoid unexpected overages.
To save money, reduce the bitrate to the lowest acceptable level without hurting the viewer experience. AI-powered streaming analysis can help identify optimal bitrate ladders for your audience mix.
You can also use cloud transcoding, which dynamically generates renditions on the fly. This ensures efficient delivery and reduces redundant storage and bandwidth costs.
3. My encoded video has a larger file size than the original one.
While encoding can’t improve quality, it often changes file size depending on your bitrate and codec choices. A larger file size usually means bitrate settings are higher than necessary.
To reduce file size, try lowering the bitrate while monitoring for noticeable quality loss. Also, consider newer codec options (like HEVC/H.265) if supported, as they offer smaller files at the same visual quality.
Cloud encoder redundancy also helps here. If one encoder pushes inefficient settings, a backup encoder can step in with optimized parameters.
4. After encoding, the audio is out of sync.
This often comes down to mismatched frame rates. Use a free tool to check your original file’s frame rate. If unusual, you may notice sync drift after encoding.
Try enabling two-pass encoding, which often resolves timing issues. If the problem persists, check whether your audio and video stream lengths differ. Source files with mismatched durations can cause sync issues during processing.
Modern AI-based encoding pipelines can also auto-detect and repair drift by re-aligning frames with audio timestamps—saving time compared to manual fixes.
5. My video is already encoded in a web-ready format.
If your video is already an H.264 MP4, you can select “no encoding” in your ingest recipe. Just ensure the MOOV atom is placed at the start of the file for smooth playback.
If you’re unsure, Dacast’s built-in encoding can safely repackage your MP4 with the same frame size and bitrate. This guarantees proper compatibility without noticeable quality loss.
AI preprocessing can also check for metadata issues like MOOV atom placement automatically, reducing upload rejections.
6. I don’t want my videos in an MP4 format.
The Dacast video hosting solution primarily encodes content to H.264 in an MP4 container. If you require another format, you can reach out to Support for potential custom solutions.
As industry standards evolve, expect broader support for formats like CMAF (Common Media Application Format), which offers improved low-latency performance and cross-platform compatibility.
7. I uploaded a video and the quality is really poor.
This usually means the target video’s frame size or bitrate is set much lower than your original. To ensure quality, always include the “Original” profile in your ingest recipe alongside lower renditions.
That way, viewers with strong connections can access a high-quality version, while others fall back to optimized renditions.
Tip for mobile-first streaming: Always prioritize 480p and 720p renditions with balanced bitrates, since most mobile users won’t benefit from 4K streams that burn data without improving perceived quality.
Streaming Video Encoding Glossary
Frame rate is the number of frames shown per second (fps). Higher rates (30–60 fps) capture motion smoothly, while lower ones (24–25 fps) create a more “cinematic” feel.
Bitrate measures how much data a video uses per second (kbps/Mbps). Higher bitrates usually mean better quality, but you can’t improve poor source quality just by raising bitrate.
Aspect ratio is the width-to-height proportion of video. Modern screens are 16:9, while older TVs used 4:3.
Resolution is the pixel count of a video (e.g., 1280×720 or 720p). Higher resolution means more detail.
Codec (“coder/decoder”) compresses and decompresses video/audio so files can stream efficiently. Common video codecs include H.264, MPEG-2, VP8, and WMV; audio codecs include MP3, AAC, and Vorbis.
Remember: codecs don’t define a file’s extension—that’s the container format (e.g., MOV, MP4, OGG, AVI).
FAQs
1. What is the difference between video encoding and transcoding?
Video encoding is the process of converting raw video data into a compressed digital format suitable for storage or transmission. Transcoding, on the other hand, involves converting an already encoded video from one format to another, often to ensure compatibility across different devices or platforms. For example, transcoding may be used to change the resolution, bitrate, or codec of a video to meet specific requirements.
2. How does video encoding affect streaming quality and bandwidth usage?
Efficient video encoding compresses video files, reducing their size without significantly compromising quality. This compression decreases the bandwidth required for streaming, leading to smoother playback with less buffering, even on limited connections. However, overly aggressive compression can degrade video quality, so it’s essential to balance compression levels to maintain an optimal viewing experience.
3. What are the most common video codecs used today?
The most widely used video codecs include:
- H.264 (AVC): Known for its balance between quality and compression efficiency, making it prevalent in streaming, Blu-ray discs, and various online platforms.
- H.265 (HEVC): Offers improved compression efficiency over H.264, supporting higher resolutions like 4K and 8K, but may have licensing considerations.
- VP9: A royalty-free codec developed by Google, commonly used on platforms like YouTube for efficient compression and quality.
- AV1: An open-source, royalty-free codec developed by the Alliance for Open Media, designed to provide superior compression efficiency and quality, though its adoption is still growing.
4. What factors should be considered when choosing a video encoder?
When selecting a video encoder, consider the following factors:
- Encoding Speed: The time it takes to encode videos, which can impact workflow efficiency.
- Output Quality: The visual quality of the encoded video, especially at various compression levels.
- Supported Formats: Compatibility with desired input and output formats and codecs.
- Hardware vs. Software: Hardware encoders offer faster performance but may lack flexibility, while software encoders provide more customization options but can be slower.
- Cost: Budget constraints, including potential licensing fees for certain codecs.
5. How does encoding impact video file size?
Encoding significantly reduces video file size by compressing the data, which makes storage and transmission more efficient. The degree of compression applied during encoding determines the final file size; higher compression results in smaller files but can affect video quality. Choosing the right balance between compression and quality is crucial based on the intended use and distribution method.
6. What is the role of bitrates in video encoding?
Bitrate refers to the amount of data processed per unit of time in a video stream, typically measured in kilobits per second (kbps) or megabits per second (Mbps). Higher bitrates generally indicate better video quality but result in larger file sizes and require more bandwidth for streaming. Adjusting the bitrate during encoding allows control over the trade-off between video quality and file size, enabling optimization for different viewing scenarios and network conditions.
Incorporating these FAQs can provide readers with a clearer understanding of video encoding and its various aspects, enhancing the overall value of your article.
7. What is the best codec for low-latency live streaming in 2025?
In 2025, H.265 (HEVC) remains the most widely supported codec for low-latency streaming, especially with protocols like Low-Latency HLS (LL-HLS) and CMAF. While AV1 is catching up in adoption, its hardware acceleration is still less universal for real-time streaming. Broadcasters who need ultra-low latency often combine H.265 with optimized delivery protocols.
8. AV1 vs H.265: Which should I choose for streaming?
H.265 offers broader device support and lower latency, making it ideal for live streaming today. AV1, however, provides better compression efficiency, meaning smaller file sizes at the same quality. This is great for VOD and future scalability. The best choice depends on your audience: choose H.265 for reliability now, but start testing AV1 for long-term adoption.
9. How can AI improve video encoding efficiency?
AI-powered encoders can analyze video content in real time and allocate bitrate more intelligently. For example, they reduce bitrate during static scenes while preserving detail in high-motion sequences. This leads to smaller file sizes, reduced bandwidth costs, and consistent viewer quality across devices.
10. How do I future-proof my video encoding workflow?
To future-proof, use adaptive bitrate (ABR) ladders, codecs with strong industry backing (H.265, AV1, and eventually H.266/VVC), and flexible cloud-based workflows. Supporting both hardware and software encoding options ensures you can adapt as devices and standards evolve. Investing in scalable, standards-compliant infrastructure helps minimize future migration costs.
11. What is the difference between hardware and software encoders?
Hardware encoders are dedicated devices built for real-time encoding, offering stability, speed, and low latency. Software encoders run on PCs and provide more flexibility and advanced customization but require higher CPU/GPU resources. Many broadcasters use a hybrid approach—hardware for mission-critical live events and software for flexible, lower-cost workflows.
12. How does encoding affect bandwidth usage and streaming quality?
Encoding determines the bitrate, compression efficiency, and quality of your stream. Higher bitrates require more bandwidth but deliver sharper video, while efficient codecs can lower bandwidth needs without sacrificing quality. Properly tuned encoding ensures a balance between cost, quality, and audience accessibility.
13. How can I make my encoding process more energy-efficient?
Energy efficiency can be improved by using modern codecs (like AV1 or H.266) that achieve higher compression at lower bitrates. Leveraging GPU-based encoding or AI-enhanced tools reduces CPU load and power usage. Cloud-based encoding also allows for resource optimization, cutting down on unnecessary energy consumption.
Conclusion
Video encoding is what makes live-streaming video content possible. This technology transforms raw video data into high-quality video. With the right video platform equipped with advanced video coding, you too can turn video and audio data into phenomenal live streams your viewers will crave.
Dacast offers a powerful and streamlined video streaming encoder so you can accomplish this. It’s built into the video platform, making setting up and streaming video content in the highest quality seamless. With Dacast, you’ll get an optimized and scalable video hosting solution with the best live-streaming delivery.
You can try Dacast and all its features free for 14 days.
For regular live-streaming tips and exclusive offers, join Dacast’s LinkedIn group. Our experts offer continual, practical value daily.
Do you still have questions or feedback about video encoding? Leave your thoughts in the chatbox below and our support team will get back to you.