


Video Lighting Setup: 6 Best Practices

Lighting is essential in videography and photography. In fact, it’s so fundamental, it’s even in the name (photo: light, graphy: imaging). This blog post is going to focus on the video lighting setup.
We’re going to provide 6 tips in this article. The first few tips will introduce you to the theory of video lighting. The second half will focus on the practical methods you can use to apply that theory and make your content look better right now.
1. The (Subjective) Science of Lighting and Mood
Light changes everything about your video. It’s long been understood that light influences mood. This basic understanding colors (literally) everything in visual marketing, cinematography, even interior design, and branding. You can change the lighting characteristics of your video to influence how it makes people feel.
On a basic level, we can talk about brightness and light vs. shadow. A dark, shadowy image or video portrays drama, tension, and seriousness. A bright image or video communicates the opposite: relaxation, friendliness, and mystery.
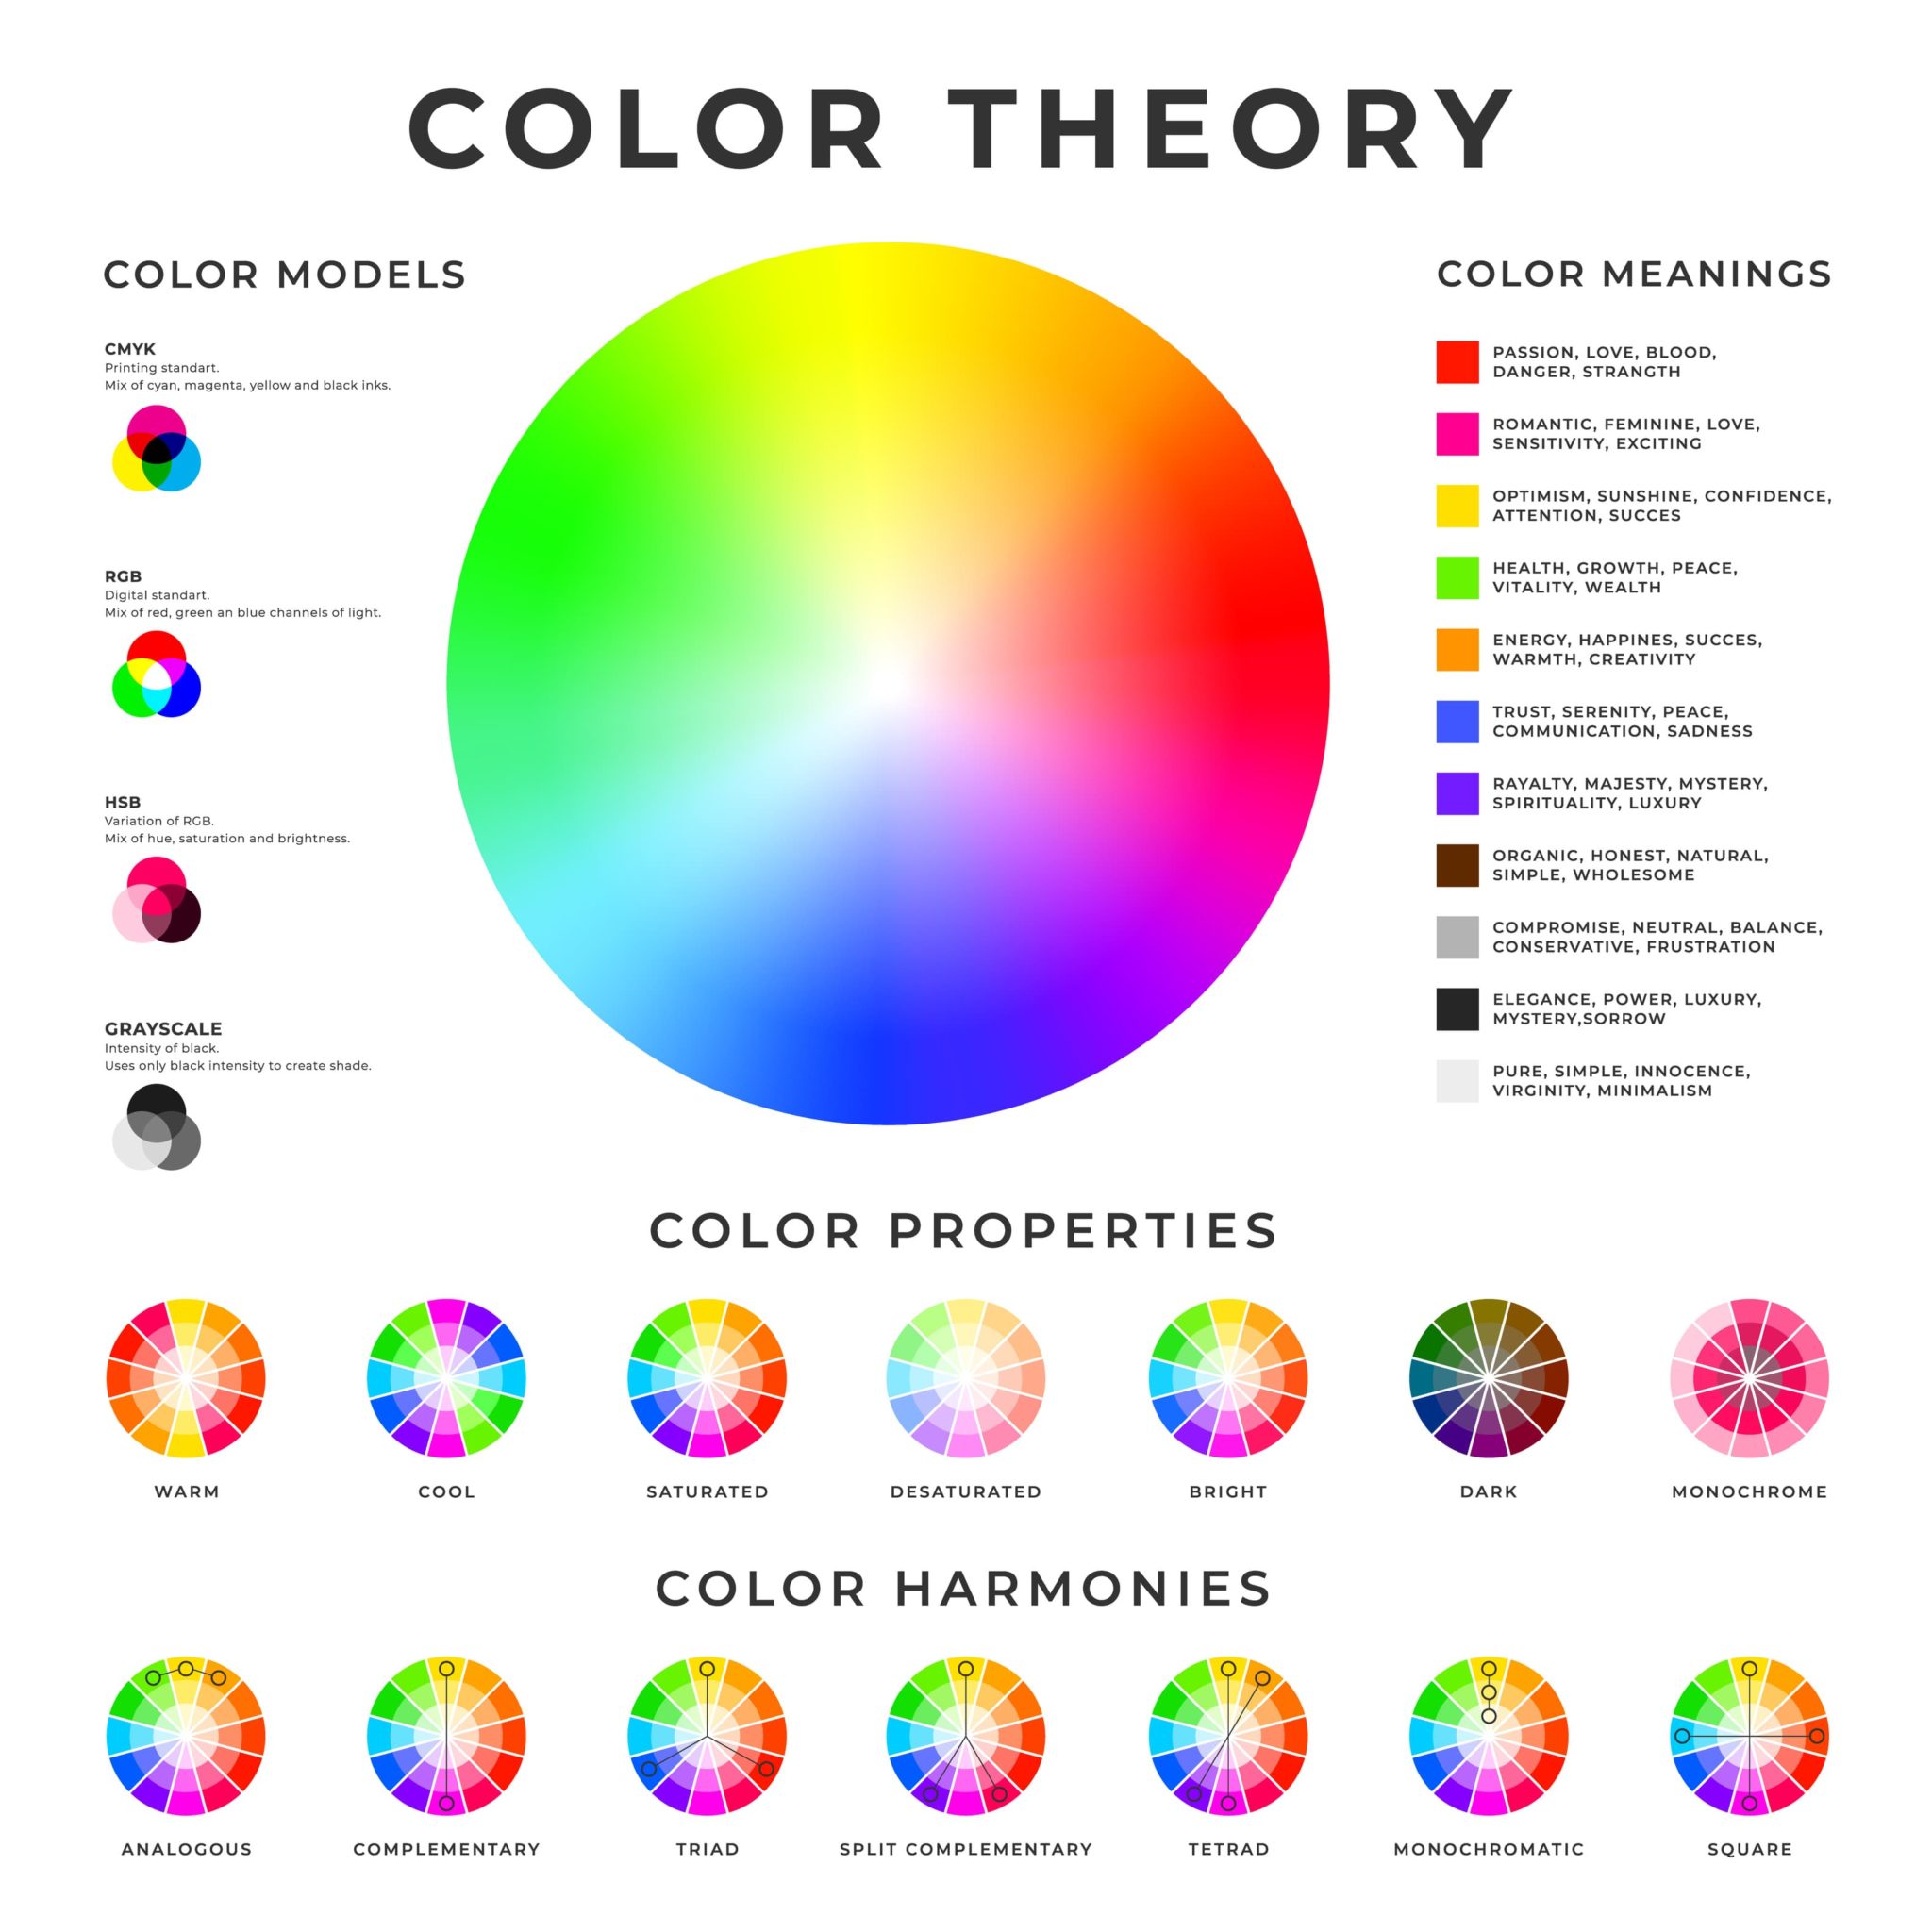 Color also influences mood significantly. For example, red colors tend to be associated with passion, love, and danger. Blue tends to communicate trust, serenity, and peace. These color connotations are at least partly cultural, but some may have biological roots as well. Regardless, it’s worth considering these basics of color theory whenever you are involved in creating a video.
The image to the right shares some basic color theory information. Click the image to view full size.
2. White Balance, Color and Mixing Light Sources
Now that we’ve talked about color, we can talk about white balance. White balance is a way of measuring the color of light. It’s usually measured in degrees kelvin. As a ballpark, 1000 K is the color temperature of the candlelight of flame (very red). On the other end of the spectrum, 10000 K is the color temperature of a heavily overcast day (blue tones). Somewhere in the middle, around 5000-6000 K, is the color temperature of daylight.
So why is this important? Well, each light source may have a different color temperature. When you buy a lightbulb, you can buy a “cool” (blue tint), “warm” (red/yellow tint), or “neutral” (daylight tint) bulb. Using all three to illuminate the same video can result in a strange effect. One side of your subjects face could be a different color cast than the other.
This effect is even worse when mixing natural and artificial light sources. For this reason, it’s important to consider white balance when shooting video. Ideally, use all-natural or all artificial lights. If mixing, use artificial lights with the adjustable color cast and match the daylight conditions carefully.
3. Soft vs. Hard Light
 Next, let’s talk about hard vs. soft light. “Hard” light comes from a single point-source. Imagine a small, very bright lightbulb shining on a person in a dark room. Half their faces will be brightly lit, and the other half will be almost totally dark. This is also described as “harsh” lighting, and it tends to create drama, tension, etc. Think film noir.
Soft light is produced by a diffuse light source. Think of a bright but cloudy day. The sun’s rays are being spread out by the clouds, and you don’t really cast a shadow.
In a studio setting knowing the difference between soft and hard light allows you to make choices and changes to your video lighting setup to change the mood. As a simple example, you could close the drapes and use small, powerful lights to create dramatic images. Or, you could use lights filtered through a commercial light diffuser (sometimes called a “lightbox”) to achieve the opposite mood. It all depends on your goal. Generally speaking, businesses will want to use soft light.
4. Three-Point Lighting
Ok, now let’s get practical. The most common type of video lighting setup is called three-point lighting. Three-point lighting is cheap, easy to set up, and will provide great results for most video shoots. Therefore, it’s widely taught. As the name implies, the three-point method involves using three light sources:
- The Key Light is the strongest light you have. It provides most of the illumination. It should be positioned pointing down at your subject at an angle, and located about 45 degrees to their right or left.
- The Fill Light is usually half as strong as the key light. It should be positioned to the opposite side of the subject, also at a 45-degree angle. The purpose of the fill light is to full in the shadows on the subjects face.
- The Back Light is the final element. As the name implies, you should place this light above and behind the subject, usually off to one side. This light will help make your subject stand out from the background and create more depth.
If you’re interested in purchasing a video lighting setup, I recommend looking around at Adorama for a wide range of products. Many of these products can also produce different light intensities and color tints to help you create the mood you want.
5. Outdoor Video Lighting Setup
 So what about if you’re outdoors? In addition to the right mobile live streaming equipment setup, you can create a simple 3-point video lighting setup using just the sun. You can start by placing the sun in the position of the key light, just offset from your subject to one side or the other. To do this, you’ll have to record in the morning or afternoon, when the sun isn’t directly overhead.
You can create a fill light and a backlight using reflectors to redirect (or “bounce”) sunlight onto your subject. A reflector could be a commercial product or even a large sheet of white cardboard. Sometimes, a gold reflector is useful to enhance the sun’s natural color. This is most relevant for the backlight setup.
Of course, this is all much harder when it’s cloudy and the sunlight is entirely diffuse. Three-point outdoor lighting depends on having some direct sun. And the weather is unpredictable, which is why many videographers use artificial lights. Here are some more advanced tips for outdoor shooting.
6. Checking Your Work
Our final tip will be a quick one. While you’re shooting, be sure to review footage for color accuracy, balance, and overall light. If possible, playback the footage on a larger screen, so you can see if your color and lighting are working as planned. Then you can modify things on the fly until you’ve got your video lighting setup dialed. You can edit color to some degree in post-production. However, it’s almost impossible to fix bad overall lighting after you shoot a video. Save yourself time and make it look good while shooting.
Conclusion
Video lighting can be tricky. But it’s the best single way to differentiate a professional from an amateur. When you can create beautiful, deliberately lit videos each time, you’re ready for the big leagues. Hopefully, this blog post has introduced you to video lighting setups and how they work.
Of course, video lighting setup and shooting your video are just the first steps. Next, you have to get that content online. Here at Dacast, we offer an online video platform service with streaming solutions for professionals. Our platform includes live streaming and VOD hosting, video monetization, and white label service. Plus, we offer a 14-day free trial (no credit card required) so you can test out our streaming platform for yourself. If you’d like to learn more, just click the button below to sign up today!
For regular tips on live streaming, exclusive offers, and networking with industry professionals, you can also join the Dacast LinkedIn group. As always, thanks for reading and good luck with your online video!