


How to Use SlingStudio Encoder Software with Dacast
In this tutorial, we will be explaining how to stream with Dacast using SlingStudio encoder software with Mac. To download for free the latest SlingStudio version you can do so via this link.
Before moving forward with the encoder configuration, we strongly recommend you to follow the encoder settings recommendations for live streaming with Dacast. Following these guidelines will ensure that your stream runs smoothly and at the best quality.
How to Stream Using SlingStudio
1. Steps Within Dacast
Log in to your Dacast account and select the stream of your choice by clicking on the title or create a new live stream by clicking on “Create Live Stream” as shown below:

Once you’re inside the live stream settings, click on “Encoder Setup.

By default, the “Generic RTMP Encoder” will be selected.
But in our case, we will select Sling Studio in the RTMP Encoders dropdown:
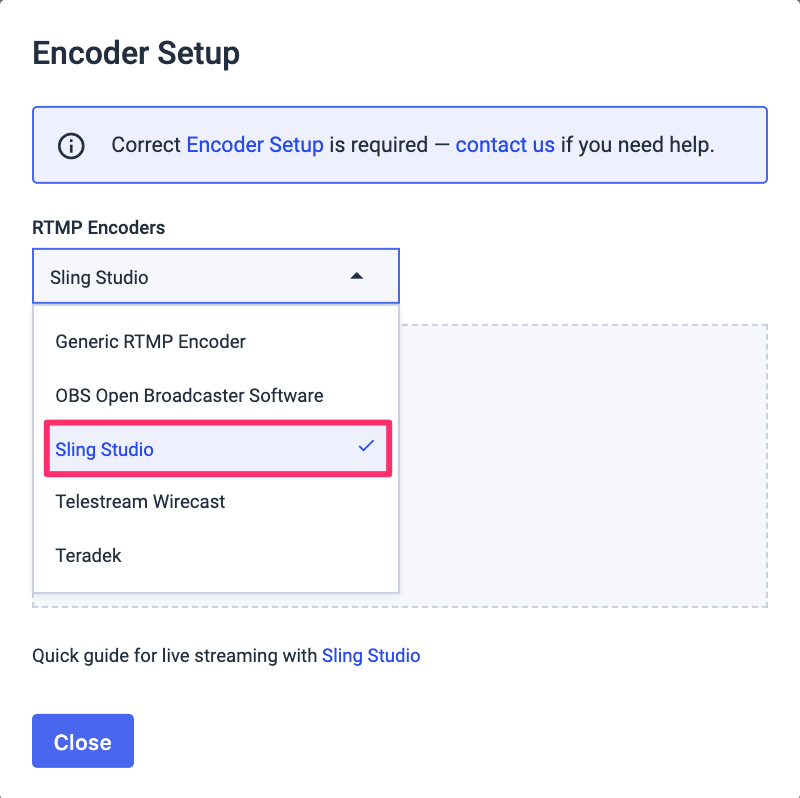
This selection will give you the following information:
- Stream URL
- Stream Name
Clicking on the page icon on the right side of the corresponding credentials will automatically copy them. All you need to do is paste them to SlingStudio.
2. Steps With SlingStudio
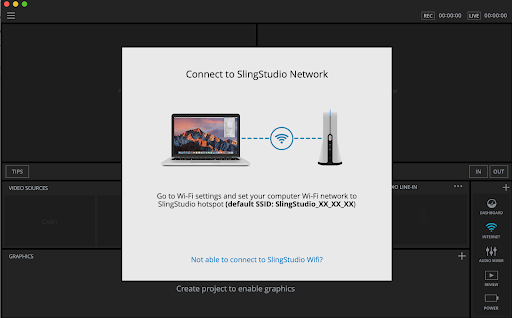
When you have downloaded SlingStudio and register your information, you will need to connect to the SlingStudio network.
To begin setting up a live stream, go to the project settings in the menu (left top side) and turn on live broadcasting.
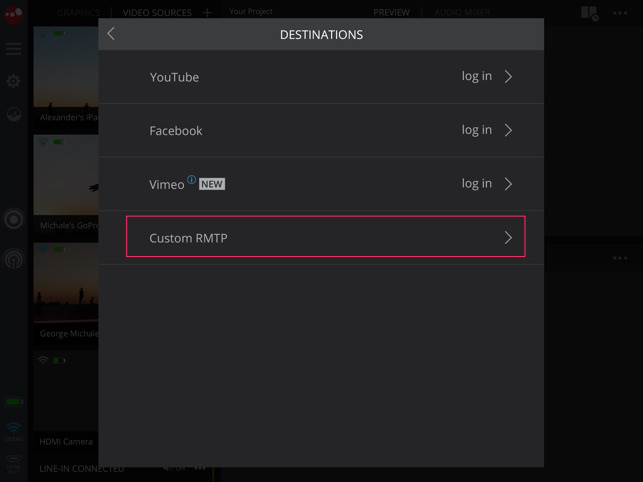
Then select the destination to get started. In our case, we will choose the Custom RTMP option.
In this part, you will have to fill in a few pieces of information as:
– Server URL
– Stream Key
– User-Agent
A. Server URL:
Now we invite you to go back to your Dacast account and to your open encoder set up window.
First, you will click on the copy icon of your Server URL as shown below:

And paste it into the corresponding field in SlingStudio.
B. Stream Key
We will repeat the operation by copying and pasting the Stream Name from your Dacast account into the Stream Key field in SlingStudio.
C. User-Agent
For User-Agent, you will select SlingStudio. Once you are done filling in your custom settings, click “Set Destination”. Now save the project, and go back to your production interface. When you are ready to begin streaming, hit the “Go Live” button just below record.
Start Streaming
After completing these steps, you are ready to live stream with Dacast. Do not forget to check your encoder settings also under Preference -> Video Preference and make sure the settings are following the encoder settings recommendations mentioned earlier.
To test the stream, return to your Dacast account, and in the general tab of your live stream, under the “Sharing” section, you will have two options to see your live stream.
You will be able to see your stream by copying and pasting the “Share Link” into your browser, or by clicking on the “Preview” button as shown below:

You should see your live stream within a minute. If you are having issues please check the encoder is configured correctly.
Troubleshooting Live Streaming Issues
It can be quite frustrating when issues arise in the middle of a live stream. So we’ve put together a thorough guide with our top 10 tips to help you troubleshoot live streaming issues and identify the root of the problems. Using the troubleshooting framework we’ve laid out will get your stream back on track in no time. If you are still having issues, please contact our support team in chat or via email at support@dacast.com.
Not yet a Dacast user, and interested in trying Dacast risk-free for 14 days? Sign up today to get started.