


Use Wirecast to broadcast your screen with microphone audio

Learning how to broadcast your screen with microphone audio via Wirecast may be a bit more complex than expected. However, there is no need to fret. We’ve put together a step-by-step guide to walk you through the process. If you follow these steps and still need further support, let us know.
What is Video Encoding?
Before we dive into the ins and outs of using Wirecast to capture audio, we’re going to briefly discuss encoding. Live stream e ncoding is a process used to convert the RAW video files captured by a camera into digital files suitable for live streaming on your website over the internet. Wirecast is an example of a software encoder that is used for live streaming. This means that the encoder feeds digital video files to the streaming platform in real-time.
Required Encoder Settings
The following settings are required for live streaming with Dacast, regardless of your selected resolution and bitrate:
| VIDEO CODEC | H.264 (x264 may work) |
| FRAME RATE | 25 or 30 |
| KEYFRAME INTERVAL | 3 secs (or 3x frame rate) |
| SCANNING | Progressive |
| ENCODING BITRATE | Constant (CBR) |
| AUDIO CODEC | AAC |
| AUDIO BITRATE | 128 kbps |
| AUDIO CHANNELS | 2 (Stereo) |
| AUDIO SAMPLE RATE | 48 kHz (48,000 Hz) |
Part 1: Configuring Wirecast
First, you will need both Wirecast and an added install called “ Desktop Presenter.” Once you have both installed, launch Wirecast and configure for your encoder settings. Use the required settings listed above.
Part 2: Getting your Audio Connected
First, click the Source Menu “+” icon and then select “Screen Capture.” On the right side select “Remote Desktop Presenter.” Click “Add” soon after. 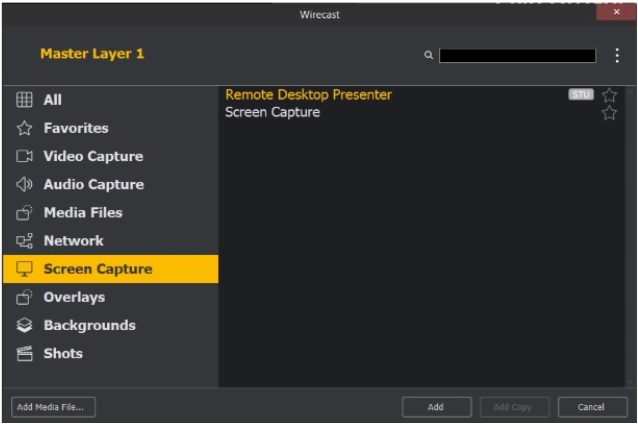
To be able to use the mic you need to deselect “Enable Audio” from the Desktop Presenter window that pops up. 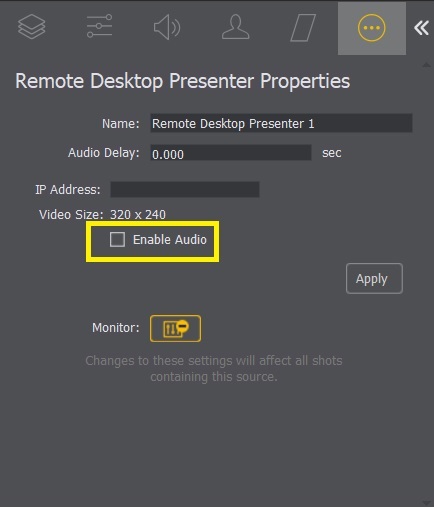
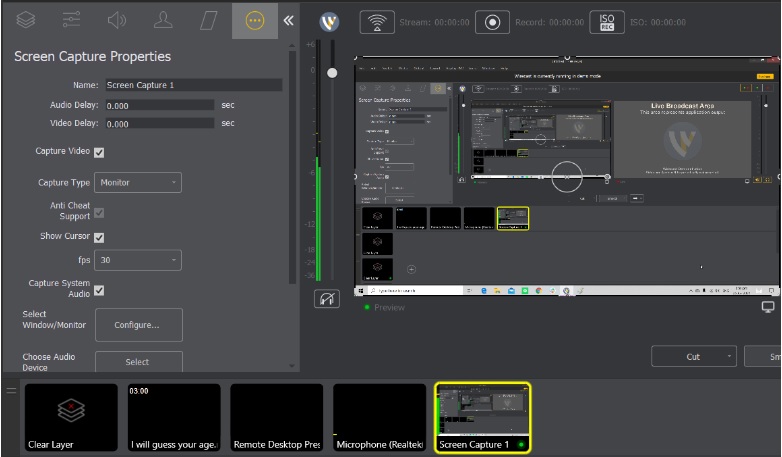
Remote Desktop Presenter Properties have the following settings:
- Source Name: Displays the name of the source. To change the Source Name, enter a new one.
- Audio Delay: Enter the amount of time (in seconds, as short as 1 ms) to delay audio.
- IP Address: Enter an IP address of the target computer.
- Enable Audio: When checked, the audio from the remote desktop is enabled.
- Apply: Click the “Apply” button to update any changes.
- Channel: Select the channel of the remote desktop audio used: Stereo, Left only, or Right only.
- Monitor: When checked, the audio is enabled in your monitor. When unchecked, audio is still streamed to your audience.
Next, click on the “Source Window” icon again and select “Screen Capture.” Click “Add” soon after. 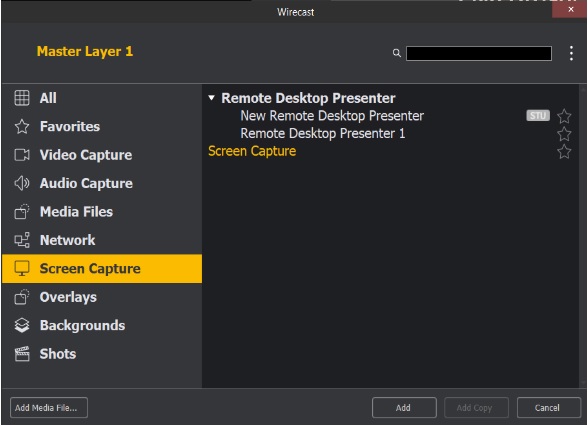
Click on “Audio Capture,” then from System Device, select your internal microphone. Please note that the name for this will be different depending on setup. 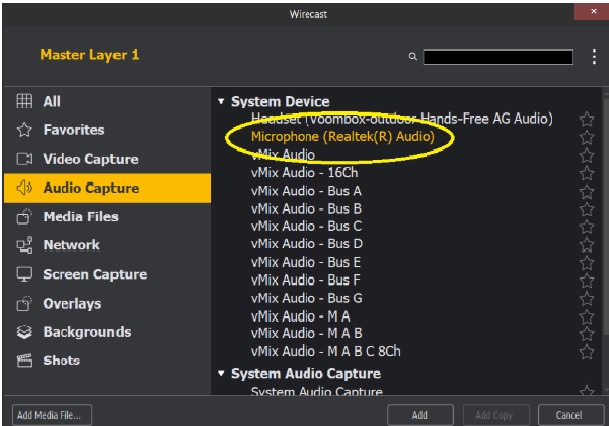
Now select the “ScreenCapture” from “Screen Capture.” 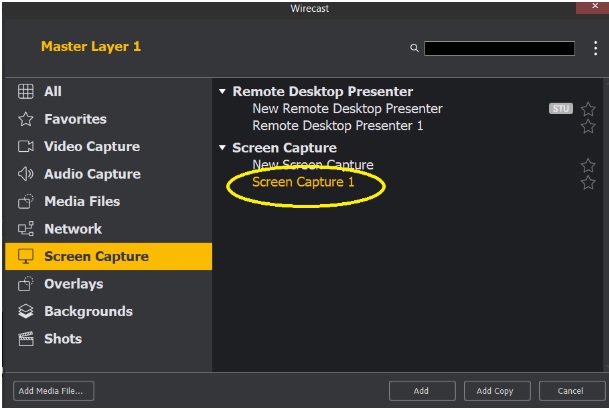
Next, highlight the “UScreenCapture” image, click the audio icon on the far right, and select the internal microphone. The name for this will be different depending on setup.
After you’ve completed this process, you’re ready to broadcast audio and screen-sharing.
Additional Resources
- Introduction to Live Streaming: A Walk Through
- How to Use Wirecast for Multi-Bitrate Documentation
- How to Use Wirecast for Live Event Streaming
- How to Stream Live Video with Wirecast