


How do I Stream On Dacast Using VidBlasterX?
VidBlaster is a software encoder for Windows only. There are several paid versions of this tool, but you can download a free version of VidBlasterX Studio version 5 here. VidBlasterX Broadcast (the most inclusive version of this encoding software) supports multiple streamer modules, which allows you to set up multiple streams. Below find our video tutorial and the written steps to help you start live streaming with VidBlaster:
1 – Video Tutorial:
Check out this quick tutorial, and discover how you can quickly launch a live stream with VidBlaster:
2 – Written tutorial:
Setting Up VidBlasterX
There are two primary phases of setting up VidBlasterX: the steps within Dacast and the steps within VidBlaster.
Steps Within Dacast
If you haven’t done so already, you first need to create a live stream on Dacast. Once this is done, go to the General tab. Under “Encoder Setup” in the top right corner, you will see the encoder settings that you will need to enter in your encoder.
By default, the “Generic RTMP Encoder” will be selected. Note that VidBlaster uses different terminologies; that is why we offer you the possibility to select “Vid Blaster” directly in the RTMP Encoders dropdown.

Steps Within VidBlaster
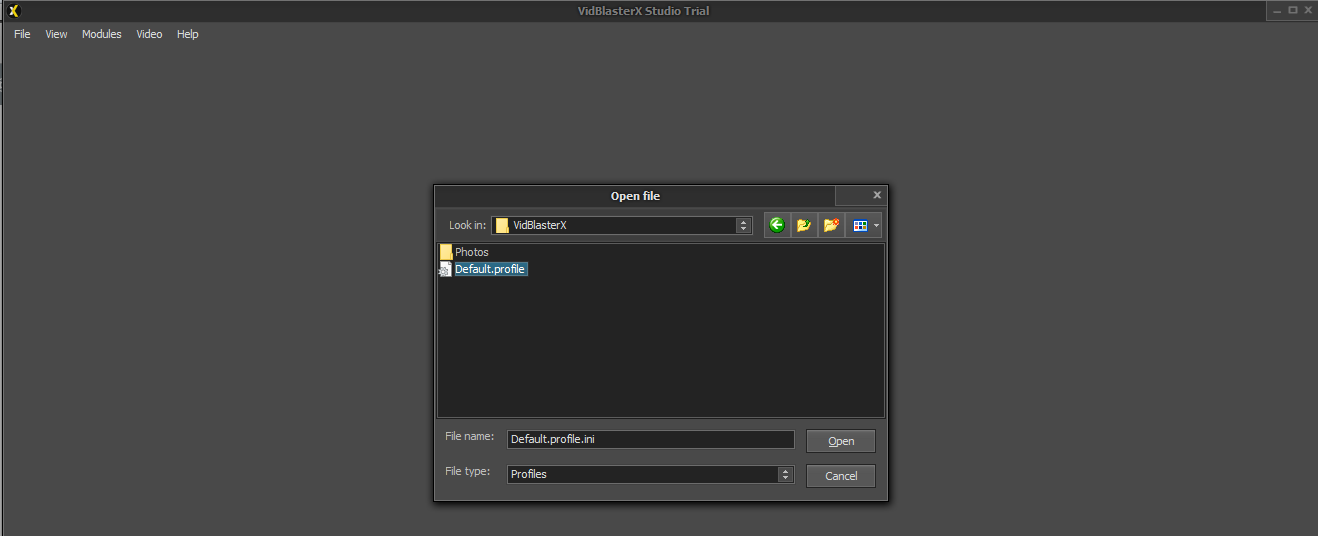
STEP 1: Start by clicking on “File,” then “Load Profile” and finally, select the default profile as shown below:
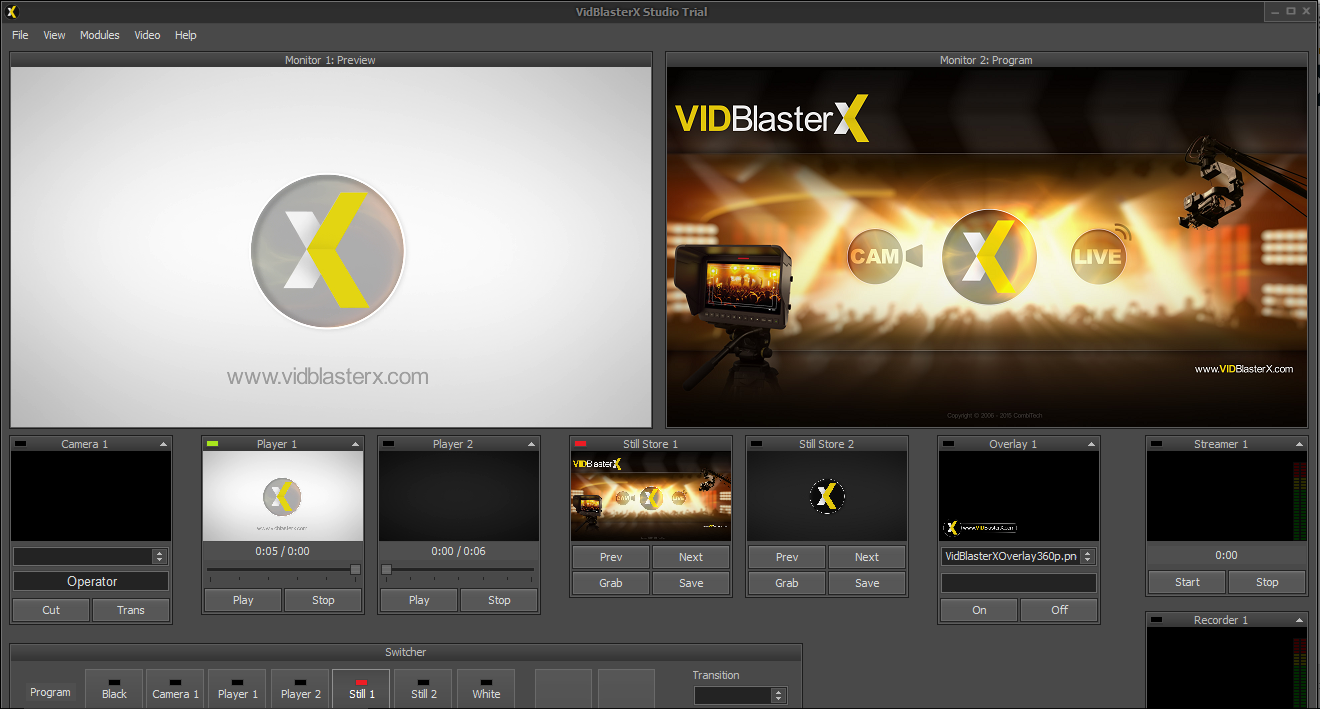
You should see the following screen at this point:
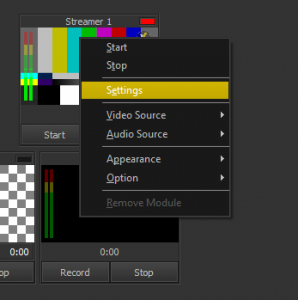
STEP 2: From here, right-click in the Streamer 1 module and go to Settings
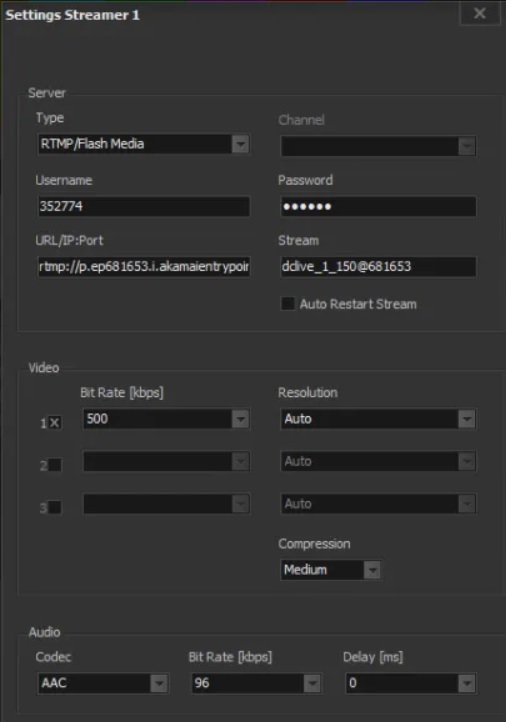
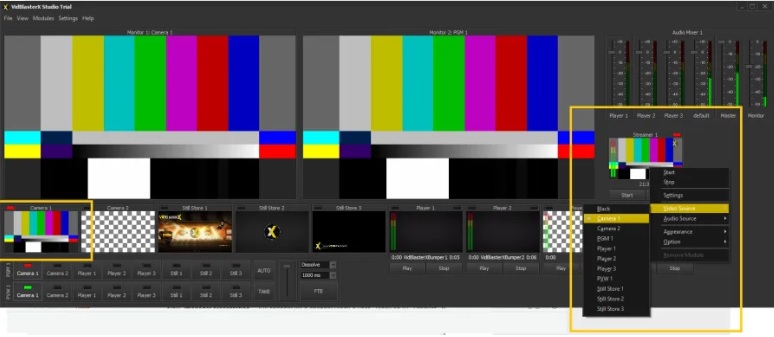
STEP 4: You can now select the source of your stream from the available options. Make sure it coincides with the source module you already selected.
For example, if you choose the Camera 1 module as your source, make sure you select Camera1 as well in the source of Streamer 1:
To test your stream in a browser, you can also copy and paste the share link in your search bar. The video can take up to 50 seconds to come up online.
Not yet a Dacast user, and interested in trying Dacast risk-free for 14 days? Sign up today to get started.
Additional Resources:
- Required Configuration for Encoding Software
- Hardware vs. Software Encoders
- Top Encoding Software
- Hardware Encoding Alternatives