


As you know Dacast is geared towards video streaming, but there are still different methods by which you can use your audio files for live streaming and on-demand content on the Dacast platform.
Let’s have a closer look at this with the video tutorial!
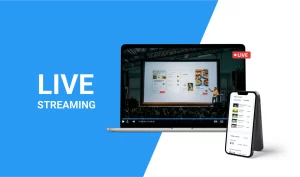
Live Stream Audio: How to Navigate Audio-Only Streaming
To do audio-only live streaming on your website, simply begin by setting up a regular live stream as you normally would. To only stream with audio, you must uncheck the “video” feature in your encoder. This feature works for HTML5 channels. For the best performance, you will want to use AAC audio as your source [...]
(0:06 – 0:22)
Welcome to Dacast. In this video we’ll show you how to set up live streaming and on-demand audio streaming on Dacast. Please remember that Dacast is geared towards video streaming, but there are still different methods by which you can use your audio files for live streaming and on-demand content on the platform.
(0:24 – 0:34)
Let’s start with audio live streaming. Click on the live stream menu and create a live stream, then select the standard passthrough channel. Click on the create button.
(0:35 – 0:47)
You’re now redirected to the general tab. The encoder setup page will be displayed automatically right away. Now with the RTMP encoder setup DuckCast provides, you can upload the audio file onto the encoder as a media file.
(0:49 – 1:20)
Then proceed back to the Dacast encoder setup, where you can now copy and paste the needed encoder credentials for your encoder to connect to the Dacast platform. Once connected to Dacast you may now start live streaming your audio file. Dacast does not have a specific player for audio content.
You should showcase a fixed image via your encoder or you will get a black background on your player. We are working on an audio player and will let you know when this is released. Upload audio files.
(1:22 – 1:47)
Go to the Videos section. Click on the upload video button at the far right side of the page. Audio files are not encoded and so you don’t need to worry about choosing a recipe.
The system will automatically skip this. If you are uploading audio files one by one from your computer, the browse videos option would be the button to choose. Otherwise you can drag and drop your file onto the uploader.
(1:49 – 1:58)
Once your content is uploaded, go back to the video section. Click on the title of your uploaded audio file. If needed you can make revisions as you so wish.
(2:01 – 2:18)
Once changes are done, these will now be reflected in the video section. If you have any questions, please contact our 24-7 support team or visit our knowledge base. For new customers, please book a demo with our sales specialists and sign up for a free 14-day trial to start streaming today.


