


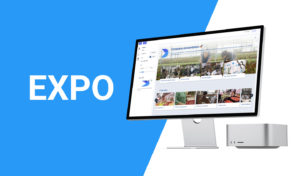
Dacast’s new Expo video portal feature is an immersive gallery that allows you to organize content together and share a collection of videos or live streams with your audience.
For example, if you do not have a website, this is the perfect way to launch a content gallery in minutes and create captivating, immersive video experiences.
The Expo feature is white-label and totally customizable. You can monetize and secure it, to control exactly who gets to see each video content.
Let’s have a look at it!
Dacast’s Expo Video Portal: How to Create an Immersive Video Gallery
What is Dacast’s Expo Video Portal Feature Dacast’s new Expo video portal feature is an immersive video gallery that allows you to organize videos together and share a collection of videos with your audience. For example, if you do not have a website, this is the perfect way to launch a content gallery in minutes [...]
(0:05 – 0:35)
In this video, we’ll show you the fastest way to create an expo with all your content from Dacast. Dacast’s Expo Video Portal feature is an immersive video gallery that allows you to organize content together and share it with your audience. For example, if you do not have a website or want to communicate about a special project, this is the perfect way to launch a content gallery in minutes and create captivating immersive video experiences.
(0:36 – 0:51)
All of the content on an expo page is yours. You can personalize, monetize, and secure it to control exactly who gets to see each content. Creating an expo page on Dacast can be done in just a few clicks.
(0:52 – 1:06)
Here’s how to get started. Step 1. Select Expos from the left side panel of your Dacast dashboard. Step 2. Click the Create Expo button on the top right corner of the screen.
(1:06 – 1:18)
Step 3. Enter an expo title. Step 4. Click Create to save your expo video gallery. You’re now ready to start creating your expo.
(1:18 – 1:35)
What needs to be done now is to add content to your expo page. You need to click on Asset Selection to do so. You will be able to select contents from your folders or contents video libraries, just like you would do for a playlist configuration.

(1:36 – 1:55)
To begin adding contents, click on the video you want to add on the left side. Press the arrow button to transfer that video onto the expo list on the right side of the screen, or just drag and drop the content. As you can see, the contents you’ve selected are now reflecting in the preview on the right.
(1:57 – 2:11)
You have five different sections to organize your expo. Number 1. General. That will enable you to change the title and the description of your expo, as well as white labeling your expo using our CNAME feature.
(2:12 – 2:35)
Number 2. Appearance. You’ll be able to add a logo, a favicon, a cover, and more to your expo. Number 3. Paywall.
(2:35 – 2:50)
From there, you will enable a paywall. Number 4. Security. That will enable you to add a password protection, content scheduling, or geo restriction.
(2:54 – 3:08)
Number 5. SEO. For you to optimize your expo on search engines and social media. Copy Link and My Expo are available at all times.
(3:09 – 3:30)
To share your expo with your audience, or check for yourself how your expo will look like for them. By default, the expo is online, but you can put it offline if you don’t want to share it anymore. If you have any questions, please contact our 24-7 support team or visit our knowledge base.
(3:31 – 3:39)
For new customers, please book a demo with our sales specialists and sign up for a free 14-day trial to start streaming today.


