


Are you wondering how to upload videos to your Dacast account? We’ve got you covered.
In this video, we will review how to upload a video file or videos to your Dacast account and the different upload methods available.
How to Upload Videos in Your Dacast Account?
Are you wondering how to upload videos to your Dacast account? We’ve got you covered. In this article, we will review how to upload a video file or videos in your Dacast account and the different upload methods available. Where to find the uploader? There are two options to find your videos uploader. Option 1 [...]
(0:06 – 0:22)
Wondering how to upload videos to your Dacast account? We’ve got you covered. In this video, we will review where to upload videos to your Dacast account and the different upload methods available. Where to find the uploader? There are two options to find your video’s uploader.
(0:23 – 0:40)
Option 1, by clicking on the add button and selecting the video option in the drop-down. Option 2, you can also click on videos and then click on the upload video. Note that Dacast offers two methods to upload your videos.
(0:40 – 0:54)
Video uploader, select an individual or group of files from your device. Bulk upload, bulk selection of videos from an S3 bucket AWS. Now, we will explain how to use these two methods.
(0:55 – 1:04)
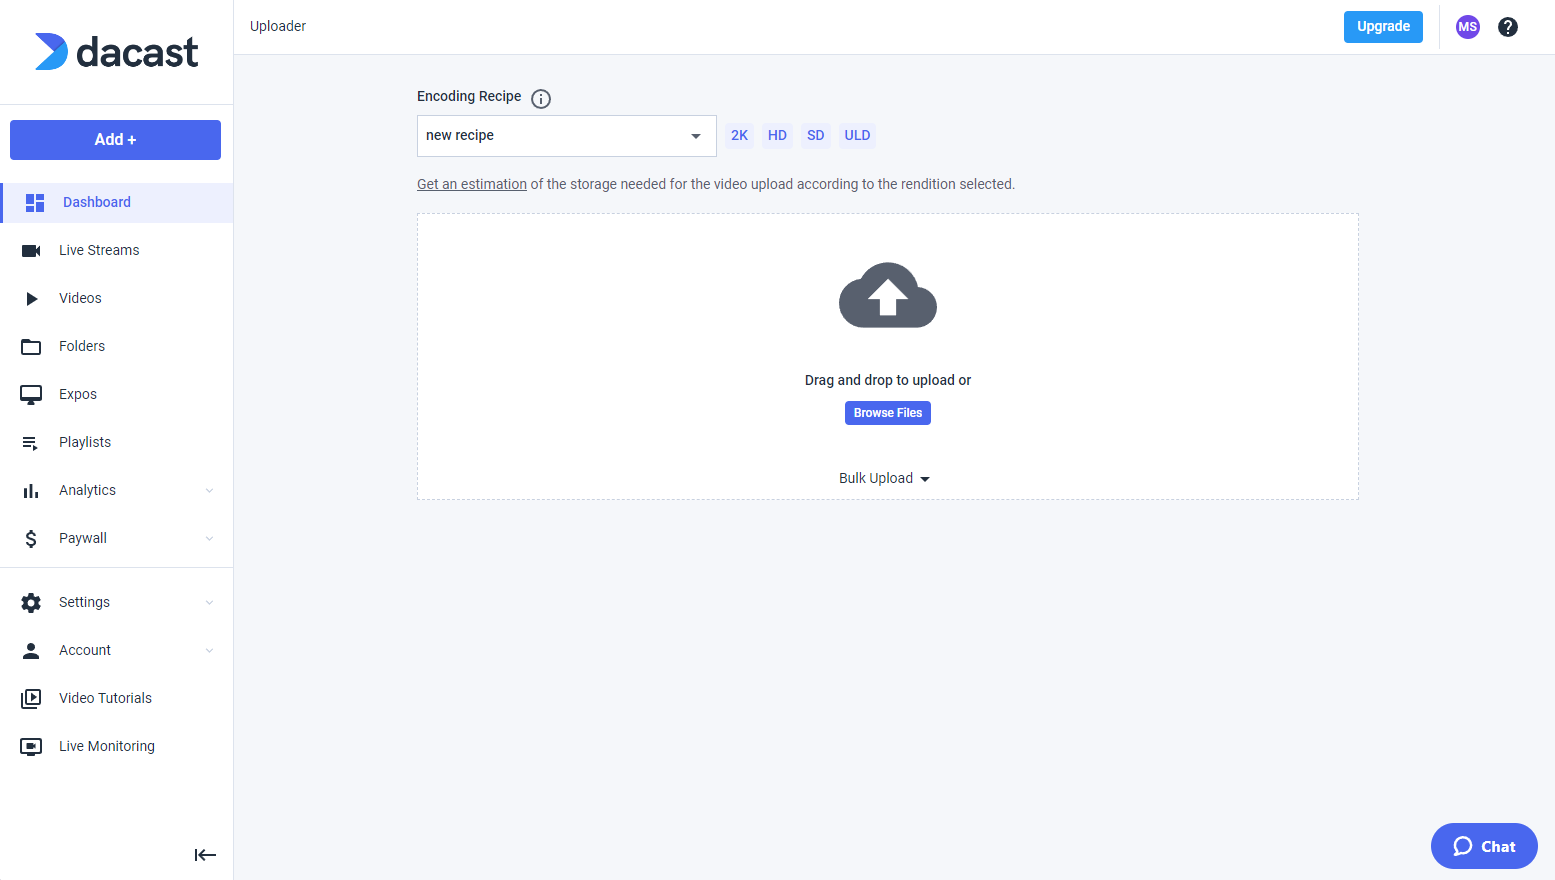
Method 1, video uploader. After completing the previous steps, you see the following screen. You will have two options to upload your videos.
(1:05 – 1:38)
Drag and drop your files or click on the browse files button to browse on your device. Note that you can select the Dacast standard encoding recipe or your own recipes by clicking on the drop-down. While your videos are uploading, you will be able to perform different actions at the same time, like changing your video title.
(1:39 – 2:02)
By clicking on the arrow icon of the uploading window, you can check out the progress of your uploads. You can travel within the app as you like and keep working while your videos are uploading without being stuck on the uploader page. Once uploaded, you will be able to copy and paste your embed codes and share link by clicking on the copy icon.
(2:03 – 2:12)
Finally, you will be able to click on your videos from the uploader or the uploading window and edit your video metadata directly from there.


