


How to Set Up Your Account on the Dacast Video Platform

Today, we’re going to walk you through setting up your account on our Dacast online video platform.
Start by logging into your Dacast account at www.dacast.com.
Click “Account” on the left sidebar.

You will find six different tabs: Plan, Upgrade, Profile, Company, Users, Billing, Custom Orders, and Invoices.
Let’s break down some of the most important pieces of information you need to successfully set up your Dacast account.
Plan

The purpose of the “Plan” tab is to show you how much Data & Storage you have remaining on your video platform account.
You can purchase more simulcast minutes, but also additional transcoding for your videos. By clicking the “Buy More” button on the dashboard or navigating directly to the /account/plan page, you will now find a dedicated transcoding section.
This is also where you can upgrade your plan based on your needs.
Upgrade

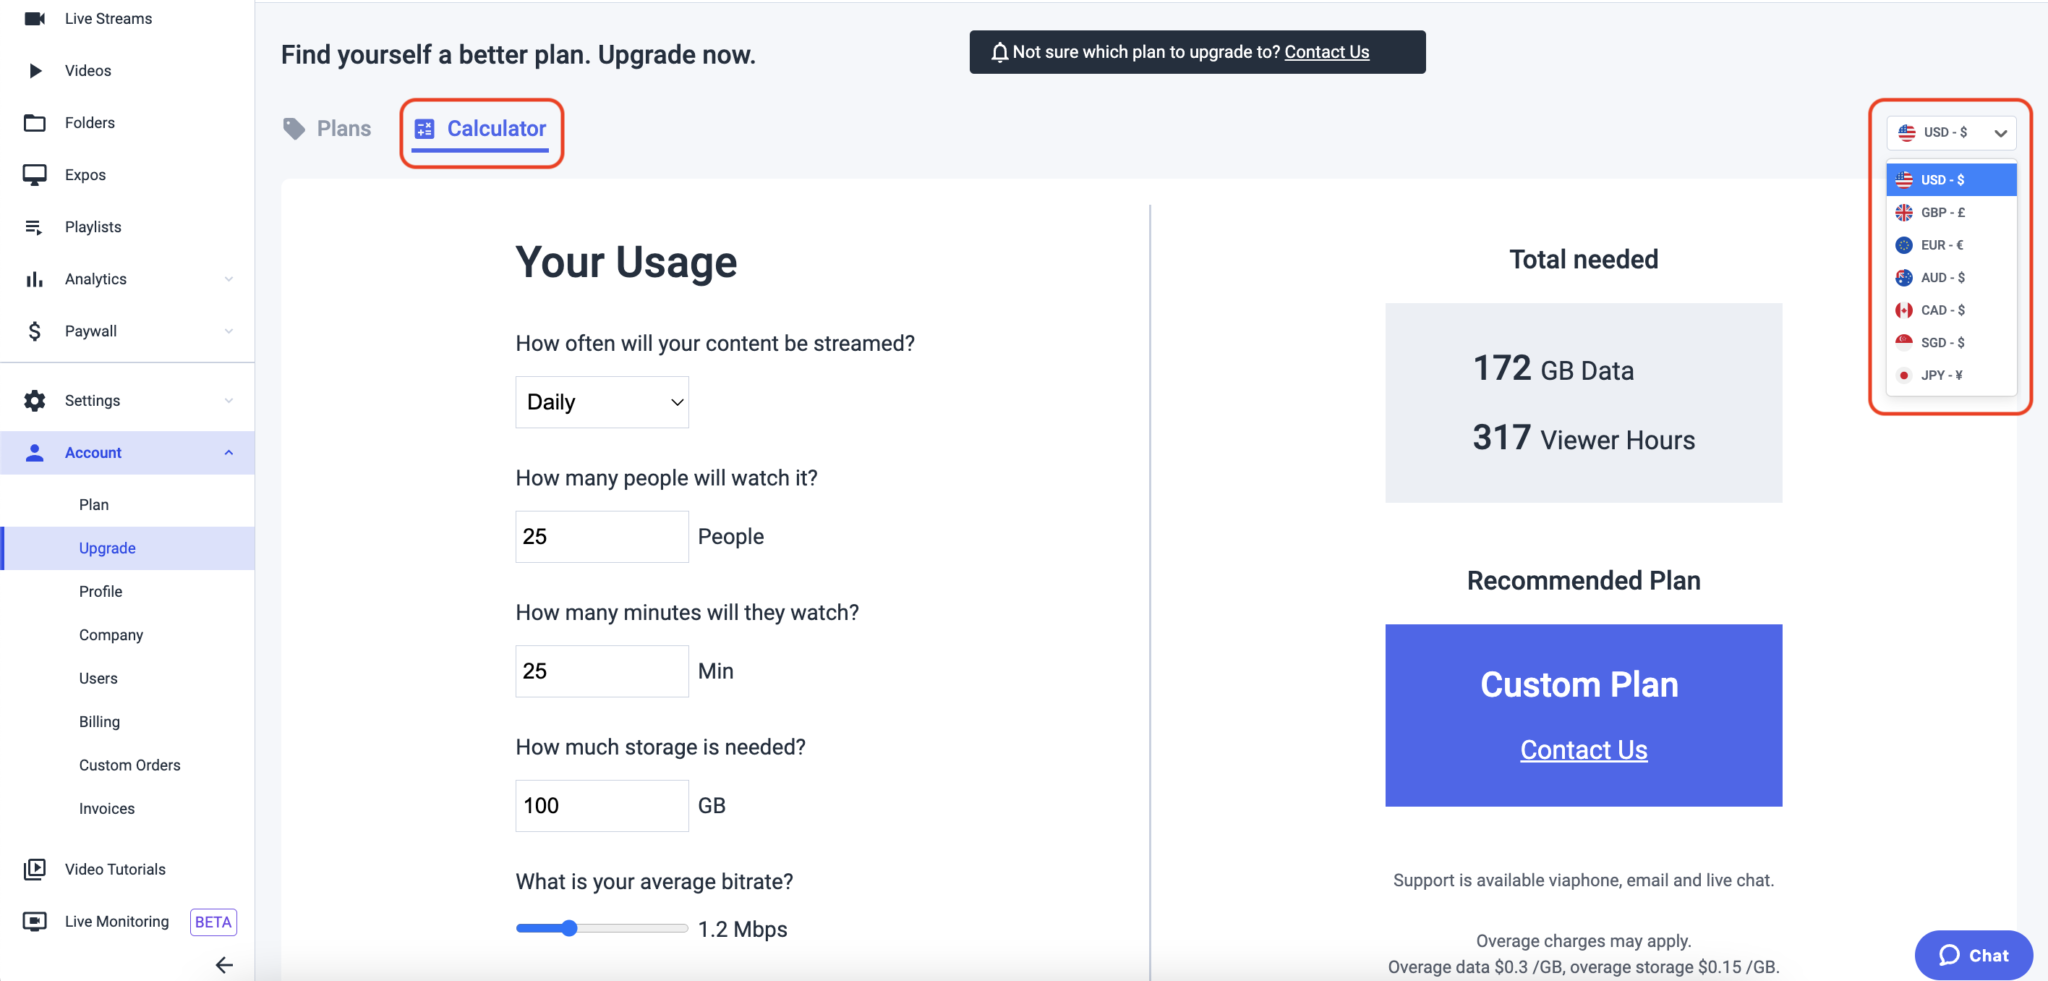
But if you want a more detailed view of upgrading, we suggest you click on the Upgrade tab, to see the prices and benefits of each and every Dacast plan.
If you scroll down a little, you can click on the toggle button indicated on the see all features tab, this will give you the different options side by side of each Dacast plan and its features.
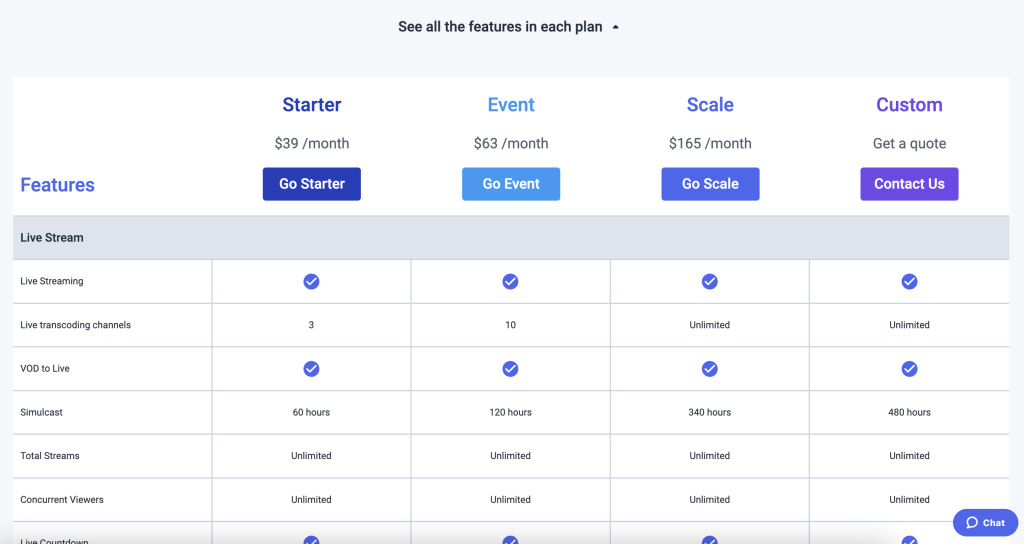
From this dropdown menu you can select your preferred currency to see how much each plan will cost.
Profile
Profile
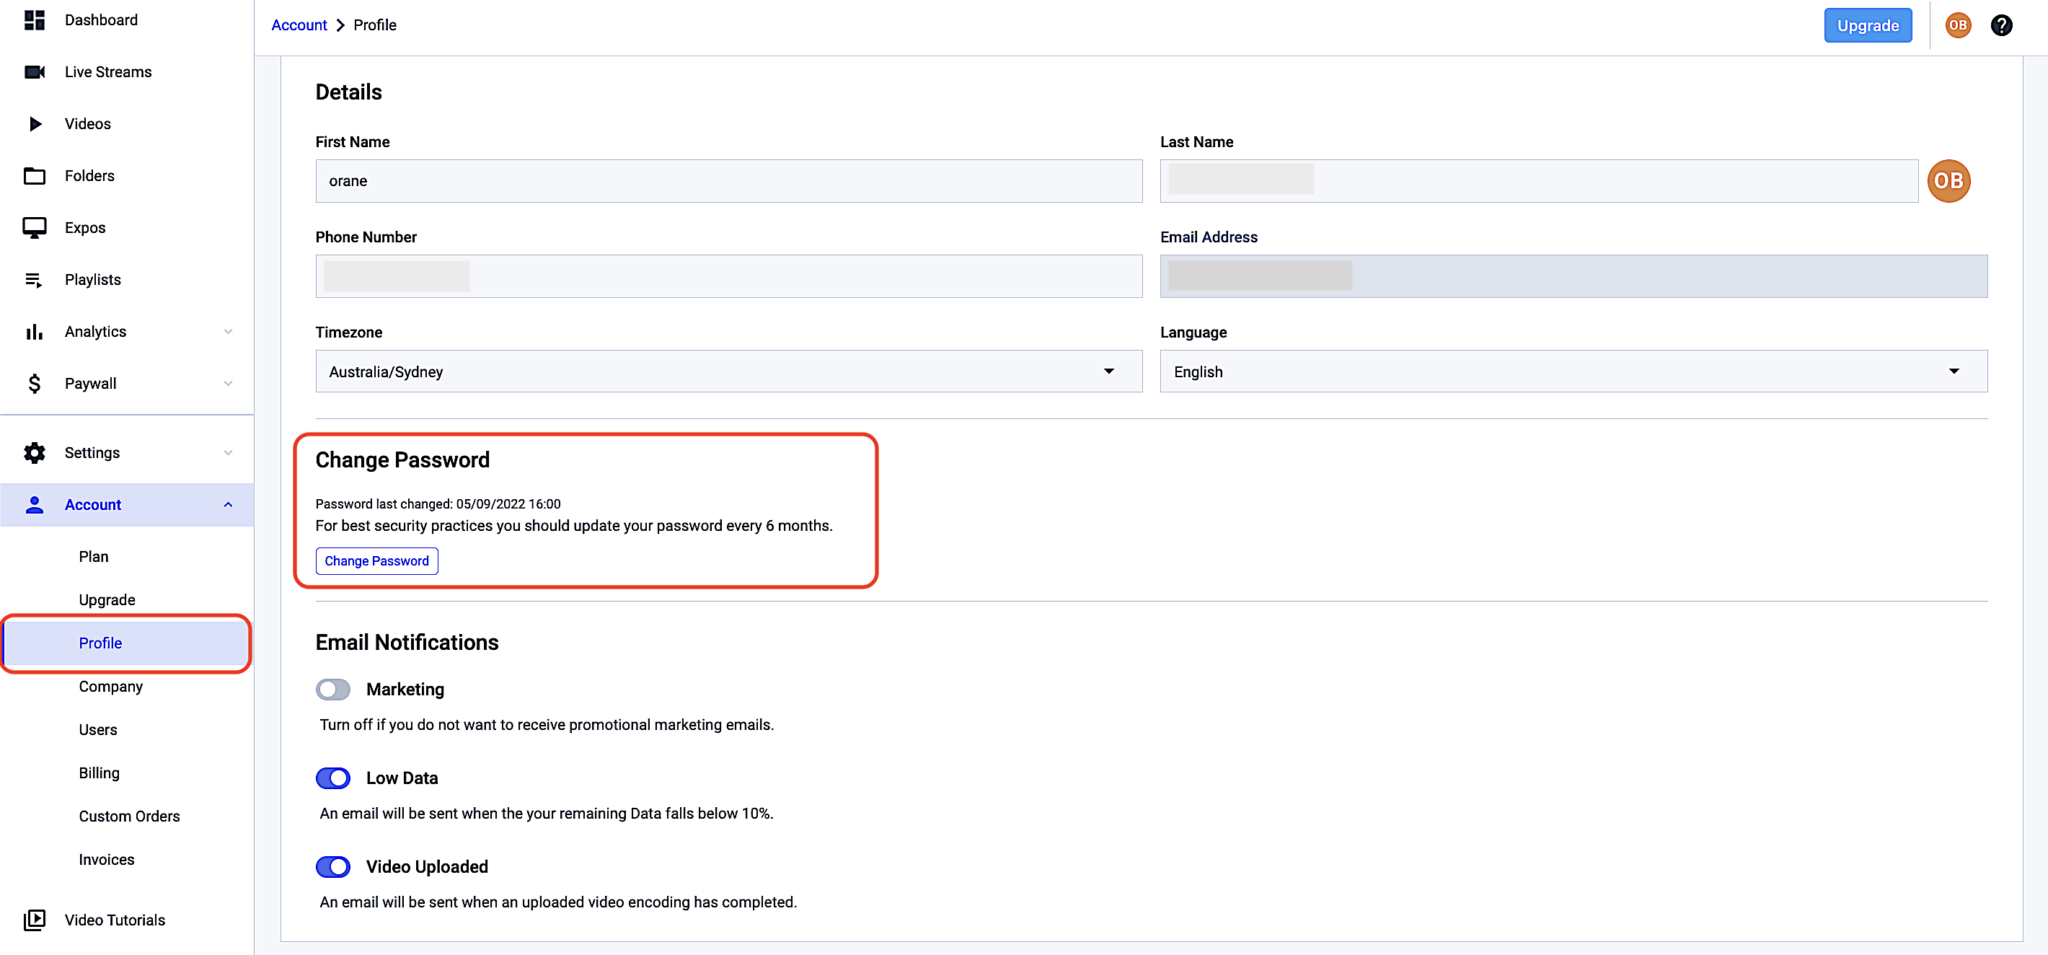
The “Profile” tab is where you can fill up information of the owner of the account such as Name, email address, and phone number. You can also change your password on this tab.
There are also five languages that you can select on this section based on your preference, the available languages as of the moment are: German, Italian, Portuguese, and Spanish.
Fill in necessary details about your basic personal preferences.
Click “Save” once your info has been entered.
Company
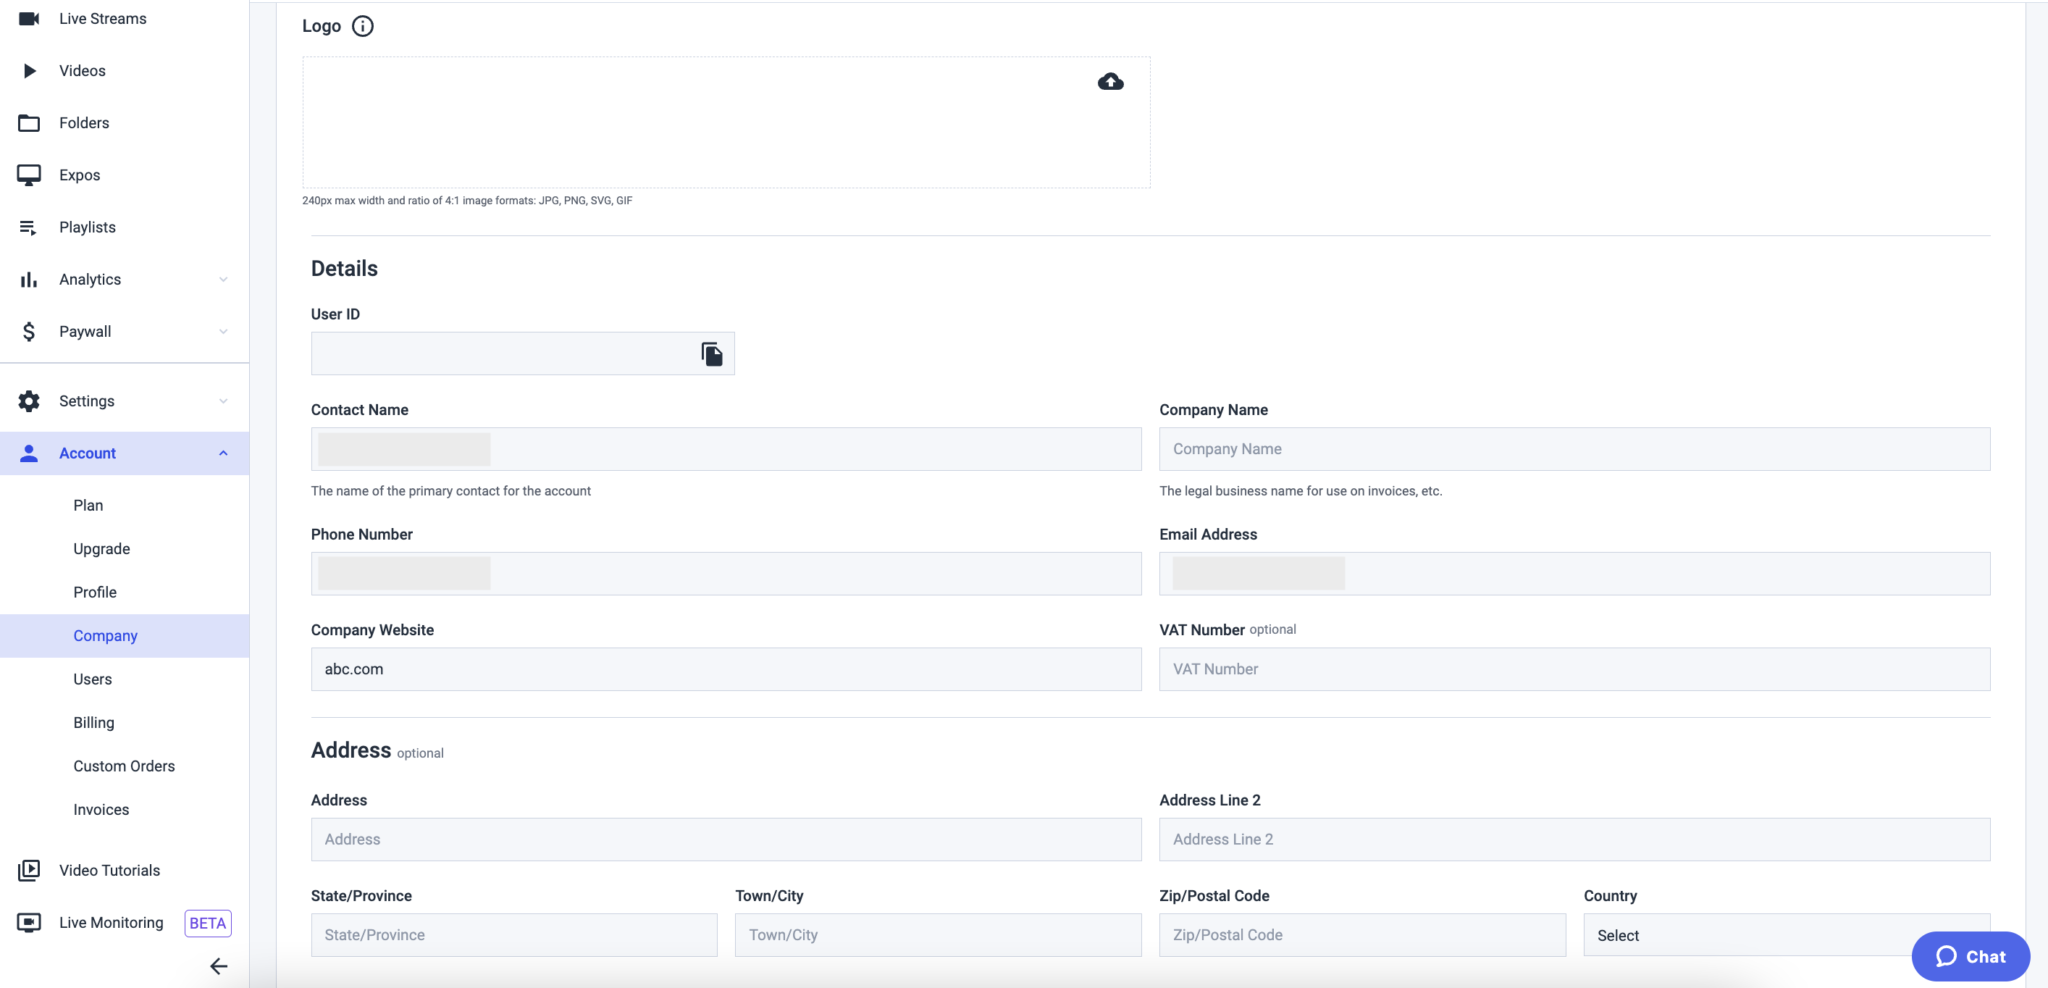
Under the “Company” tab of your Dacast account, you’ll be prompted to share some basic information about your business. This will help us verify the account faster for better support.
Upload a logo to be used as your “default” logo. You can change your logo by uploading a new one. This logo can be used for watermarks when customizing your player.
Please click “Save” once you’ve entered your info.
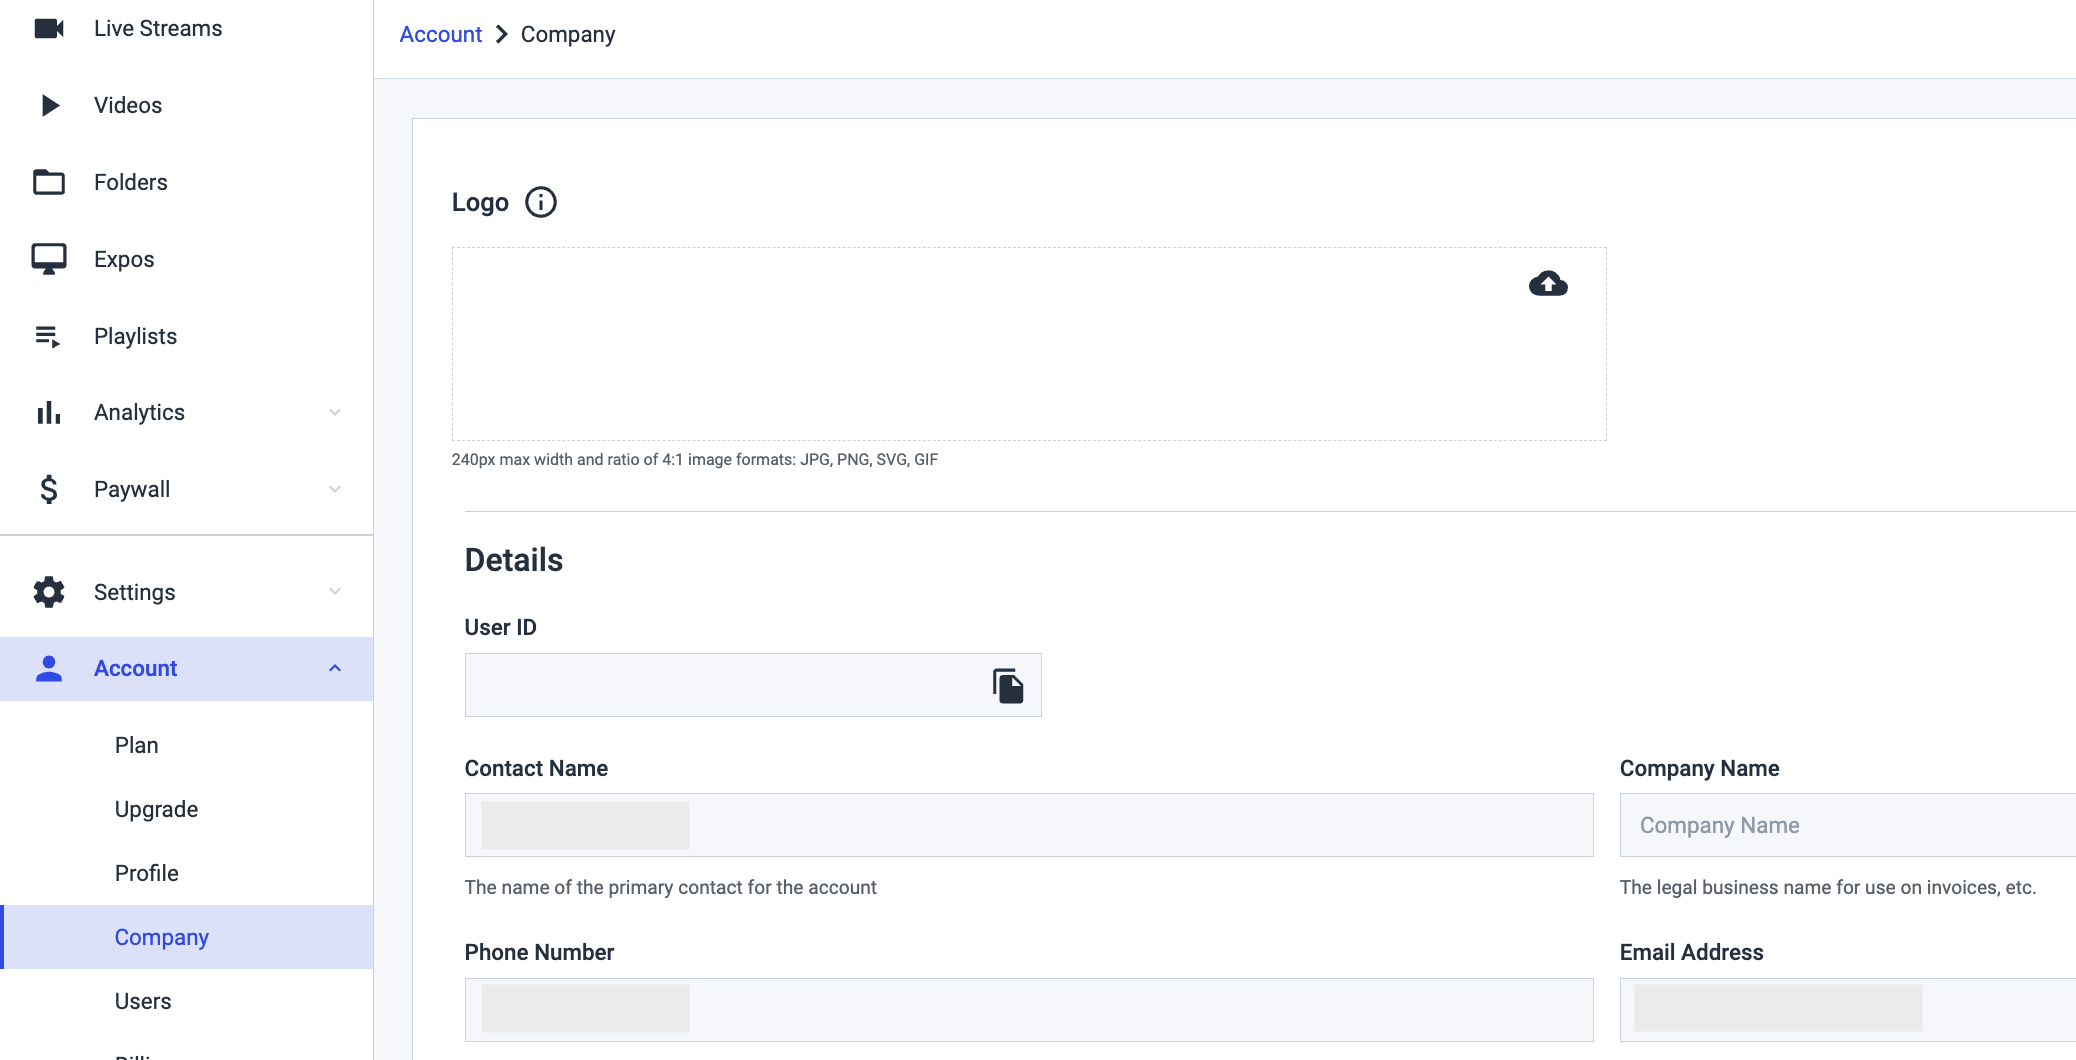
Other info is indicated and can be updated via the Details tab. This tab will also have your very own unique Dacast User ID, which you can provide to any of our departments for easier tracking, assistance and convenience. Simply click on the copy icon and paste it on a notepad, to view the unique numerical ID.
Users
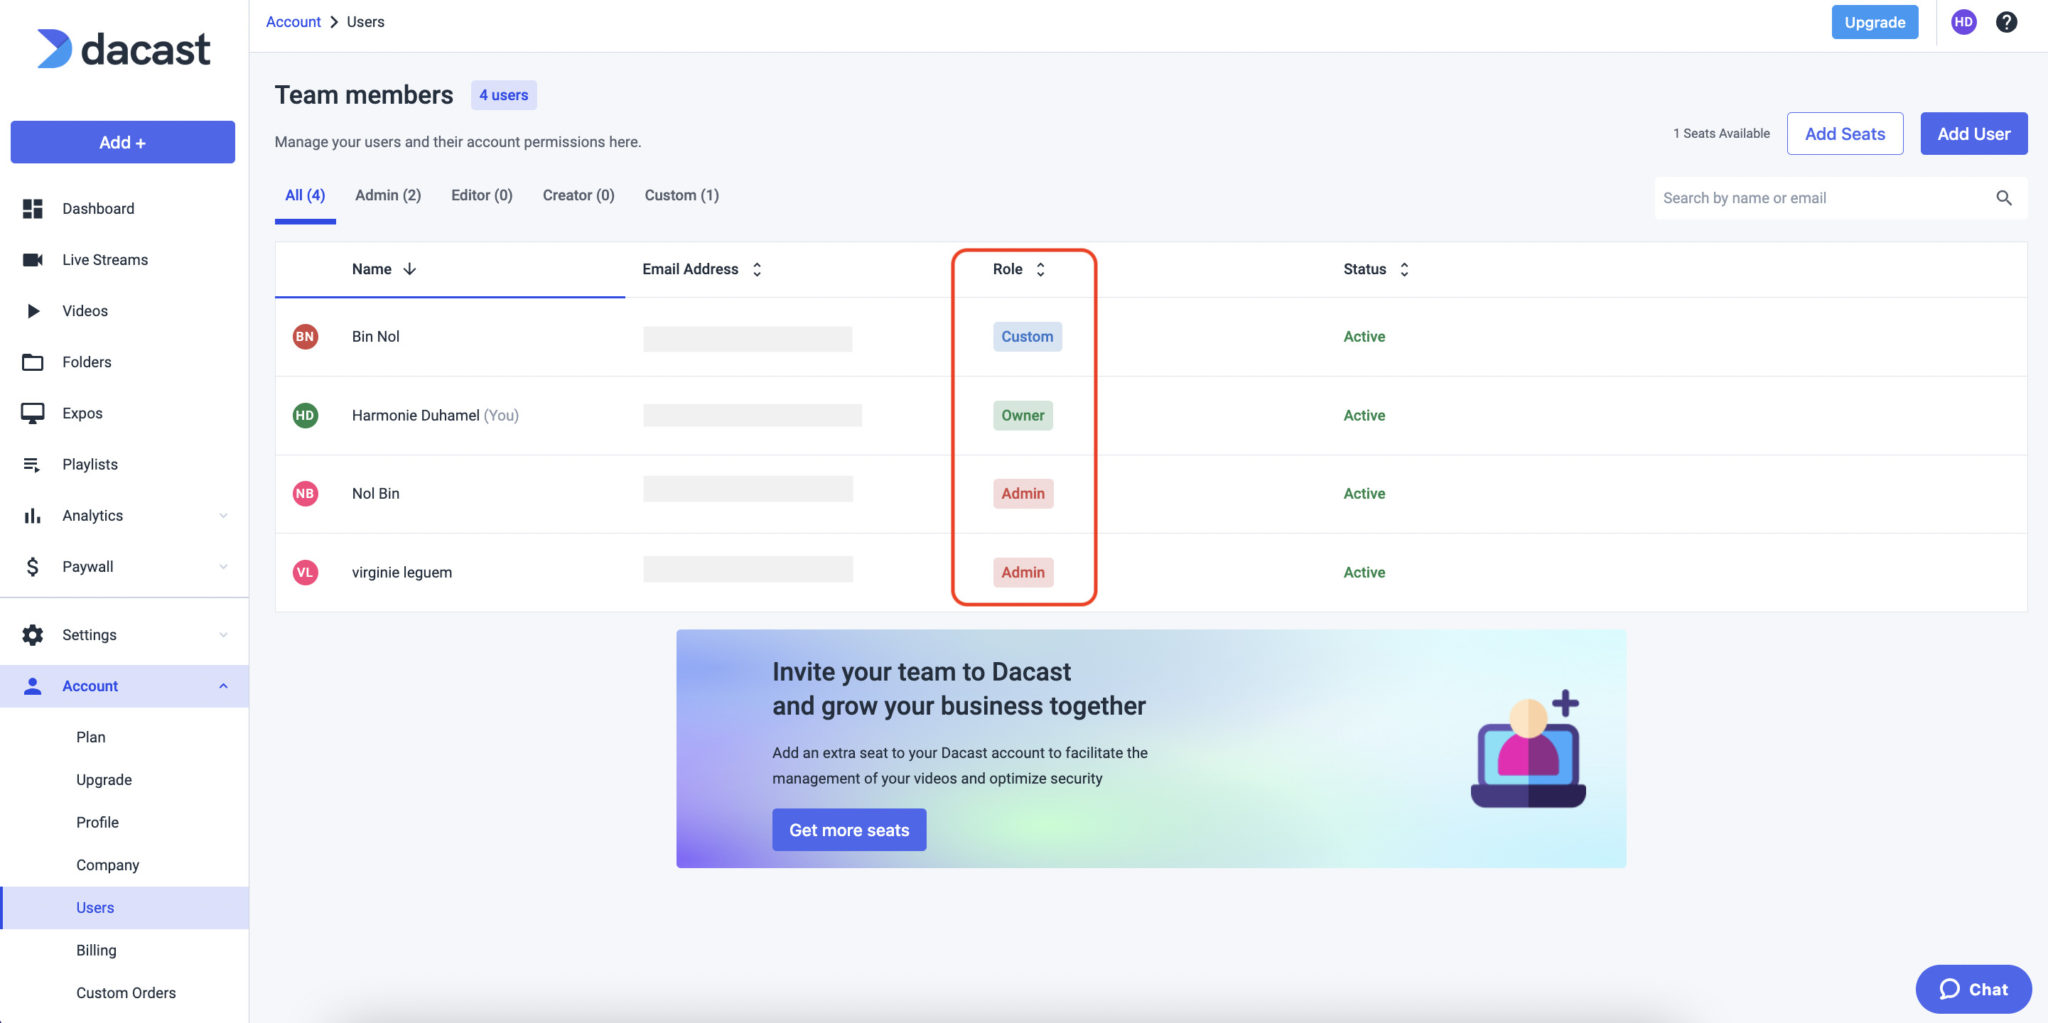
For the user’s tab, the Dacast Team Members feature, you can invite new users (team members or partners for example) to your Dacast video platform account and manage the permissions you want to grant them. So that multiple people can collaborate and share the same account.
Here are the current roles in Dacast:
- Owner
- Admin
- Editor
- Creator
- Custom
Each role offers different access in the app:
- The owner can access it all and have access to billing.
- The admin: Access to manage users, all live channels, all videos and global settings.
- The editor: Access to all live channels, all videos and global settings.
- The creator: Access to live channels and videos only.
- Custom: Create the role you need with custom permissions.
However as an “Owner” you will be able to create specific roles with specific access, for your multi-users.
We have a separate instructional guide as well as the criteria to have this benefit on your Dacast paid plan. Please feel free to check this out or contact us to learn more about it.
Billing Information
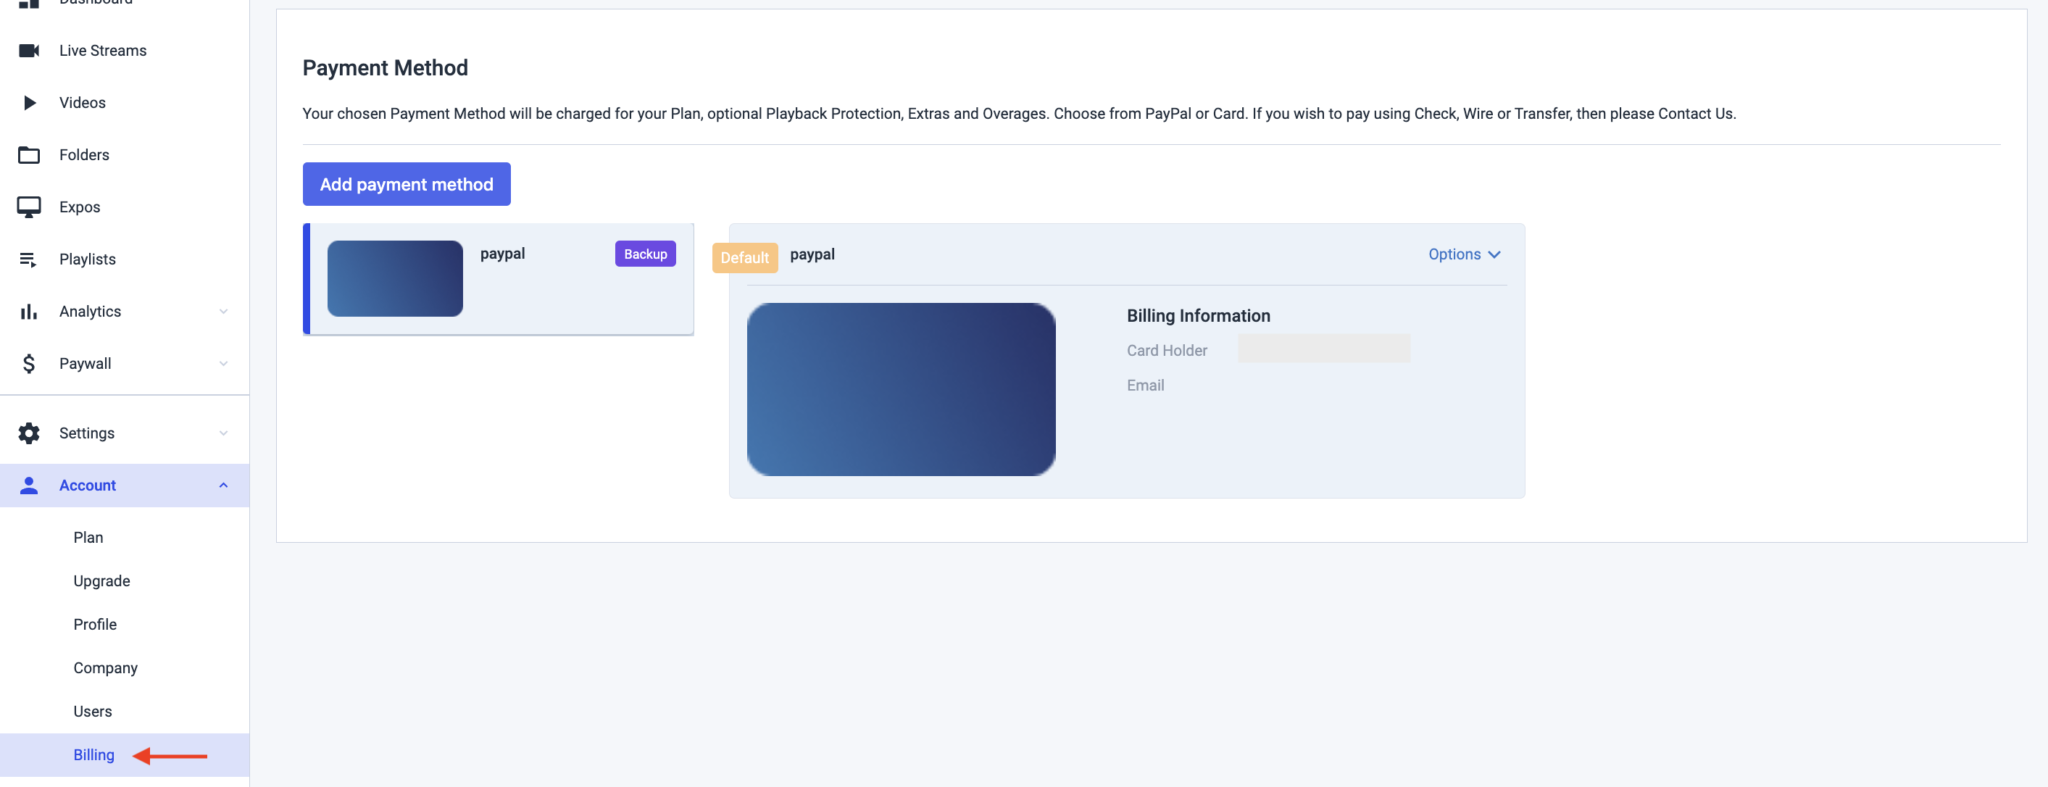
You can update your payment method under the “Billing” tab. Again, always remember to click “Save” after making changes.
Custom Orders
This tab shows any pending custom subscriptions you have discussed with your sales representative. It will show you transaction details such as, the date of the request, the price, currency used, and the status of the custom order request.
Invoices
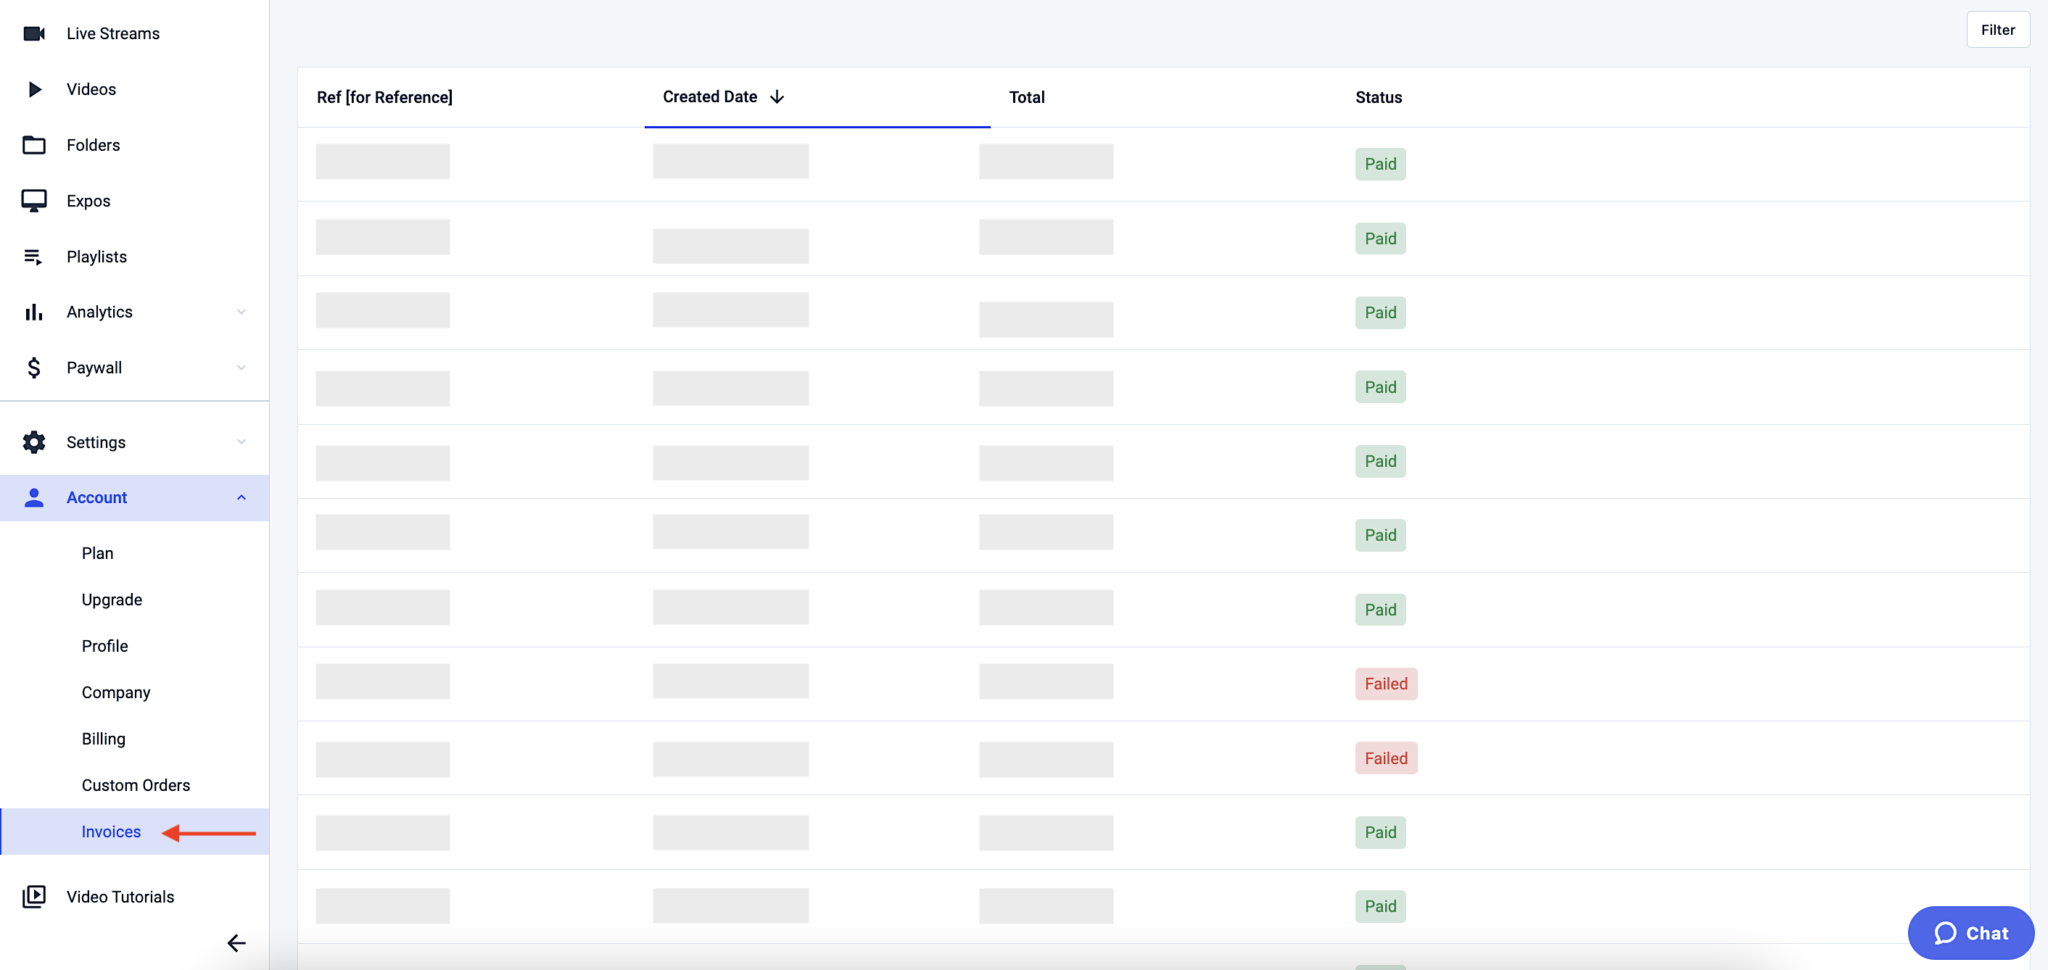
The invoice tab gives you the ability to review all of your invoices on Dacast. Access the reference number, date, total, and status of each invoice.
You have the option to download and print documents right from this portal.
Not yet a Dacast user, and interested in trying Dacast risk-free for 14 days? Sign up today to get started.
Additional Resources
- Intro to Live Streaming: A Walkthrough
- Setting Up Promo Codes with Your Dacast Account
- Where is the Login and Password for HTML5 channels?
- Free Trial Account: Are There Any limitations?
- Can I Stream Ad-Free with Dacast?