


Walkthrough: Encoder Setup Guide
While setting up your live stream is easy, the encoder setup page is admittedly the most challenging step. For first-time users of the platform, it is understandable you may encounter some confusion. With this general guide, we provide you with the basic steps from within the platform, to make sure your live streaming experience with Dacast is a pleasant one.
Setting Up an Encoder for Your Live Stream:
This is the first step in the whole process: creating a live channel is the most important step as this is where you will get the information you need to paste in your RTMP settings in your encoder.
1. Auto-Select a Publishing Point
All you need to do is make sure you are logged inside your Dacast account. From the main dashboard, you can click on Live Streams (left side), then press the Create Live Stream button (if you have not created a Live stream yet). If you have created a Live stream, you can either click on the live channel name or the edit button (pencil icon). Creating a Live stream enables you to get the information to feed into your encoder behind an RTMP firewall and connect to the Dacast server, in order to stream live video:

Now once inside the live stream, on the General tab, you will find the encoder setup details when clicking on that button:

You will then see this window. This is where you will get the information you will feed into your encoder.

By default, the “Generic RTMP Encoder” will be selected, and here is the information you will see:
- URL
- Stream Name or Key
- Username
- Password
You will also have further options by clicking on the dropdown menu below “RTMP Encoders”. Depending on the encoder you are using, select yours in the following list of encoders: OBS Open Broadcaster Software, Sling Studio, Telestream Wirecast, Teradeks, Vid Blaster, or vMix.
If you are using a different encoder than the ones listed, you can keep the “Generic RTMP Encoder” selected.

Simply copy and paste these pieces of information into your RTMP encoder setup. We have simplified the process by including an icon you can just click to copy the info easily.
2. Setting Up the RTMP Encoder for Your Live Stream:
Now that you have the information from your Dacast live stream, we will show you how to put them on the most common software encoders used for live streaming.
OBS Studio
In your Dacast Encoder Setup, select “OBS Open Broadcaster Software” or “Generic RTMP Encoder”.
Then in OBS, in the main window of the encoder click on Settings under Controls:

Then, you will be redirected to the Settings page of OBS Studio. Click on Stream on the left side. Then under the first tab, click on “Service”, and select Custom (if you’ve selected the Generic RTMP encoder on the app). From there, this window will appear. This is where you put the stream credentials, which you can copy and paste easily from your Dacast live stream into this part:

Next, click “Apply” so that OBS Studio can save those credentials. Finally, from the main window, you can now click on the “Start Streaming” button, and your OBS Studio will then be connected to the Dacast server and your Dacast live stream, so you can start the live stream immediately:

Wirecast
In your Dacast Encoder Setup, select “Telestream Wirecast”:

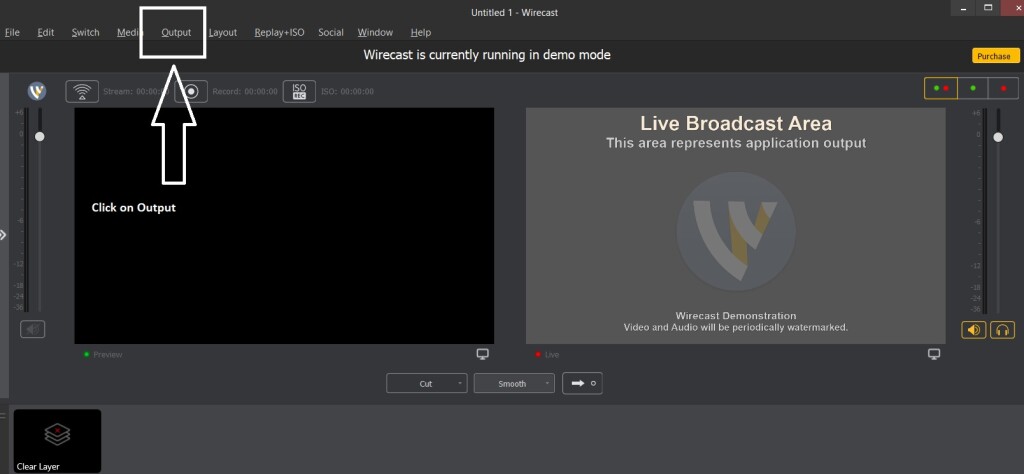
Then in Wirecast, from the main window of the encoder, click on Output:
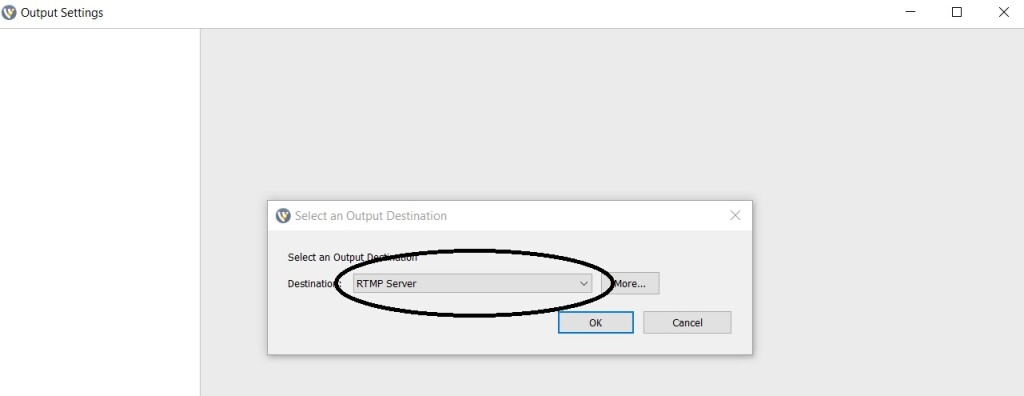
You will then be redirected to this window. Select RTMP Server:
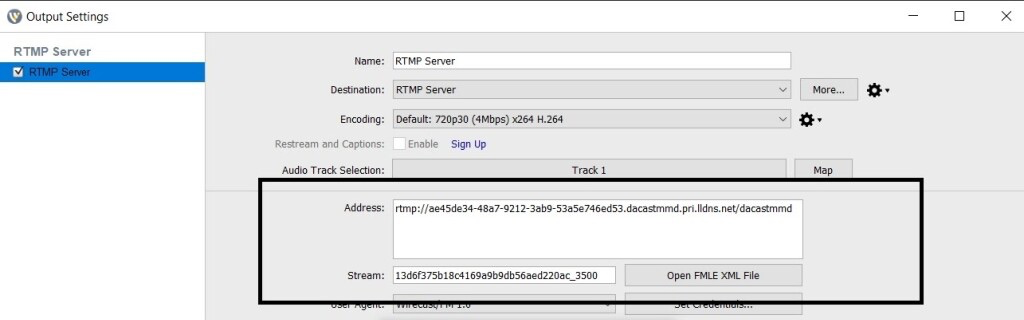
Then once inside this window, go to the Address and Stream tab on Wirecast and paste the information from your Dacast encoder setup:
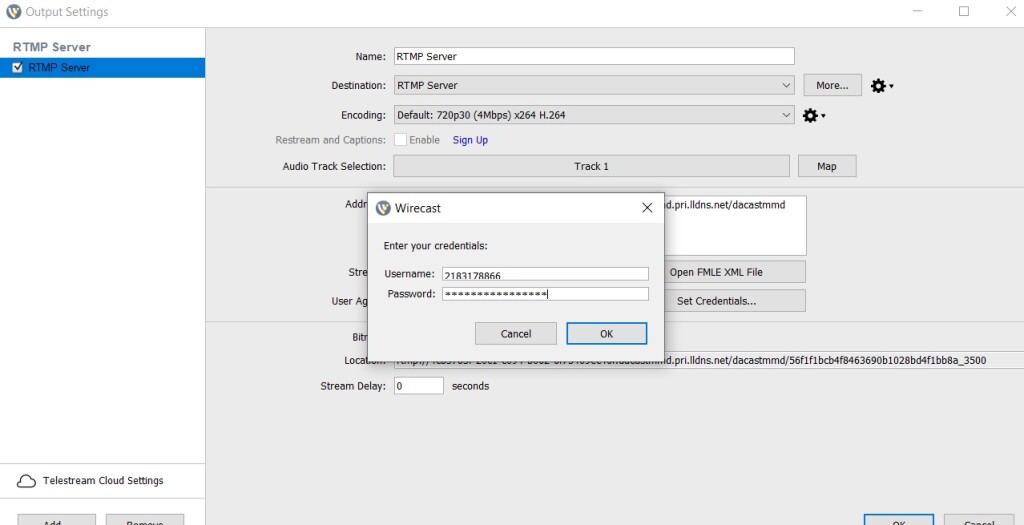
After pasting the Address and the Stream keys, click on OK. Clicking on Set Credentials, this is where you will paste the username and password respectively:
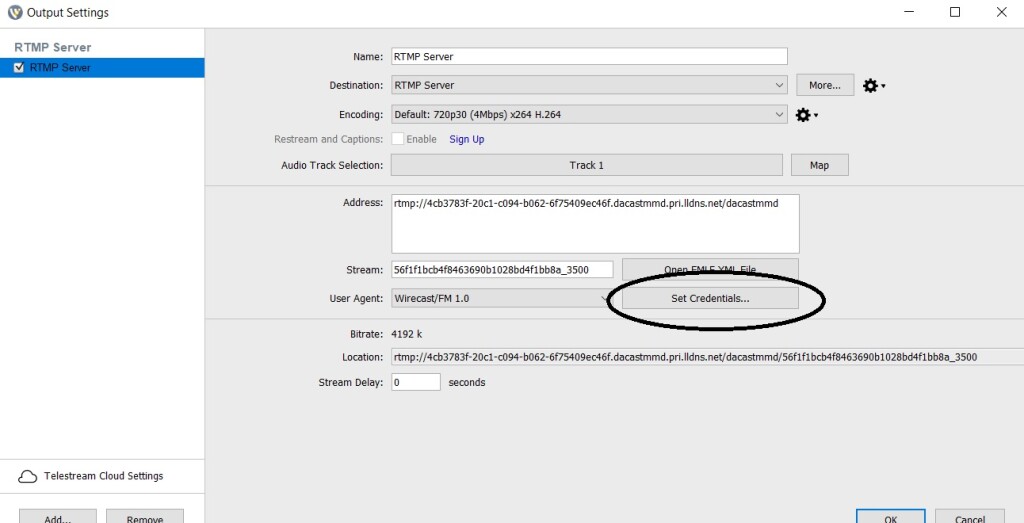
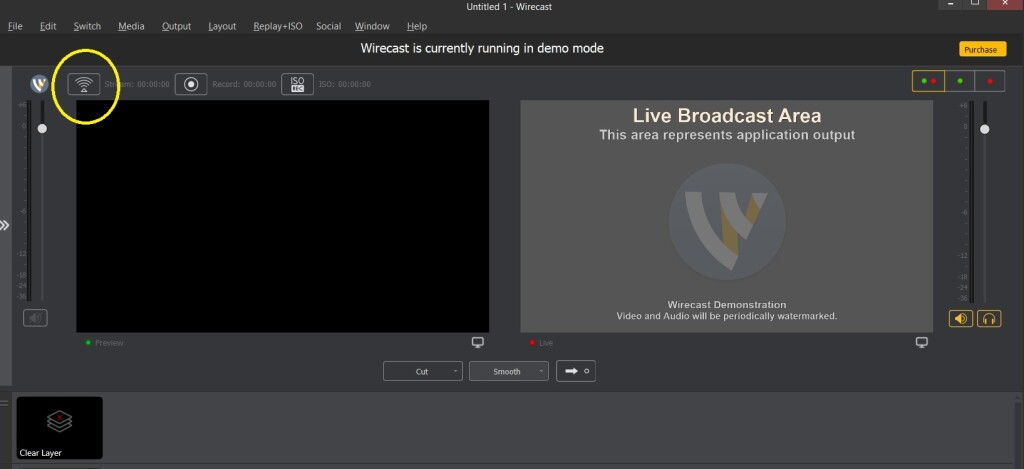
Next, click OK to save changes. You have now inputted the stream credentials from your Dacast live stream, into your Wirecast encoder. You can now click on the stream icon (circled in yellow below). The encoder will recognize the stream credentials and connect to the Dacast server, thus enabling you to do your live stream:
vMix
In your Dacast Encoder Setup, select “vMix”:

Then in vMix, from the main window of the encoder, click on the configuration settings icon (cogwheel icon).

You will then be redirected to the streaming settings window. Here you can fill the URL and Stream Name or Key tabs.

If you click Advanced, this is where you will paste your username and password respectively:

Click OK, then you will be redirected to the streaming settings window again. All you need to do is press start. You are now ready to stream.

NOTE:
We have taught you the basic setup on inputting the stream credentials from your Dacast live stream to these common software encoders our broadcasters use.
Since you now know the basic setup, we recommend that you always test your upload speed at the location of the stream. Please visit https://testmy.net/ and do an upload speed test. In general, our recommendation is that your upload speed should be at least double the total bandwidth you require. Checking the upload speed of your Internet connection will help you determine the necessary bitrate adjustments suitable for your live stream.
3. Recommended Encoder Settings
To ensure your Dacast live stream is stable and fully functional, you MUST configure your encoder to use the settings defined on this page. First, ensure you are following everything in the Common Settings section. Then select the most appropriate Resolution & Bitrate (depending on your needs) and configure all settings for that size exactly. Finally, be sure not to use any of the Unsupported Settings because they will very likely break your stream.
Required Settings
The following settings are required for live streaming with Dacast, regardless of your selected resolution and bitrate:
| VIDEO CODEC | H.264 (x264 may work) |
|---|---|
| FRAME RATE | 25 or 30 |
| KEYFRAME INTERVAL | 3 secs |
| SCANNING | Progressive |
| ENCODING BITRATE | Constant (CBR) |
| AUDIO CODEC | AAC |
| AUDIO BITRATE | 128 kbps |
| AUDIO CHANNELS | 2 (Stereo) |
| AUDIO SAMPLE RATE | 48 kHz (48,000 Hz) |
Resolution & Bitrate Settings
Please select one of the following configurations and ensure your encoder is set up with these exact settings to help prevent streaming issues:
| ULD | LD | SD | HD | FHD | |
|---|---|---|---|---|---|
| Name | Ultra-Low Definition | Low Definition | Standard Definition | High Definition | Full High Definition |
| Video Bitrate (kbps) | 350 | 350 – 800 | 800 – 1200 | 1200 – 1900 | 1900 – 3000 |
| Resolution Width (px) | 426 | 640 | 854 | 1280 | 1920 |
| Resolution Height (px) | 240 | 360 | 480 | 720 | 1080 |
| H.264 Profile | Main | Main | High | High | High |
Unsupported Settings
Note that the following settings are unsupported and will break your stream:
- Baseline H.264 Profile
- Interlaced Scanning
Any questions or need help/access to this feature? Please contact us. Not yet a Dacast user, and interested in trying Dacast risk-free for 14 days? Sign up today to get started.
- Spanish Tutorial: How Do I Broadcast My Screen With Microphone Audio On Wirecast?
- How to Use Wirecast and OBS Studio with Multiple Video Sources
- Wirecast: What to Do When You Get an Error Publishing Stream
- Introduction to Live Streaming: A Walkthrough
- Video Renditions and Bitrates
- New Transcoding Limits on VOD
- Transcoding: Everything You Need to Know
- VOD Multi-Bitrate Walkthrough
- Video Streaming Software and Multi-Bitrate Streaming