


FFmpeg Live Streaming – What Professional Broadcasters Need to Know [2025 Update]

Many professional broadcasters use live streaming software in addition to their online video platforms. Video streaming software typically provides tools for encoding, transcoding, adding on-screen effects, and more. If you are looking for a no-frills, lightweight tool for broadcast live stream production and other video tasks, you will find FFmpeg very useful.
FFmpeg powers professional broadcasting with unmatched flexibility, enabling seamless live streaming, transcoding, and media manipulation. Its open-source framework supports modern codecs like AV1, protocols like SRT, and integrations with AI and cloud pipelines, making it essential for broadcasters and developers.
This guide goes deeper into FFmpeg’s capabilities, setup, and real-world applications to help you deliver high-quality streams efficiently. We’ll provide a brief walkthrough on how to use the software with our own live streaming platform.
Table of Contents:
- What is FFmpeg?
- What Can You Do With FFmpeg?
- How FFmpeg’s Live Streaming Tools Work
- Modern Protocols and Codecs
- Testing M3U8 Media Files
- FFmpeg and Cloud Streaming Workflows
- How to Download and Set Up FFmpeg
- How to Use FFmpeg for Live Streaming
- How to Live Stream Using FFmpeg and Dacast
- FFmpeg Automation and Scripting
- AI and FFmpeg in 2025
- Troubleshooting: FFmpeg Live Streaming Errors and Fixes
- Business Use Cases for FFmpeg in 2025
- FFmpeg Comparison Tables: Making the Right Choice
- FAQs
- Conclusion
What is FFmpeg?
FFmpeg is a powerful, open-source multimedia framework designed for converting, recording, editing, splicing, encoding, decoding, muxing/demuxing, streaming, and playing audio and video files. It supports virtually every multimedia format and codec developed over the last two decades, making it a versatile solution for modern and legacy media workflows alike.
Since its debut in 2000, FFmpeg has evolved into an essential tool in professional broadcasting and content creation. Its importance continues to grow today thanks to its compatibility with modern protocols (like SRT and WebRTC), cutting-edge codecs (AV1, H.265/HEVC), and cloud-native environments such as AWS, GCP, and Docker.
Some of the key uses of FFmpeg include:
- Real-time video streaming with ultra-low latency
- Scalable transcoding in cloud pipelines
- Automated workflows with scripting and scheduling
- AI-powered enhancements like live captioning or face detection
FFmpeg is a command-line utility, which means it operates via text-based commands entered through a Command-Line Interface (CLI). It does not have a built-in Graphical User Interface (GUI), making it best suited for users with some technical knowledge. This CLI approach appeals to power users, system administrators, and developers because of its precision, automation potential, and integration flexibility.
If you’ve ever used the “Terminal” on macOS or Linux or “Powershell” on Windows, you’ve already encountered environments compatible with FFmpeg commands.
This streaming software powers everything from FFmpeg M3U8 live stream testing to FFmpeg real-time streaming for large-scale broadcasts. It can serve as an FFmpeg streaming server or act as a bridge for FFmpeg RTSP to HTTP live streaming. Other than being free and open-source, it also integrates with AI tools (like Whisper for transcription) and cloud infrastructure for advanced video delivery.
What Can You Do With FFmpeg?
FFmpeg offers unmatched control and flexibility for professional and technical users. Supporting a broad range of workflows for real-time video streaming, transcoding, and multimedia handling, some of FFmpeg’s wide range of live video streaming capabilities include the following:
- Format and Codec Agnostic: FFmpeg can transcode between virtually any audio and video formats and codecs, such as MP4, HLS, WebM, or MKV. This allows seamless interoperability across different platforms, devices, and streaming services, ensuring optimal playback everywhere.
- Stream Optimization: It provides granular control over bitrate, resolution, and frame rate, allowing you to fine-tune streams for bandwidth constraints or device-specific requirements. This makes streaming with FFmpeg adaptable whether you’re targeting mobile users or high-end 4K setups.
- Audio Manipulation: FFmpeg offers a robust suite of audio editing tools within the live streaming workflow. You can adjust volume levels, remove unwanted audio tracks, or integrate an external audio source with your live video feed. Remapping mono to stereo or 5.1 channels is also possible.
- Video Processing in Real Time: FFmpeg goes beyond simple streaming. You can use its video processing capabilities to crop, scale, rotate, or flip your live video feed in real time. You can apply filters, watermarks, or overlays during streaming, which is particularly useful for simulcasting, rebranding, or adapting streams for social platforms.
- Input Versatility: FFmpeg accepts a wide range of input streams and file types. This includes webcams, capture cards, network streams (RTMP, SRT, RSTP), pre-recorded files, and IP camera feeds. There is also the possibility for desktop captures, which is great for screen sharing or tutorials. It’s equally powerful when used for FFmpeg input stream → output conversion or direct FFmpeg RTSP to HTTP live streaming setups.
- Broadcasting and Recording: You can use FFmpeg to broadcast to Twitch, YouTube, Facebook Live, or any custom RTMP/SRT servers. Be free to schedule or script live sessions with automation tools. There is also the possibility to record webcam or external feeds locally while simultaneously streaming. It’s a go-to choice for technical broadcasters who need a custom FFmpeg streaming server without the bloat of GUI software.
Typical FFmpeg Workflows
Below, you will find just a few examples of what you can do with FFmpeg:
- Adjust bitrate (both audio and video)
- Adjust volume, remove audio, and/or merge an audio file with a video file
- Remap a mono audio source to stereo channels
- Crop, scale, rotate, or watermark a video
- Recording input from a webcam or other video source
- Broadcast a live stream of a video feed
- Use FFprobe to analyze bitrate, resolution, and stream health
- Convert or repackage between formats like MP4, HLS, WebM, or DASH
You may not have known that many GUI encoders (like OBS, Wirecast, and vMix) rely on FFmpeg to provide backend processing. Even if you’ve never typed a single command, you may have already used FFmpeg via another app or an FFmpeg online service.
There is one thing that is important to mention. While incredibly powerful, FFmpeg is not ideal for those just starting out in live broadcasting. Its command-line interface requires a basic understanding of CLI environments and multimedia terminology.
New broadcasters would be better off starting with free, available encoders such as OBS Studio. They could also consider investing in paid encoding software options, such as Wirecast, vMix, and VidBlasterX.
How FFmpeg’s Live Streaming Tools Work

FFmpeg provides a relatively wide variety of tools as far as live video stream software goes. As a command-line-based software, it gives technical users precise control over streaming workflows and real-time encoding tasks.
You’ll find that it supports numerous audio and video inputs that are accessible from your system. These include webcams, USB microphones, HDMI/SDI cameras via capture cards, desktop/screen capture, and IP and network streams.
FFmpeg can stream directly to platforms like YouTube, Twitch, or custom servers by specifying an output format such as RTMP, HLS, or SRT. With a single command-line interface, FFmpeg transforms into a powerful live streaming encoder.
A popular use case for FFmpeg real-time streaming involves multi-camera, high-performance live production environments. In these setups:
- A dedicated production computer captures and mixes feeds from multiple cameras using production software or hardware switchers.
- The mixed feed is sent, often over HDMI, SDI, or NDI, to a second machine running FFmpeg.
- FFmpeg encodes and streams the final output using protocols like RTMP, SRT, or HLS.
This type of configuration distributes the workload across multiple systems. One handles live production and mixing, while the other focuses purely on real-time encoding and streaming with FFmpeg. The result is a stable, scalable streaming pipeline.
Here is a brief overview of how FFmpeg seamlessly supports modern streaming workflows with a variety of protocols:
| Protocol | Use Case |
| RTMP | Legacy support for social streaming platforms |
| SRT | Secure, low-latency streaming over unreliable networks |
| HLS | Adaptive bitrate streaming for HTML5 playback |
| MPEG-DASH | Cross-platform adaptive streaming |
| RTSP | Ingest feeds from IP cameras or remote encoders |
Modern Protocols and Codecs
Broadcasters have a difficult job that demands they stay ahead of the curve with protocol and codec choices. FFmpeg streaming offers strong support for cutting-edge technologies like SRT, WebRTC, and newer codecs such as AV1, HEVC/H.265, VP9, and the emerging VVC standard.
Below, you’ll find a breakdown of today’s most relevant protocols and compression formats and how to use them with FFmpeg.
RTMP vs. SRT: Protocol Comparison
For years, RTMP (Real-Time Messaging Protocol) has been the standard for pushing streams to services like YouTube and Facebook Live. However, SRT is now the preferred protocol for professional broadcasting. This is especially true for remote production, contribution feeds, and high-latency networks like mobile or satellite connections.
While it’s simple and widely supported, RTMP is a legacy protocol with key limitations:
| Feature | RTMP | SRT (Secure Reliable Transport) |
| Latency | ~2–5 seconds (low) | Sub-second (ultra-low) |
| Security | Basic (no encryption by default) | Encrypted + packet recovery (AES) |
| Firewall Traversal | Limited | NAT-friendly + robust over public internet |
| Use Case | Social media platforms | Contribution workflows, remote ingest |
| Reliability | Poor over unstable networks | Designed for packet loss & jitter |
SRT Setup with FFmpeg
Install FFmpeg with SRT support (–enable-libsrt)
Run: ffmpeg -i input.mp4 -c:v libx264 -f mpegts srt://destination:port?passphrase=yourkey
Verify with: ffplay srt://destination:port
WebRTC
WebRTC offers sub-second latency for interactive streams but requires browser support. Alternatives like SRT or HLS suffice for most use cases.
Codec Support
- AV1 (libaom, SVT-AV1): High compression, ideal for low-bitrate streaming, CPU-heavy
- H.265/HEVC (libx265): Broad compatibility, licensing costs
- VP9: Open-source, YouTube-friendly, less efficient than AV1
- VVC: Emerging, high efficiency, limited adoption
| Codec | Compression | CPU Usage | Compatibility |
| AV1 | Excellent | High | Growing |
| HEVC | Very Good | Moderate | Widespread |
| VP9 | Good | Moderate | Moderate |
| VVC | Excellent | High | Emerging |
Testing of M3U8 Media Files
Protecting your video content is important, especially if your streaming services generate revenue. Using M3U8 playlists as part of an HLS (HTTP Live Streaming) workflow allows for both secure delivery and broad compatibility across devices and platforms.
When a video is streamed using HLS to an HTML5 player, the stream is delivered in chunks referenced by an M3U8 playlist file. An M3U8 file is a UTF-8 encoded playlist that organizes and sequences these media segments (typically .ts or .mp4 files) for adaptive playback. These M3U8 playlists may include security tokens or encryption keys, which are crucial for protecting your content from unauthorized access.
So, why is M3U8 important for streaming? It allows the player to switch between different quality levels based on bandwidth conditions. Additionally, it’s mobile and HTML5 friendly, meaning HLS with M3U8 works natively in most mobile browsers and HTML5 players. You can also take advantage of the security options. Integrate token-based authentication, geo-blocking, and AES-128 encryption directly in the playlist.
Now, let’s have a look at how FFmpeg contributes to testing M3U8 files.
1. Playback Testing
Simulate playback using FFmpeg to ensure the stream loads and plays correctly. This helps verify accessibility, decoding, and stream sync across segments.
For a quick quality check, use: ffplay “http://example.com/stream.m3u8”
It helps to:
- Verifies audio/video synchronization
- Detects visual artifacts in real-time playback
- Business impact: Confirms viewer-ready stream quality
You can also use ffmpeg -hide_banner -i “http://example.com/stream.m3u8” -f null – for advanced diagnostics. It validates segment accessibility and decoding and outputs HTTP errors (404/403) and codec support issues.
2. Stream Validation
FFmpeg checks the integrity and structure of the M3U8 file and its associated TS or fragmented MP4 segments to ensure compliance with HLS standards. A broken segment or wrong duration can break adaptive playback.
To validate the playlist structure and segment integrity, use ffmpeg -v error -i input.m3u8 -map_metadata 0 -f null –
It helps to:
- Check TS/CMAF segment alignment
- Verify #EXT-X-VERSION compatibility
- Critical for: DRM implementations, CDN token authentication
3. Performance Testing
FFmpeg can monitor bitrate fluctuations, segment download speed, and streaming behavior.
To check the network load simulation, use ffmpeg -i “http://example.com/stream.m3u8” -report -loglevel verbose -f null –
To simulate load, you can run multiple ffplay instances or scripts that initiate concurrent requests.
It measures:
- Segment fetch times (identifies CDN hotspots)
- Bitrate consistency across variants
- Buffer underflow risks
4. Transcoding and Compatibility Testing
You can use FFmpeg to repackage or transcode the M3U8 stream into other formats to test compatibility with different devices and players. It ensures the stream works across low-bandwidth environments or next-gen displays. HEVC and AV1 offer better compression, especially for 4K content.
Use FFmpeg to transcode an M3U8 stream into more modern or compatible formats like HEVC (H.265):
ffmpeg -i “https://example.com/stream.m3u8” -c:v libx265 -c:a aac output.mp4
or AV1:
ffmpeg -i “https://example.com/stream.m3u8” -c:v libaom-av1 -c:a aac output_av1.mkv
5. Segment Analysis
You can download individual segments referenced in the M3U8 file and analyze their quality or encoding parameters. It verifies segment durations, timestamps, and encoding settings. Useful for diagnosing desync issues.
To download and inspect a segment, use ffmpeg -i “https://example.com/stream.m3u8” -c copy segment.ts
Or to view segment metadata in detail, use ffprobe -show_packets https://example.com/stream.m3u8
It validates:
- Keyframe alignment (GOP structure)
- Timestamp continuity
- Compliance with CMAF specifications
6. Bandwidth and Variant Testing
Use FFmpeg to test M3U8 playlists with multiple variants (adaptive bitrate streaming). It ensures proper configuration of bitrate ladders, enabling smooth switching between quality levels based on user bandwidth.
HLS often uses a master playlist with multiple bitrates. You can test all variants by using
ffmpeg -i “https://example.com/master.m3u8” -map 0 -c copy output.mkv
- Business value: Confirms smooth bitrate switching
- Technical benefit: Tests CDN edge-case handling
7. Debugging Errors
FFmpeg outputs detailed error logs. It can enable verbose logging to troubleshoot:
ffmpeg -i “https://example.com/stream.m3u8” -loglevel debug -f null –
The key troubleshooting areas include the following:
- Token expiration in URLs
- Cross-origin resource sharing (CORS) errors
- AV1/H.265 decoder compatibility matrices
8. Compliance Testing
Use FFmpeg tools to check if the stream meets platform and spec requirements (e.g., Apple HLS guidelines):
- Consistent segment durations (typically 6 seconds)
- Valid encryption and tokenization (if using DRM)
- Supported codecs: H.264, H.265, AV1
Other Benefits of FFmpeg for M3U8 Testing
Integrate FFmpeg into your workflow to identify and resolve potential issues with M3U8 files and ensure smooth and reliable video streaming.
- Open-source and free: No licensing fees or vendor lock-in
- Cross-platform: Runs on Windows, macOS, Linux
- Scriptable and automated: Ideal for CI/CD and regression testing
- Up-to-date codec support (2025): Works with AV1, HEVC, VP9, and VVC
- Flexible: Supports playback, encoding, transcoding, and format conversion
- Protocol support: Handles HLS, MPEG-DASH, RTMP, SRT, and more
FFmpeg and Cloud Streaming Workflows
Modern video delivery at scale relies on the power of cloud platforms combined with flexible open-source tools. FFmpeg acts as a foundational tool in cloud-based video workflows.
How FFmpeg Fits into Cloud Streaming
In a typical cloud pipeline, FFmpeg handles local capture, encoding, and transport of the video feed to a cloud service. These services then transcode, scale, and distribute content globally via a multi-CDN architecture.
Let’s explore common integrations
FFmpeg and AWS Elemental MediaLive
Amazon’s MediaLive service ingests a RTMP, HLS, or SRT feed. You can use FFmpeg to prepare and push the stream:
ffmpeg -re -i input.mp4 -c:v libx264 -preset veryfast -f flv rtmp://medialive-endpoint/app/stream
FFmpeg handles:
- Live source ingest (e.g., from camera, RTSP)
- Real-time encoding (e.g., H.264 + AAC)
- Stream packaging (RTMP, HLS)
MediaLive then transcodes and redistributes the stream to platforms like CloudFront, YouTube, or custom players.
FFmpeg and Google Cloud Transcoder API
Google Cloud offers a powerful Transcoder API for converting video into multiple renditions. FFmpeg acts as the encoder and uploader, preparing media before submitting it to the API.
ffmpeg -i input.mov -c:v libsvtav1 -c:a aac output-av1.mp4
# Upload to Google Cloud Storage
gsutil cp output-av1.mp4 gs://your-bucket/video/
You can also use FFmpeg to generate FFmpeg M3U8 live stream files (HLS segments + playlist), which the API can ingest directly.
FFmpeg in Docker for Containerized Streaming
For scalable workflows, FFmpeg can run inside Docker containers to support microservices or serverless models. This is ideal for creating transcoding clusters, dynamic ingest services, or isolated FFmpeg live transcoding workers.
Dockerfile snippet:
FROM jrottenberg/ffmpeg:6.1
CMD [“ffmpeg”, “-i”, “input.mkv”, “-c:v”, “libx265”, “output.mp4”]
It’s used with orchestration tools like Kubernetes or AWS ECS, you can auto-scale workloads based on incoming stream volume or CPU load.
SRT for Low-Latency, Secure Streaming (2025)
The Secure Reliable Transport (SRT) protocol is increasingly replacing RTMP in 2025, especially for real time video streaming where latency and encryption matter.
FFmpeg supports SRT natively:
ffmpeg -re -i input.mp4 -c:v libx264 -f mpegts “srt://your-cloud-endpoint:8000?pkt_size=1316”
Why choose SRT?
- Encrypted transport over public networks
- Low latency (<1 second)
- Resilient against packet loss and jitter
Use SRT with cloud receivers, Docker-based listeners, or even FFmpeg RTMS alternatives.
Below is a simplified cloud streaming pipeline using FFmpeg:
[Local Capture]
↓
[FFmpeg Input + Encode]
↓
[SRT / RTMP / HLS Push]
↓
[Cloud Transcoder (AWS/GCP)]
↓
[Multi-CDN Output: HLS, DASH, WebRTC]
↓
[Global Playback: HTML5 Player, App, Smart TV]
How to Download and Setup FFmpeg
To begin streaming with FFmpeg or using it for video processing, you’ll need to download and install the software on your system. Fortunately, FFmpeg is open-source and widely supported across all major platforms.
The exact installation steps vary by operating system, but the general process is straightforward. Below is a quick setup guide for Linux, macOS, and Windows users.
Linux Installation (Ubuntu/Debian – Recommended)
The FFmpeg website has Linux packages for Debian, Ubuntu, Fedora, and Red Hat Enterprise Linux. Here is what you need to do:
1. Update your package repository (example for Ubuntu 24.04):
sudo apt update
sudo apt upgrade
2. Install FFmpeg from the official repositories:
sudo apt install ffmpeg
3. Verify installation:
ffmpeg -version
The package includes support for modern codecs like libx265 (HEVC) and libsvtav1 (AV1), essential for efficient FFmpeg video streaming today. For cutting-edge features, consider building FFmpeg from source or using third-party PPAs that provide the latest stable releases.
macOS Installation
As with Linux, we recommend macOS users compile a custom build of FFmpeg. The recommended method is using Homebrew, a popular package manager for macOS:
- Install Homebrew (if not already installed):
Open Terminal and run: bin/bash -c “$(curl -fsSL https://raw.githubusercontent.com/Homebrew/install/HEAD/install.sh)”
- Update Homebrew and install FFmpeg:
brew update
brew upgrade
brew install ffmpeg
- Verify FFmpeg installation:
ffmpeg -version
- (Optional) To install the latest Git master version with experimental features:
brew install ffmpeg –HEAD
Why use Homebrew?
- It automatically manages dependencies and updates.
- Supports advanced FFmpeg options for streaming, including codecs like AV1 and HEVC out of the box, ideal for FFmpeg M3U8 live stream and FFmpeg live transcoding workflows.
Windows Installation
- Download a precompiled FFmpeg build:
Visit the official FFmpeg download page or trusted distributors like Gyan.dev and download the latest ffmpeg-release-full.zip for full codec support. - Extract the ZIP file:
Extract it to a permanent folder, e.g., C:\ffmpeg\. - Add FFmpeg to the system PATH:
- Right-click This PC → Properties → Advanced system settings → Environment Variables.
- Under System variables, select Path and click Edit.
- Add a new entry: C:\ffmpeg\bin (adjust if your path differs).
- Click OK to save.
- Verify installation:
Open Command Prompt and run: ffmpeg -version
Here are some additional tips:
- For FFmpeg RTSP to HTTP live streaming or FFmpeg RTMPS workflows on Windows, the full build includes all necessary libraries.
- You can automate installation using community scripts if preferred.
Advanced Setup (Optional – Build from Source)
If you require maximum control, GPU support, or experimental codecs like AV1, VP9, or FFmpeg RTMPS, you can compile FFmpeg from source.
Advanced Linux Compile Guide:
Advanced macOS Compilation Guide:
Typical use cases:
- Building a custom FFmpeg streaming server
- Enabling non-free codecs (e.g., libfdk-aac)
- Fine-tuning for FFmpeg real time streaming or containerized deployment
Verifying Your Installation
After installation, run the following to ensure it’s set up correctly:
ffmpeg -hide_banner
You should see version info, available encoders (like libx265 or libsvtav1), and supported formats. It’s the key to setting up FFmpeg stream output pipelines or verifying FFmpeg input stream compatibility.
How to Use FFmpeg for Live Streaming
Once installed, FFmpeg can act as a live encoder, pushing streams to any platform that supports RTMP, HLS, or SRT. You can also create a streaming channel on your video hosting platform.
Once FFmpeg is installed on your computer, it is time to connect it to your video hosting solution. You can connect FFmpeg as an encoder. Your video hosting manager will provide credentials to enter into FFmpeg.
Step 1: Install FFmpeg
If you haven’t already, install FFmpeg using the method appropriate for your OS. We recommend precompiled binaries:
- Windows builds
- brew install ffmpeg for macOS
- sudo apt install ffmpeg for Ubuntu/Debian
Learn more: FFmpeg Setup Guide
Step 2: Get Your Streaming Credentials
Set up your streaming channel on your video hosting platform (e.g., Dacast, Wowza, or YouTube Live). Navigate to the encoder settings to copy your:
- Stream URL (e.g., rtmp://yourplatform.com/live)
- Stream Key or Playpath
- Username and Password (if required)
Step 3: Start Streaming with FFmpeg
You can start FFmpeg live streaming with a single CLI command. Below is a customizable example:
ffmpeg -re -f lavfi -i testsrc \
-c:v libx264 -b:v 1600k -preset fast -tune zerolatency \
-c:a aac -b:a 128k -s 1280×720 -pix_fmt yuv420p \
-f flv “rtmp://your.stream.url/live/streamkey”
Replace the following:
- testsrc → replace with your video input source (-i /dev/video0 for webcam, or a file path).
- rtmp://… → your Stream URL
- /live/streamkey → your Stream Key or Playpath
This command creates a 720p stream at ~1600kbps using x264 + AAC, optimized for low-latency streaming.
Common Flags and Options
| Option | Purpose |
| -re | Simulates real-time input for smoother live pushing |
| -preset fast | Balances encoding speed and quality (change to ultrafast for low CPU) |
| -tune zerolatency | Reduces buffering, best for interactive/live apps |
| -b:v, -b:a | Sets video/audio bitrates to match your bandwidth |
| -s 1280×720 | Sets output resolution |
| -f flv | Required format for RTMP streaming |
If you’re seeing only a test screen, ensure -i points to your actual source.
Pro Tips for Better Streaming
- Source Input: Replace -f lavfi -i testsrc with -i /path/to/file.mp4 or a live device like /dev/video0 or video=”Webcam Name” (Windows).
- Latency: Add -tune zerolatency for real-time video streaming applications.
- Buffering: Increase -bufsize for smoother playback (e.g., -bufsize 3000k).
- DRM or Authentication: FFmpeg supports tokens or credentials in the RTMP URL (pubUser, pubPasswd, etc.).
- Transcoding: FFmpeg supports live transcoding to HEVC (libx265), AV1 (libsvtav1), and VP9.
Check out our dedicated guides for using FFMPEG with Dacast on Linux and Mac.
How to Live Stream Using FFmpeg and Dacast
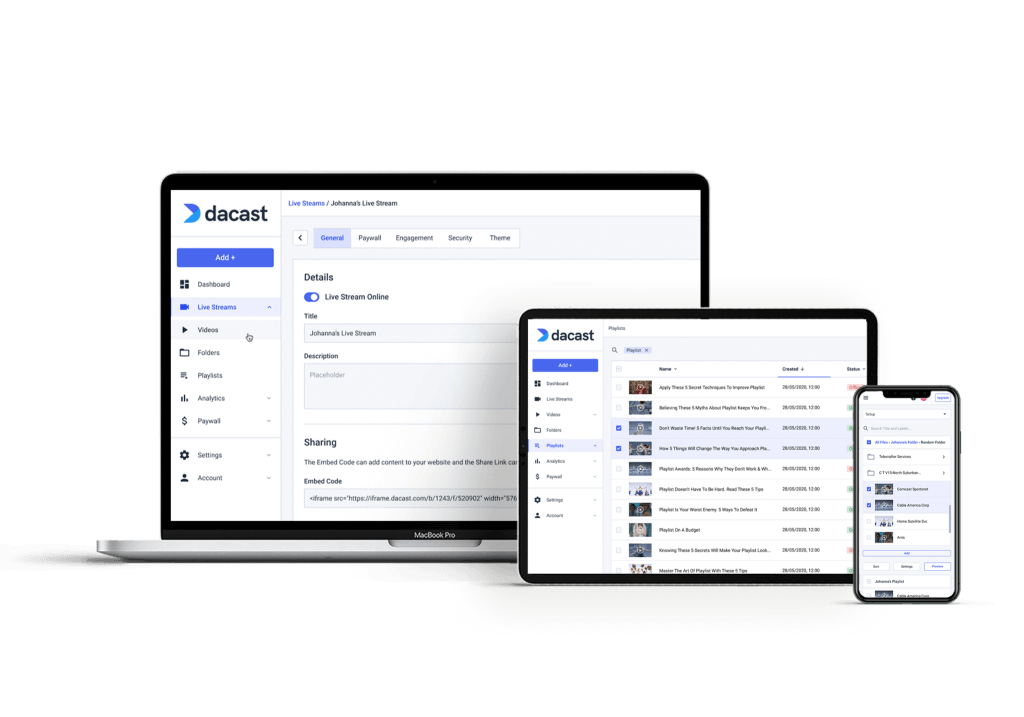
You’re now ready to broadcast a live stream over Dacast. We offer secure video upload and many other features to make streaming live accessible to all kinds of broadcasters.
Let’s take a look at the three steps for setting up FFmpeg to live stream via Dacast. This is a simple FFmpeg tutorial for working with Dacast.
Step 1: Configure Dacast Encoder
- Log into your Dacast account and create a live channel
- Navigate to Encoder Setup → Select Generic RTMP Encoder
- Select “Other RTMP encoder” on the left side of the screen
Step 2: Copy Your Credentials
On the right side of the screen, copy down these pieces of information:
- Stream URL (RTMPS endpoint)
- Login (Publisher User)
- Password (Publisher Password)
- Stream Name (Playpath)
Step 3: Prepare FFmpeg Command
Copy the command into a text editor or directly into your CLI as we described in the general FFmpeg tutorial above.
A basic 1080p stream example (low latency):
ffmpeg -re -f lavfi -i testsrc=size=1920×1080 -c:v libx265 -preset ultrafast \
-b:v 6000k -x265-params keyint=50:min-keyint=25 -c:a aac -b:a 160k \
-f flv “rtmps://p.epXXXXXX.i.akamaientrypoint.net/EntryPoint \
flashver=FME/3.0 live=true pubUser=USERNAME pubPasswd=PASSWORD \
playpath=STREAM_NAME”
Once that command has been inserted, you should be ready to stream.
Please check out our encoder setup guide for a more detailed tutorial on setting up FFmpeg and other similar software with Dacast.
FFmpeg Automation and Scripting
Automating your FFmpeg streaming workflows can dramatically increase efficiency for broadcasters, educators, surveillance users, and developers. Simple scripts and job schedulers like cron can help to create powerful systems for scheduled live streams, auto-recording, and remote stream monitoring. This can all be done without manual intervention.
Scheduled Streams with Cron
You can use cron on Linux or macOS to automatically start and stop FFmpeg streams at specific times. It’s ideal for daily news, school broadcasts, or pre-recorded playback.
This example uses streaming with FFmpeg to push a pre-recorded video to an RTMP endpoint every morning at 8:00 AM.
Create a shell script (start_stream.sh):
#!/bin/bash
ffmpeg -re -i /home/user/videos/show.mp4 \
-c:v libx264 -preset veryfast -b:v 2500k \
-c:a aac -b:a 128k -f flv “rtmp://yourserver.com/live/streamkey”
Then schedule it with cron:
0 8 * * * /home/user/start_stream.sh >> /var/log/ffmpeg_stream.log 2>&1
Auto-Recording Live Streams
Use FFmpeg to automatically record incoming live streams (e.g. from an RTMP, SRT, or RTSP source). This is useful for compliance, archiving, or repurposing content.
Example: Record 24/7 RTSP Security Camera Feed
ffmpeg -i rtsp://camera_ip/stream1 \
-c copy -f segment -segment_time 3600 \
reset-recordings/stream_%Y-%m-%d_%H-%M.mp4
This records one-hour segments of FFmpeg video streaming directly to disk. Use log rotation or cron to clean up old files.
Remote Monitoring of Live Streams
Monitor remote stream health using FFmpeg + shell scripts or Python. Useful for verifying uptime of public streams or feeds from distributed encoders.
Example: Check if Stream is Live
ffmpeg -i http://yourstream.net/live/playlist.m3u8 -t 5 -f null – 2>&1 | grep “frame=”
You can run this command every few minutes via a scheduled task or use it inside a monitoring script to:
- Alert via email/Slack if a stream goes offline
- Restart FFmpeg or notify an admin
Combine this with uptime tools like Monit, systemd watchdogs, or container health checks for robust FFmpeg streaming server setups.
AI and FFmpeg in 2025
With tools like Whisper and OpenCV, FFmpeg can now become part of a smart video pipeline that doesn’t just encode, but interprets. Live captioning can be enabled by piping FFmpeg audio output into Whisper, OpenAI’s speech-to-text model, or Google Cloud Speech API. This makes FFmpeg live streaming more accessible and compliant with global accessibility standards.
Facial recognition and automatic face blurring are increasingly popular in legal, surveillance, and social media contexts. FFmpeg, combined with OpenCV, allows for real-time face detection and pixelation:
ffmpeg -i input.mp4 -vf “select=gt(scene\,0.4),boxblur=10:1” -an output.mp4
Scene detection enables automated highlight reels. Using the -vf select=’gt(scene,0.4)’ flag, FFmpeg identifies major visual transitions and extracts segments, perfect for sports, gaming, or educational content recaps.
Real-Time Analytics and Monitoring
Monitoring your stream performance is critical. FFmpeg’s companion tool, ffprobe, can be used to extract real-time insights into bitrate, resolution, frame rate, and stream health.
Many streaming engineers now integrate ffprobe output into Prometheus + Grafana dashboards. This lets you visualize FFmpeg stream output in near real time with alerts for bitrate drops, encoding lag, or resolution mismatches.
Sample metrics like average bitrate and audio delay can be extracted with:
ffprobe -v quiet -print_format json -show_format -show_streams your_stream.mp4
Grafana dashboards can visualize these metrics by tailing logs, processing JSON, or tapping into Prometheus exporters tied to FFmpeg’s health checks.
Security Best Practices for Streaming with FFmpeg
FFmpeg can generate AES-encrypted HLS streams for secure delivery across CDNs. This enables DRM-ready workflows with tools like Shaka Player, Bitmovin, or Apple FairPlay.
For tokenized delivery, FFmpeg can integrate with middleware that signs HLS requests, ensuring each segment and playlist is served only to authorized users.
RTMP, while still widely used, must be hardened. Use RTMPS (RTMP over TLS) for encrypted transport, restrict ingest IPs via firewalls, and rotate keys frequently.
Here’s an example of an HLS stream with AES-128 encryption:
ffmpeg -i input.mp4 -hls_time 4 -hls_key_info_file enc.keyinfo -f hls stream.m3u8
Troubleshooting: FFmpeg Live Streaming Errors and Fixes
When streaming with FFmpeg, logs are your best friend. Use the -report flag to generate verbose log files, or pipe logs directly into external logging systems like ELK or Loki.
Common errors include:
- “Invalid data found when processing input” (often a codec mismatch)
- “muxing overhead” warnings (usually benign unless excessive)
- dropped frames or low FPS (check -preset, -bufsize, and CPU usage)
Always test your stream locally first with a dummy input:
ffmpeg -re -f lavfi -i testsrc -f flv rtmp://yourserver/test
The -loglevel debug and ffprobe tools help diagnose bitrate inconsistencies, stream interruptions, or protocol handshake issues.
Business Use Cases for FFmpeg in 2025
FFmpeg streaming powers a wide range of use cases in every industry. 24/7 live channels—once exclusive to broadcast—can now be run from a single Docker container using a combination of FFmpeg, NGINX RTMP, and cron jobs.
Churches rely on FFmpeg for low-cost simulcasting to multiple platforms simultaneously. E-commerce brands use FFmpeg for real-time product demos via RTMP or HLS. Sports broadcasters automate replays and highlight cuts with scene detection. Webinar platforms embed FFmpeg into their backend for scalable live transcoding.
FFmpeg Comparison Tables: Making the Right Choice
When choosing between streaming protocols or encoding tools, clarity is essential. Here’s how the key options stack up.
FFmpeg vs GUI Encoders (OBS, Wirecast)
| Feature | FFmpeg | GUI Encoder |
| Flexibility | High | Medium |
| Customization | Full CLI control | Limited |
| Learning Curve | Steep | Beginner-friendly |
| Automation | Scriptable | Manual |
HLS vs RTMP vs SRT vs WebM
| Protocol | Latency | Compatibility | Encryption | Use Case |
| HLS | 3-10s | Broad | AES/DRM | CDN delivery, HTML5 |
| RTMP | ~2s | Legacy | RTMPS only | Fast ingest |
| SRT | <1s | Growing | AES native | Secure, low-latency |
| WebM | Varies | Niche | Experimental | AV1/VP9 streams |
FAQs
1. Can you stream video with FFmpeg?
Yes, FFmpeg supports live and on-demand video streaming using protocols like RTMP, HLS, SRT, and more.
2. Can FFmpeg transcode live stream?
Absolutely. FFmpeg can transcode a live input streams in real time, changing codecs, bitrates, resolutions, and formats on the fly.
3. What bitrate is FFmpeg streaming?
The bitrate used for FFmpeg streaming can be configured based on the specific requirements of the streaming platform and the available network bandwidth. FFmpeg provides options to set the video bitrate and the audio bitrate to achieve the desired output quality. Typical bitrate ranges for FFmpeg video streams can be 1500-6000 kbps for 720p, 3000-8000 kbps for 1080p (video) and 128-256 kbps (audio).
4. Does FFmpeg streaming server support RTMP?
FFmpeg can push streams to an RTMP server, but it’s not a server itself. For hosting RTMP, pair it with NGINX + RTMP module.
5. What FFmpeg output formats are available?
FFmpeg supports many output formats including MP4, FLV, HLS (.m3u8), MPEG-TS, WebM, and more depending on your flags and codecs.
Conclusion
While FFmpeg can seem complex due to its command-line interface, its versatility and power make it one of the most valuable tools for video professionals and streamers alike. With the right commands and a bit of practice, FFmpeg becomes an indispensable asset for everything from live streaming to video transcoding and automation.
We hope this FFmpeg streaming guide has equipped you with the knowledge and confidence to start broadcasting using FFmpeg. Whether you’re streaming to RTMP servers, creating HLS outputs, or automating workflows, FFmpeg gives you full control over your video pipeline.
Want more tips, real-world tutorials, and industry updates? Join our LinkedIn group to connect with other streaming professionals and stay ahead of the curve.
If you’re still searching for a reliable live streaming and video hosting platform, give Dacast a try. Our all-in-one solution supports FFmpeg streaming workflows, offers robust security features, and includes tools for analytics, monetization, and more. Best of all, you can test it out with a 14-day free trial—no credit card required.
Thanks for reading, and good luck with your live broadcasts!