


How to Use Zoom: A Step-by-Step Guide for Getting Started

Zoom became an essential tool at the onset of the pandemic, enabling businesses, schools, and organizations worldwide to stay connected even when in-person interactions were limited. During that time, Zoom experienced unprecedented growth as millions turned to its platform for remote work, education, and socialization. However, Zoom’s success goes beyond the pandemic era; it has continued to expand and evolve, offering robust features that cater to a range of communication needs, including enterprise-grade live streaming options for larger audiences.
Zoom’s impact is reflected in its recent financial and usage statistics. According to Zoom’s Q3 FY2024 Earnings Report, the company now supports 7 million paid Zoom Phone seats, up from 4 million in July 2022, and its 2024 annual revenue has grown to $4.527 billion, a 3.06% increase from 2023. On average, meetings on Zoom last around 52 minutes, highlighting its role as a primary communication tool across industries.
In this post, we’ll cover everything you need to know about Zoom’s capabilities and how to use them. We’ll explore what Zoom is, its main applications, and provide hands-on tutorials for scheduling and hosting meetings or webinars. Finally, we’ll review some top alternatives to Zoom and offer guidance on streaming Zoom meetings with Dacast for an elevated broadcast experience.
Table of Contents:
- What is Zoom?
- Zoom from Mobile Phones
- In-depth Live Streaming Tips and Use Cases
- The Rise of Zoom: Statistics and Trends
- How to Use Zoom: The Basics
- How to Start a Meeting on Zoom
- How to Schedule a Meeting on Zoom
- How to Join a Zoom Meeting
- How to Screen Share on Zoom
- Advanced Settings on Zoom
- How to Use Zoom for Hybrid Events in 2024
- Monetization Strategies for Zoom Live Streams
- Comparison of Zoom with Competitors
- Zoom Alternatives
- Streaming Zoom Meetings with Dacast
- Common Technical Challenges and Fixes
- Accessibility Tips
- Integrating Zoom With Other Tools
- Zoom Live Streaming Checklist
- Innovative Uses for Zoom in 2024–2025
- Zoom Pro Tips for Hosts
- Integrating AI into Zoom Workflows
- New Features and Trends for 2024–2025
- FAQs
- Conclusion
What is Zoom?

Zoom is a popular web conferencing platform that uses peer-to-peer streaming technology to host virtual meetings and webinars. This platform is used by both individuals and professional organizations, such as businesses, government organizations, health care providers, and schools.
Zoom was initially released in 2012, and it is compatible with most major operating systems, including Windows, macOS, iOS, Android, and Linux. It can be used on both desktop and mobile devices.
This web conferencing platform is considered “freemium” since it has both free and paid plans. Users can access many functions with the free plans, but access to more scalable conferencing requires paid upgrades.
Top Zoom Use Cases
Zoom can be used for both personal and professional use. Some of the popular use cases for Zoom include:
- Webinars
- Business meetings
- Virtual panels
- Virtual events
- Classes and training sessions
- Telehealth
Zoom is particularly useful for helping people stay connected and continue life with some sense of normalcy during different
Zoom from Mobile Phones
Using Zoom on a mobile phone is convenient and easy, whether you’re using an iPhone or another smartphone. To get started, download the Zoom app from the App Store or Google Play. If you’re wondering how to use Zoom on iPhone, the app allows you to join or host meetings, schedule events, and even share your screen. For those curious about how to use Zoom on phone, the process is similar across devices—just open the app, sign in, and access all the features Zoom offers. If you prefer how to use Zoom on iPhone without app, you can join meetings through a web browser by clicking the meeting link and following the prompts, though features may be limited compared to the app.
Zoom Pricing
Zoom offers a variety of services tailored to different business needs. Here’s an overview of their pricing plans for each service:
Zoom Workplace:
Zoom Workplace is a comprehensive suite that includes Meetings, Team Chat, Phone, Mail & Calendar, and Scheduler.
- Pro: Starting at $13.23 per user per month, this plan includes Meetings, Team Chat, and more.
- Business: Designed for small to medium-sized businesses, offering additional features and capabilities.
- Enterprise: Tailored for large organizations with advanced needs.
Zoom Phone:
Zoom Phone is a cloud-based business phone system.
- US & Canada Metered: Starting at $10 per user per month; includes essential features with pay-as-you-go calling.
- US & Canada Unlimited: Starting at $15 per user per month; offers unlimited calling within the U.S. and Canada.
- Pro Global Select: Starting at $20 per user per month; provides unlimited domestic calling in over 40 countries.
Zoom Events & Webinars:
Zoom offers solutions for hosting virtual events and webinars.
- Zoom Webinars: Starting at $79 per month; suitable for large webinar sessions of 500+ attendees.
- Zoom Sessions: Starting at $99 per month; includes features like event branding and multiple-host collaboration.
- Zoom Events: Starting at $149 per month; offers advanced registration and networking features.
Zoom Scheduler:
Zoom Scheduler is a tool to streamline meeting scheduling.
- Basic: Free; includes essential scheduling features.
- Pro: Available as part of the Workplace Pro plan; offers advanced scheduling capabilities.
Zoom Rooms:
Zoom Rooms are designed for seamless video conferencing in physical meeting spaces.
- Standard: Starting at $49 per room per month; includes features for room management and scheduling.
- Enterprise: Offers advanced room management features; pricing varies based on requirements.
Note that prices may vary based on regional markets, additional services, or add-ons selected.
In-depth Live Streaming Tips and Use Cases
Live streaming with Zoom opens up advanced possibilities for various scenarios. For hybrid events, businesses can connect in-person and remote participants seamlessly, ensuring everyone stays engaged. Product launches can leverage a Zoom broadcast to reach global audiences, creating buzz and encouraging interaction. Virtual town halls are another great application, offering companies a way to communicate with employees transparently, regardless of location. Also, employee training sessions become more flexible and effective with interactive features that allow questions, polls, and live demonstrations.
Success stories highlight how businesses thrive using Zoom. A multinational corporation utilized how to use Zoom meeting techniques to host a virtual conference, reporting significant cost savings and increased attendee satisfaction. Another example includes an educational organization teaching staff how to operate Zoom efficiently, enhancing their Zoom statistics by boosting meeting attendance and participation.
The Rise of Zoom: Statistics and Trends
Video conferencing, especially via Zoom, has recently seen a major surge in popularity. Here are a few stats that exemplify how valuable Zoom and web conferencing have become in the past year:
- Over 3.3 trillion minutes of meetings are streamed on Zoom each year
- Zoom is used to stream 45 billion minutes of webinars every year
- The peer-to-peer streaming industry is projected to be valued at $50 billion by 2026
- As of 2021, there are over 467,100 business users on Zoom
- The web conferencing market grew by 500% within the first two months of the pandemic
- Over three-quarters of employees feel that video meetings are as productive as in-person meetings
This surge in peer-to-peer streaming will likely last longer than the pandemic. Now that businesses and other professional organizations have seen how video conferencing
How to Use Zoom: The Basics

Now that you understand what the platform does and how you could use it for your business, it’s time to learn how to get started with Zoom.
1. Create a Zoom Account
Open up Zoom.us, and click the orange button in the top right-hand corner that says “Sign Up, It’s Free.”
You’ll be prompted to input your date of birth. Once you fill that in, you’ll be directed to the signup page. You can either enter your email address or you can create an account with your existing Google, Facebook, or company sign-on.
The next steps will depend on the signup method that you choose. If you choose to sign up with your email, for example, you’ll receive a link to your inbox with the code. If you sign up with Google, you’ll have to complete the standard Google account verification process.
2. Download Zoom
Go to the Zoom Download Center and choose the version of the software that fits your streaming needs. Click the appropriate button to start the download.
When the file is finished downloading, click the file that pops up in the lower lefthand corner of your screen that says “Zoom.pkg.” When prompted, click “Continue.”
The next page will give you the option to set up your app for all users of the computer or just for you. Choose appropriately, and click “Continue.” When you reach the next page, click “Install.”
3. Open the App
Once you have Zoom downloaded, it is time to open the app. If it’s not saved on your desktop or home screen, you can open it by going to Finder (on Apple devices) or My Computer (Windows devices).
Log in with the credentials you used to sign up.
4. Start, Schedule, or Join a Meeting
Once you’re signed in, you will be presented with four options: New Meeting, Join, Schedule, and Share Screen. Choose the option that you’d like to use.
Each of these processes is a little different, so let’s take a look at how each works.
How to Start a Meeting on Zoom
To start a meeting on Zoom, you have to first complete the steps we covered above.
Once you’ve opened the app and signed in, click the dropdown arrow beside “New Meeting.” This can be found under an orange box with a camcorder icon. There are two boxes that you can check. The first is “Start with video” and the second is “Use My Personal Meeting ID (PMI).” You can select either or both of these boxes to set your preferences.
You’ll also see your PMI in this drop-down menu. If you hover over the code, you’ll be given the option to copy the ID, copy the invitation, or open PMI settings.
Opening the PMI options will allow you to configure settings for your stream, such as changing the passcode, choosing if there will be a waiting room, video controls for the host and participants, and some advanced settings.
Once you are confident with the settings, you can save them and click the orange “New Meeting Button” to start your stream. You can share the meeting invitation before you start the stream or invite users after you get started.
Once you start the stream, you’ll be presented with a lot of functions. You can mute or unmute your microphone, start or stop your video, edit security settings, view and manage participants, chat, share screen, record the meeting, and end the meeting.
How to Schedule a Meeting on Zoom
Some people opt to schedule Zoom meetings beforehand because it helps to avoid any frantic scrambling or confusion when the meeting is supposed to start.
Scheduling a meeting is simple. You’ll start with the basic steps that we discussed before.
Click the “Schedule” button, which is a blue logo with a calendar icon on it. You’ll be prompted to configure the following settings:
- Meeting Topic
- Date and time (and timezone)
- Meeting ID (choose between Generate Automatically or PMI)
- Passcode
- Whether or not there will be a waiting room
- Host and participant viewer settings
- Calendar invite settings (iCal, Google Calendar, or “Other Calendar”)
You can also configure Advanced Settings, which include:
- Enable join before host
- Mute participants upon entry
- Automatically record meetings on the local computer
Once these settings are configured, click “Save.” You’ll be redirected to a digital calendar event (iCal, Google Calendar, or whatever other option you chose).
For example, if you are using Google Calendar, you can invite participants by typing their email addresses into the “Add guests” field. Once you’ve added all of your guests, click the blue “Save” button at the top of the screen.
A popup will appear that says “Would you like to send invitation emails to Google Calendar guests?” Click “Send.”
You can access this meeting by clicking the link in the calendar invite or on the Home page of your Zoom app.
How to Join a Zoom Meeting

There are a couple of ways to join a Zoom meeting. You can either join through the app or directly with the link on an invite.
To join through the app, click “Join” on the Zoom home page. You’ll be prompted to enter either a Meeting ID or a Personal Link Name. You’ll also be able to add your name and choose whether you’d like to join with video and/or audio.
Joining with a link is an easier option. If you received an invite via email, clicking the link will also take you to an in-browser page.
With both methods, the meeting should launch in the app automatically, but if it does not, click “Launch Meeting.” You can choose whether you’d like to join with the computer audio or test a different microphone.
At this point, you should be able to participate in a meeting and access the chat function.
How to Screen Share on Zoom

There are a couple of ways that you can share your screen on Zoom. If you are already in a meeting, it is as simple as clicking “Share Screen” at the menu at the bottom of the screen. The other option is clicking the “Share Screen” button on your Zoom home page and entering your Sharing Key or Meeting ID.
Next, you’ll be prompted to choose the screen that you’d like to share. The options include:
- Any open window
- Whiteboard
- iPhone or iPad screen (via AirPlay or a cable)
- Slides as a virtual background
- Portion of Screen
- Music or Sound Only
- Content from 2nd Camera
- Files from Microsoft One Drive, Dropbox, box, or Google Drive
Once you’ve chosen an option, click “Share” to start sharing your screen.
Advanced Settings on Zoom
Zoom has many advanced settings that can be accessed by clicking the gear icon in the top right-hand corner of the Zoom app home screen.
These advanced settings allow you to customize and control aspects related to different Zoom functions, including:
- Video
- Audio
- Screenshare
- Chat
- Background & Filters
- Recording
- Profile
- Statistics
- Keyboard Shortcuts
- Accessibility
Within each of these settings, there are many options and possibilities. We recommend going through these settings before you start your first stream so that you’re familiar with all of the options available to you.
How to Use Zoom for Hybrid Events in 2024
Hosting hybrid events in 2024 with Zoom is easier than ever with the platform’s advanced features. To ensure a seamless experience, start by understanding how to use the Zoom app effectively. Download and install the app, then test your audio, video, and internet connection in advance. For large webinars or meetings, Zoom’s Webinar feature supports up to thousands of participants, making it ideal for hybrid audiences.
If you’re wondering how to use Zoom to record a presentation, simply enable recording in your settings, then select the “Record” button during your event. This allows you to save the session for future sharing.
Troubleshooting live streaming issues, like lag or audio glitches, often involves checking your bandwidth, updating the app, and ensuring your devices meet Zoom’s requirements. Proper preparation, like a dry run, helps mitigate potential issues and guarantees a smooth hybrid event experience.
Monetization Strategies for Zoom Live Streams
Monetizing live events via Zoom opens up a world of opportunities for businesses. Companies can generate revenue through ticketed webinars, where attendees pay to access exclusive content, or by offering premium training sessions with industry experts. Sponsorships are another effective way to monetize, allowing businesses to partner with brands for mutual exposure.
When paired with Dacast’s robust monetization features, Zoom becomes even more powerful. Dacast enables pay-per-view or subscription-based access, seamless integration with Zoom, and advanced analytics to track audience engagement.
For those new to the platform, learning how to use Zoom on laptop, how to use Zoom on iPad, or how to use Zoom app is straightforward, making it accessible for both organizers and attendees.
Comparison of Zoom with Competitors
Zoom stands out among competitors like Microsoft Teams, Google Meet, and Cisco Webex for its user-friendly interface and powerful live streaming capabilities. Zoom supports larger audience sizes compared to Google Meet, which caps at 500 participants, and Microsoft Teams, limited to 1,000 participants in webinars. Cisco Webex also offers competitive audience limits but often lacks the simplicity of Zoom’s integration with tools like Dacast for seamless streaming.
Zoom’s rich features, such as advanced screen sharing and virtual backgrounds, make it appealing. Learning tools like how to record using Zoom or how to use annotation in Zoom are easy to grasp, even for beginners. However, pricing for advanced features can be higher. Explore guides like how to use Zoom Scheduler or how to use Zoom for beginners to make the most of its features.
Zoom Alternatives
While Zoom is a powerful live-streaming platform that is used in many professional settings, it may not be the perfect solution for all use cases. That creates the need for additional peer-to-peer streaming options.
Here are 10 of the best Zoom alternatives on the market:
- Skype
- Livestream
- Google Duo
- GoToMeeting
- ZoHo
- Cisco Webex Meetings
- Adobe Connect
- Live Webinar
- Bluejeans
- Vidthere
For a more in-depth comparison of these Zoom alternatives, please check out our dedicated guide.
Streaming Zoom Meetings with Dacast
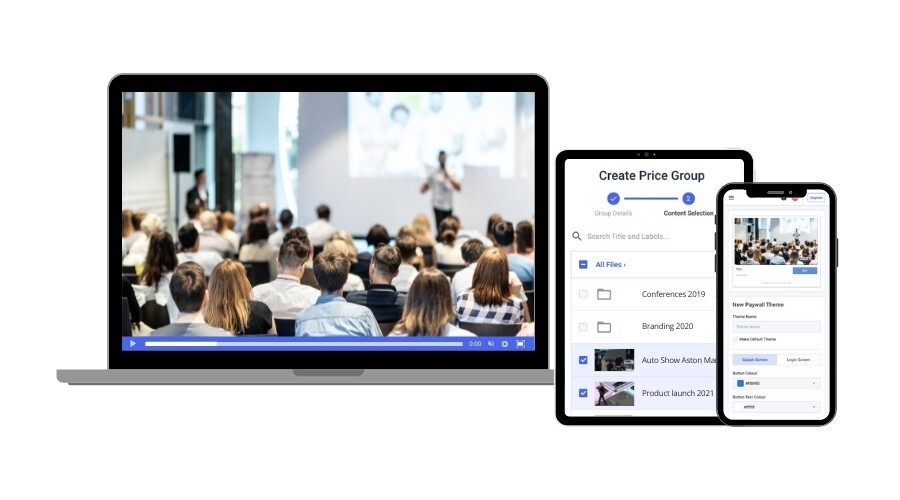
Integrating Zoom with a professional Online Video Platform (OVP) like Dacast can significantly enhance your streaming experience. With Dacast, you can scale your Zoom meetings to larger audiences, allowing for seamless streaming to thousands of viewers. This is especially useful for events such as webinars, conferences, or training sessions, where the participant count exceeds Zoom’s standard capacity.
Dacast also provides advanced analytics, helping you track viewer engagement and video performance in real time. Combining Zoom with Dacast’s platform improves security, offering features like encrypted video streams and secure content delivery. Additionally, it enhances video quality, ensuring smooth, high-definition streams for all participants. For those wondering how to use Zoom on Mac or how to use Zoom on MacBook, the integration with Dacast remains simple. It provides a professional-grade solution for those looking to take their Zoom meetings to the next level.
How to stream a Zoom Meeting Using Dacast
Streaming a Zoom meeting through an online video platform, such as Dacast, allows you to expand your audience beyond Zoom’s participation limits while gaining access to advanced streaming features like enhanced security, monetization, and more. With Dacast’s Zoom integration, you can seamlessly stream various virtual events, including panels, Q&As, and roundtable discussions, to a broader audience.
Additionally, by recording a Zoom meeting with OBS and then live streaming it via Dacast, you can further boost the reliability of your broadcast. This setup is particularly valuable for broadcasters aiming for high-quality, uninterrupted live-streaming experiences.
The process of streaming a Zoom meeting with Dacast looks something like this:
- Log into your Dacast account
- Create a stream
- Navigate to the new stream’s encoder setup
- Copy down the credentials provided (URL, Username, Password, and Stream Name/Key)
- Log into Zoom
- Click on “Schedule a Meeting” and fill in the information as prompted
- Click “Start This Meeting”
- Choose either “open Zoom meetings” or “Launch Meeting”
- Click “More” (three dots) then click “Live on Custom Live Streaming Service”
- Input the encoder credentials that you copied from the encoder settings in Dacast
- Click “Go Live” to start streaming
Please note that this tutorial requires you a Zoom Pro, Business, Education, or Enterprise account since it requires access to the “Custom Live Streaming Service” Zoom feature.
For a complete tutorial on streaming a Zoom meeting with Dacast with some additional tips and approaches, please check out our dedicated guide.
Common Technical Challenges and Fixes
During live streams or video calls, there are common technical challenges that can disrupt communication. Audio delays are often caused by low internet speeds or poor connection stability. To fix this, check your bandwidth and consider using a wired connection. Screen share glitches can occur due to outdated software or insufficient system resources. Ensure your device and Zoom app are updated to the latest versions. Bandwidth limitations may cause poor video quality. To optimize your connection, close unnecessary apps and consider lowering the video resolution in how to use Zoom for meetings.
Checklist to optimize video quality:
- Check internet speed.
- Use a wired connection if possible.
- Close unnecessary applications.
- Update Zoom and system software.
- Reduce video resolution for lower bandwidth usage.
Accessibility Tips
As Zoom continues to prioritize inclusivity, there are several ways to make meetings and live streams more accessible for everyone. Enabling live captions ensures that participants with hearing impairments can follow along. Adding ASL interpreters allows those who use American Sign Language to fully engage. Additionally, providing multilingual audio options can help non-native speakers feel more included. These features are part of a broader trend toward inclusivity for 2024–2025, where businesses and organizations focus on accessible communication. By integrating these tools, Zoom helps foster an environment where everyone, regardless of ability or language, can participate meaningfully and comfortably in virtual interactions.
Integrating Zoom With Other Tools
Integrating Zoom with other tools can greatly enhance your workflow and reach. For businesses, connecting Zoom with CRMs like Salesforce or HubSpot allows for automatic meeting scheduling and contact management.
Also, linking Zoom with social media platforms enables seamless live streaming of webinars to audiences on platforms like YouTube, Facebook Live, or LinkedIn Live. This multi-platform streaming allows you to engage with a larger audience across various channels simultaneously. Another powerful integration is with analytics tools, which helps you track meeting and webinar performance, providing valuable insights for future improvements. These integrations make your Zoom experience more efficient, connected, and scalable across platforms.
Zoom Live Streaming Checklist
A Zoom live-streaming checklist is essential for a smooth and professional broadcast.
First, ensure your pre-event setup is ready: check the camera for clear and crisp visuals, test the microphone for clear audio, and adjust the lighting to eliminate shadows and enhance visibility.
Next, confirm your internet connection is stable by using a wired connection when possible or ensuring a strong Wi-Fi signal. During the live stream, engage with your audience by asking questions, responding to comments, and keeping the conversation interactive.
Regularly monitor your stream’s quality to avoid any disruptions and keep the audience focused and engaged throughout.
Innovative Uses for Zoom in 2024–2025
In 2024–2025, Zoom continues to lead the way with innovative uses that go beyond traditional meetings. One key trend is virtual networking, where professionals can connect and collaborate globally through breakout rooms and interactive sessions. Companies are also using Zoom for team-building events, fostering stronger relationships and engagement with fun activities like virtual escape rooms or trivia. Another emerging use is hosting virtual expos, allowing businesses to showcase products, interact with clients, and present live demos. As remote work and digital interaction grow, Zoom adapts to meet these evolving needs, providing versatile solutions for various industries.
Zoom Pro Tips for Hosts
To successfully host large events on Zoom, it’s important to follow some key best practices. First, use breakout rooms to facilitate smaller group discussions and collaboration. Make sure to assign a co-host to manage different rooms. For Q&A sessions, enable the Q&A feature to allow participants to submit questions, and organize them by priority. As a host, stay engaged by monitoring the chat and muting/unmuting participants when necessary. Ensure your settings are optimized ahead of time, such as enabling screen sharing and participant management tools, to keep the session running smoothly. Always test everything before the event begins.
Integrating AI into Zoom Workflows
Integrating AI into Zoom workflows can significantly enhance user experience and productivity. Tools like meeting transcription help capture conversations in real-time, making it easier to review important details later. AI-powered translation allows for smoother communication in multi-lingual meetings, breaking down language barriers. These features also improve the quality of live streams, making them more accessible by providing real-time captions and translations.
By using AI, Zoom ensures that participants stay engaged, informed, and can collaborate effectively, regardless of their language or location, ultimately improving the overall efficiency of virtual meetings and events.
New Features and Trends for 2024–2025
Zoom continues to innovate with features like AI-powered meeting summaries, which save time by providing concise overviews, and enhanced collaboration tools, including real-time document editing during meetings. These updates streamline workflows and make remote teamwork more productive.
Looking ahead, video conferencing platforms are embracing trends like augmented/virtual reality (AR/VR) for immersive meetings, advanced accessibility tools to ensure inclusivity, and low-latency streaming for smoother live events. Such developments are reshaping how businesses connect globally.
For users exploring how to host a Zoom meeting, recent updates simplify the process with step-by-step guides. If you’re learning how to start a Zoom meeting as host on laptop, new interface improvements make navigation intuitive. Whether you need Zoom meeting steps or guidance on how to do Zoom, the platform prioritizes ease of use and efficiency.
FAQs
We’ve covered how to use many different functions on Zoom, but you might be left wondering about some other aspects of the platform. Here are a few frequently asked questions about hosting meetings on Zoom.
1. Do you have to download Zoom to use it?
Zoom supports in-browser video conferencing, but it tends to be finicky. Your best bet is to download Zoom before your meeting is supposed to start.
2. How many people can be on Zoom?
The number of people allowed on your Zoom call depends on the plan you’ve purchased. Free and Pro plans support up to 100 participants, Business plans support up to 300 participants, and Enterprise plans support up to 500 participants.
The highest tier of Zoom Events and Webinars plans is capable of supporting over 10,000 participants. Plans of this magnitude are custom-priced.
3. How long can a Zoom meeting last?
Zoom calls on free accounts are capped at 40 minutes. Meetings on paid plans are capped at 24 hours.
Conclusion
Zoom is a powerful tool for businesses since it makes remote collaboration not only possible but efficient, as well. Whether you’re hosting a Zoom meeting of your own or you’re joining as a participant, we hope that this guide has given you the knowledge to use Zoom with confidence.
If you want to stream your Zoom meetings with the support of a professional online video platform, we recommend giving Dacast a try. Our Zoom integration makes it easy to share your Zoom meeting with your audience in just a few clicks.
Want to make sure that Dacast is the video hosting platform for your streaming need? Sign up today to take advantage of our 14-day risk-free trial to test out all of our professional features.
No credit card is required.
For regular tips on live streaming and exclusive offers, we invite you to join our LinkedIn group.