


How to Set Up an RTMP Encoder for Live Video Streaming in 2026

By Dacast Editorial Team | Reviewed by Jon Whitehead, COO at Dacast | Updated June 2026
As a professional broadcaster, having the right RTMP streaming encoder is a must-have tool for delivering high-quality live videos. RTMP (real-time messaging protocol) is a widely used, low-latency streaming protocol that ensures smooth video delivery over a TCP-based network. This is why understanding RTMP setup is key to achieving professional results, whether you’re setting up a live RTMP stream for an event, webinar, or gaming session.
We will use this post to help you better understand streaming with RTMP and RTMP encoders. We’ll break down the technical details of RTMP encoding in simple terms. You’ll learn how to configure an RTMP live encoder, connect it to an RTMP-enabled streaming platform, and choose between RTMP encoding software and RTMP encoder hardware. We’ll also explore leading RTMP streaming software options and other essential video streaming protocols.
TL;DR:
- RTMP remains the standard for pushing a live feed from encoder to platform in 2026. Your encoder captures video, compresses it, and sends it to Dacast via your RTMP ingest URL and stream key.
- Software encoders (OBS, Wirecast, vMix) run on your computer, free to ~$1,200 one-time. Hardware encoders (Teradek, TriCaster) are dedicated devices, faster and more reliable at scale but significantly more expensive.
- Core encoder settings: H.264 video, AAC audio, keyframe interval 2 seconds, CBR rate control. For 1080p, target 4,500–6,000 Kbps upload.
- Enhanced RTMP (RTMP 2.0) now available in OBS 30+ and vMix 28+, adds HEVC and AV1 support for lower bandwidth at the same quality.
- Dacast accepts RTMP and RTMPS ingest from all major encoders. RTMPS (port 443) is recommended for all production streams.
Table of Contents
- Configuring Your RTMP Encoder in 6 Steps
- What is an Encoder?
- What is RTMP Streaming?
- Common RTMP Pitfalls and Solutions
- RTMP Security Improvements in 2026
- Popular RTMP-Enabled Encoders for Live Video Streaming
- Enhanced RTMP: What It Is and Why It Matters in 2026
- Factors to Consider When Choosing an RTMP Encoder
- AI-Optimized Video Compression and Bandwidth Management
- 2026-Specific RTMP Trends and Forecasts
- The Future of RTMP
- FAQs
- Conclusion
Configuring Your RTMP Encoder in 6 Steps
Once you choose an RTMP encoder, you are ready to start live streaming. To prepare for a smooth RTMP live stream with minimal buffering, you must configure your encoder settings correctly.
Join us as we walk you through the process of using RTMP encoder software or RTMP encoder hardware. Here’s a step-by-step guide to configuring your RTMP streaming encoder for the best live streaming experience.
1. Connect Your Video Sources
Setting up your video input is the first step to broadcasting. Your encoder setup method will depend on whether you’re using hardware or software encoders.
The method is simple when using RTMP encoder hardware. Most hardware encoders come with HDMI or SDI inputs for direct camera connections. Depending on your camera and the encoder, you’ll only need to get the right cable to connect both devices.
If your camera supports HDMI, setting up an HDMI to RTMP encoder is usually plug-and-play. You typically just need to take the cord from your video camera and plug it into the physical RTMP device to start RTMP streaming. Some encoders also support Wi-Fi connections for wireless streaming.
Things are slightly different with software encoders. If you’re using RTMP streaming software, you may need a capture card to connect your camera to your computer. External capture cards (via USB or HDMI) are commonly used for laptops, while internal capture cards work for desktops. Once connected, your encoder should automatically detect the video source, allowing you to select it from the input settings.
2. Create a New Live Channel and Connect Your OVP
To start streaming, you’ll need to create a live channel using an online video platform (OVP) such as Dacast, Wowza, or Vimeo. Most platforms require an RTMP stream URL and a stream key to link your encoder.
Dacast users should follow these steps:
- Log into your account.
- Click “Live Channels” in the left-hand sidebar.
- Click the orange “Create” button in the upper right.
- Enter a title for your new live channel, then click “Add New”.
- Click the “Encoder Setup” tab in the top-center of the screen
- This tab shows three simple setup steps. First, select a publishing point (optional), and then choose your bitrate, resolution, and aspect ratio (optional). These can be adjusted later in your encoder settings.
- Continue on to select your encoder type. Select the option that matches the encoder you’re using, or choose “Other RTMP Encoder” if your software isn’t listed.
- A window will display your RTMP stream URL, username, and password. Keep this open for the next step.
Now, it’s time to link your encoder to Dacast via your stream key. Go to your encoder’s “Broadcast Settings” or “Output” section and enter your RTMP URL, stream key, and login credentials to connect your encoder to your RTMP streaming platform.
3. Select Video and Audio Encoding Options
Next, select the right video and audio settings for a stable live RTMP stream. Here’s what to configure:
- RTMP stream resolution: 1920 x 1080 (Full HD) or 1280 x 720 (HD) are common choices. This will dictate the size of your live-stream video file and impact the viewing experience. The video might buffer if the viewers don’t have high-speed internet, and the key is to balance the quality and video size for best results.
- Bitrate: Higher resolutions require higher bitrates. A full HD stream typically needs 3000-6000 kbps, while 720p works best with 1500-3000 kbps.
- Codec: The industry standards include H.264 video compression, advanced video coding (AVC) for video, and AAC for audio.
- Frame Rate: 30 fps is ideal for most streams, while 60 fps is recommended for fast-paced content like gaming or sports.
For more details, check out our recommended RTMP setup or the best encoder settings guides.
4. Get an Embed Code
Before going live, it’s smart to run a test stream by embedding your player on a private webpage. This lets you check quality, buffering issues, and overall performance before broadcasting to a wider audience. It’s the best time to resolve any issues with the stream to improve the overall quality.
Most RTMP streaming platforms provide embed codes that you can copy and paste into your website. If you’re using Dacast, simply grab the embed code from your account and insert it into your site’s HTML.
5. Conduct a Test Stream
Once your embed code is in place, activate your RTMP live encoder and begin a test broadcast. Open the Dacast back office and hit the toggle switch to start your live channel. Then, simply turn on your cameras and start recording.
Monitor the stream on different devices (desktop, tablet, mobile) to ensure compatibility. You will want to check for buffering, audio sync issues, and resolution clarity. If problems arise, systematically troubleshoot by verifying connections, encoder settings, and internet speed. If you need more help, consider contacting Dacast technical support.
If you’re streaming on a paid platform, technical issues can result in refunds or dissatisfied viewers. Therefore, ensuring a flawless stream before going live is crucial.
6. Start Streaming
With everything set up and your RTMP streaming encoder, you’re now ready to stream RTMP live! Simply activate your encoder and start broadcasting.
We’d like to offer a few key tips for a stable RTMP live stream:
- Always ensure a strong internet connection and use a wired Ethernet connection whenever possible. A dedicated upload speed of at least double your streaming bitrate is recommended. Any drop in internet speeds or connectivity could result in interruptions or quality issues in the RTMP live stream.
- It’s wise to have a backup network. If your primary internet fails, a secondary connection (such as a mobile hotspot) can prevent downtime. This way, you can avoid stream drops and unwanted rescheduling.
- Monitoring the stream performance is a must. Many platforms provide real-time analytics to track bitrate stability and viewer engagement. The overall viewing experience could make all the difference, especially if the live stream is a paid one. The last thing you want is unsatisfied customers who’ve paid you to watch your stream.
What is an Encoder?
If you’re just starting streaming, you may be confused about an encoder. A video encoder is a tool that converts a video from its RAW format to a digital deliverable. On one end, video footage from a camera is fed to the encoder. This footage is converted into a different format in real time. The purpose of the conversion is to prepare the video to be broadcast over the internet.
The encoded file is then sent from your server to the CDN in bits. The CDN then delivers these files to your viewers where they’re then decoded so they can get the video and audio outputs. While they view the first file, the second one is dispatched to them to ensure uninterrupted playback. It also reduces your latency in the process.
An example of an encoder is OBS Studio. We’ve made it easy for Dacast users to use this free and open-source online encoder by developing a custom OBS Studio portal.
It’s widespread for professional broadcasters to use an external encoder to broadcast since this allows for a more advanced event production than, for example, an in-browser encoder.
Encoding can be contrasted with transcoding. While encoding turns a source into a digital file, transcoding converts one type of file to another. Consider transcoding as a type of encoding. Still, encoding can also refer to converting a video file from a raw source or even a live event feed into a digital file.
Regarding live streaming, both encoding and transcoding can be used to prepare the video feed for broadcast. Also, there are both hardware and software encoders and transcoders.
You can use either a hardware encoder or a software encoder. Each comes with its own set of benefits and drawbacks.
Hardware vs. Software Encoders
RTMP live streaming uses two main options for encoding: software encoders and hardware encoders. A software encoder is a program that runs on your computer and works with your online video platform to process and deliver video content. It uses your computer’s processing power to encode the stream, making it a flexible and cost-effective option. It’s a perfect option if you’re just getting started with RTMP streaming.
Since software encoders don’t require additional equipment, they are ideal for beginners or broadcasters who need portability. Popular choices include vMix and Wirecast, all of which support RTMP encoding software. OBS Studio is yet another popular choice. We’ve made it easy for Dacast users to use this free and open-source online encoder by developing a custom OBS Studio portal.
A hardware encoder, on the other hand, is a dedicated device built specifically for video encoding. These encoders include small camera-mounted devices, backpack-mounted units, and rack-mounted systems used in studios or broadcast vehicles.
While hardware encoders generally produce higher-quality RTMP live streams with lower latency, they are a bigger investment and less portable than software-based solutions. This makes them ideal for professional broadcasters, event production teams, and large-scale live-streaming setups.
The right choice depends on your needs and budget. If you’re new to RTMP streaming, free or low-cost RTMP encoding software (often under $100) is a great place to start. But if you’re serious about RTMP live video streaming and require top-tier quality with minimal delay, investing in a hardware encoder may be worth considering.
Encoding vs. Transcoding
While encoding converts raw video into a digital format for streaming, transcoding involves converting one digital format to another. Transcoding is often used to create multiple bitrate versions of a stream, ensuring viewers with different internet speeds can access the best possible quality.
For live streaming, both encoding and transcoding play a role in optimizing the video feed for broadcast. Whether using RTMP encoding software or RTMP encoder hardware, understanding these processes is key to delivering a high-quality live RTMP stream.
What is RTMP Streaming?
RTMP (Real-Time Messaging Protocol) is the standard for sending a live video feed from an encoder to an online streaming platform, a process called ingest. Once the platform receives the RTMP stream, it repackages it into HLS for delivery to viewers on any device. For a full technical breakdown of how RTMP works, including protocol internals, encoder settings, and comparisons with SRT and WebRTC, see our complete guide to the RTMP protocol.
How does RTMP Streaming Work?
Your encoder captures video, compresses it using H.264 (or H.265/AV1 with Enhanced RTMP), and pushes it to your streaming platform using an RTMP ingest URL and stream key. The platform then transcodes the ingest into HLS with adaptive bitrate for viewer delivery. For a detailed breakdown of the ingest process, including the three-phase handshake and Dacast setup walkthrough, see our RTMP Ingest guide.
Common RTMP Pitfalls and Solutions
While RTMP streaming remains a reliable method for live broadcasts, broadcasters may face a few challenges. Here are some common RTMP issues and solutions to keep your live RTMP stream running smoothly in 2026.
Latency Issues
Low latency is critical for interactive live streams, but RTMP encoders can sometimes introduce delays. To reduce RTMP latency, consider the following:
- RTMP to WebRTC Conversion: For ultra-low latency streaming (e.g., live auctions, gaming, or interactive webinars), convert RTMP streams into WebRTC, which is designed for real-time communication.
- Chunked Encoding: Modern RTMP streaming software now supports chunked encoding, breaking video data into smaller parts for faster delivery.
- AI-Powered Optimization: Some AI-driven encoding tools can dynamically adjust bitrate and resolution in real time to maintain low latency.
Compatibility Challenges
Not all devices natively support RTMP streaming, especially since modern browsers and mobile platforms favor HLS. To ensure seamless playback across all platforms:
- Automatic RTMP-to-HLS Transcoding: Many online video platforms offer built-in transcoding to convert RTMP live streams into HLS for broader compatibility.
- Adaptive Bitrate Streaming: Ensuring your RTMP encoder software supports ABR allows streams to adjust quality dynamically based on network conditions.
- Multi-Codec Support: Using an RTMP streaming encoder that supports multiple codecs (such as H.265) can improve efficiency and playback performance.
Firewall and Network Restrictions
Corporate firewalls, strict network policies, and ISP throttling can disrupt RTMP live streaming, especially in business settings. Here’s how to bypass these challenges:
- Use RTMPS (Secure RTMP): RTMPS encrypts the RTMP stream using TLS, allowing it to pass through stricter corporate firewalls without interference.
- VPN-Based Delivery: Businesses broadcasting behind strict firewalls can leverage VPN solutions to securely route RTMP encoder software traffic.
- Dedicated RTMP Servers: Configuring dedicated RTMP servers in geographically strategic locations can improve connectivity and bypass ISP-imposed restrictions.
RTMP Security Improvements in 2026
The demand for secure RTMP streaming is continuously increasing. This is why broadcasters need to implement stronger security measures to protect their RTMP live streams from unauthorized access and cyber threats. Here are the latest security best practices for RTMP encoders in 2026.
1. DDoS Protection for RTMP Streams
Distributed Denial-of-Service (DDoS) attacks can overwhelm your RTMP streaming encoder, causing service disruptions. To mitigate risks:
- Use a CDN with DDoS Protection: A live RTMP stream delivered via a CDN can absorb and filter out malicious traffic before it reaches your RTMP servers.
- Enable Rate Limiting: Restrict excessive requests from a single IP to prevent bot-driven attacks on your RTMP encoding software.
- Deploy Web Application Firewalls (WAFs): A WAF can help detect and block DDoS attempts targeting RTMP setup endpoints.
2. RTMP Authentication and Token-Based Access
Unauthorized access to streams is one of the biggest vulnerabilities in RTMP streaming. You should do the following to prevent this from happening:
- Restrict IP Access: Configure your RTMP broadcaster to allow access only from approved IP addresses, blocking unauthorized users from connecting to your stream.
- Use RTMP Authentication: Require username/password authentication before allowing access to your RTMP servers. Many RTMP encoding software solutions now support built-in authentication methods.
- Implement Token-Based Access: Secure streams with dynamically generated access tokens that expire after a set period, preventing stream hijacking and credential sharing.
3. RTMPS for Enhanced Security
Many platforms now support RTMPS (RTMP over SSL) to protect against eavesdropping and data interception. It’s used to encrypt your RTMP stream example over SSL/TLS. Some of the benefits include:
- Firewall-Friendly Streaming: Many corporate and institutional networks block unsecured RTMP format streams, but RTMPS allows for seamless delivery through strict firewalls.
- End-to-End Encryption: RTMPS encrypts video and audio data, making it harder for attackers to intercept and manipulate live streams.
- Compliance with Security Standards: Using RTMPS helps meet industry security regulations, making it essential for businesses and broadcasters handling sensitive content.
For a full configuration guide to RTMPS and why it matters for paid-access streams, see: What is RTMPS and Why Is It Important to Secure Streaming?
Popular RTMP-Enabled Encoders for Live Video Streaming
If you’re looking for an RTMP streaming encoder for live video streaming, choosing the right option can save you time and effort. Here’s a breakdown of some of the most popular RTMP live streaming encoders available today, starting with software-based solutions and finishing with hardware options.
1. OBS Studio
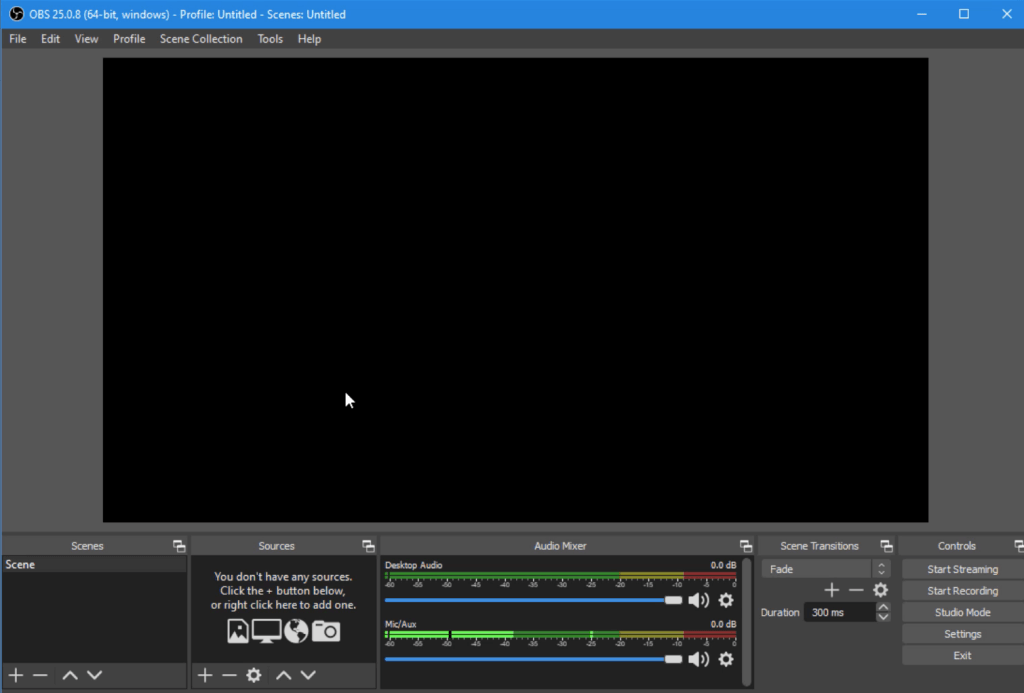
Previously known as Open Broadcaster Software, OBS Studio remains one of the most widely used encoding solutions. This professional video streaming and broadcasting software is compatible with macOS 12 or newer, Windows 10 and 11, and Ubuntu 22.04. If you’re using Linux, FFmpeg is required for full functionality.
Dacast has partnered with OBS Studio to create custom live broadcasting software on OBS Studio that integrates perfectly with the Dacast platform.
Basic Functionality:
OBS Studio offers many great features for new broadcasters just getting the hang of live streaming. The software has a set of OBS-specific settings and system requirements to ensure the most optimal live broadcasting experience.
Key Features:
OBS Studio has various recording and encoding tools, including audio and video mixing, multiple integration options, and an easy-to-use interface. Other key features include
- HLS Live streaming and recording functionality
- Audio and video mixing, filters, and transitions
- Support for hotkeys
- Chroma key and green screen support
- Scenes allow you to prepare overlays in advance for rapid switching
- Support for a wide range of video, audio, and image sources, as well as screenshots
- Expandable via plugins to add NDI functionality, remote control via WebSockets, advanced scene switching, and more
- One notable negative is that OBS Studio doesn’t currently offer multi-bitrate streaming
- Detailed wiki and highly active user forum for support/help, and many YouTube tutorials are also available.
Pros:
- Completely free and open-source, with a large community of developers
- Compatible with most RTMP streaming software and platforms
- Cross-platform support (Windows, macOS, Linux)
- Customizable via plugins and scripts
Cons:
- Very basic compatibility with macOS
- No built-in multi-bitrate streaming
- High CPU and memory usage
Pricing:
OBS Studio is free for everyone and has a working integration with Dacast.
Best Use Case:
OBS Studio is best used as encoding software and a professional video hosting platform. OBS Studio works with all three major operating systems and is designed to work seamlessly with Dacast.
It is ideal for beginners and professionals looking for free RTMP encoder software. It’s a great option for game streaming, webinars, and event broadcasting. While it lacks built-in multi-bitrate streaming, it remains one of the most flexible RTMP live encoders available today.
2. Wirecast
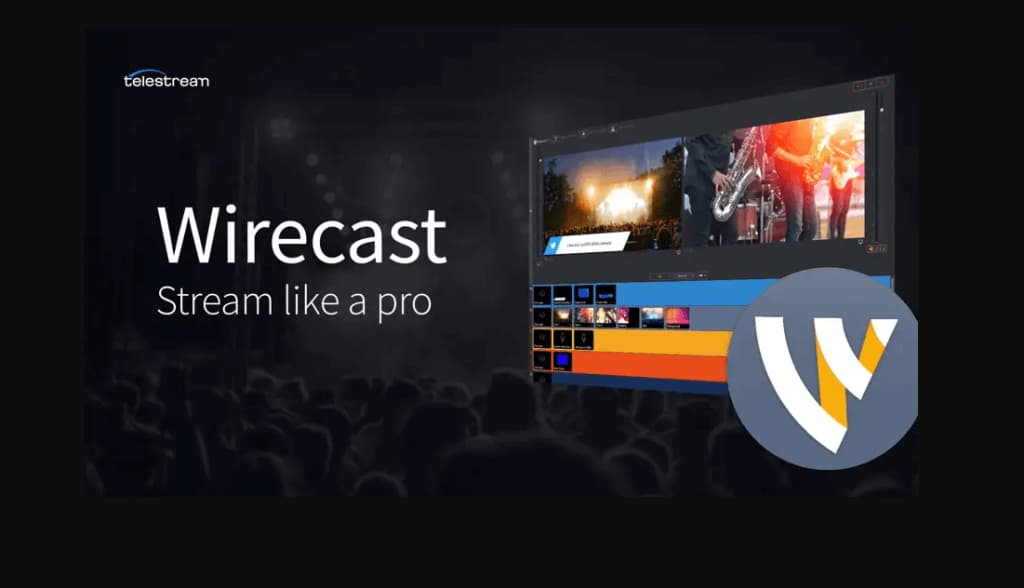
Wirecast is a high-end RTMP streaming encoder designed for live video production and broadcasting. Developed by Telestream, Wirecast has been a staple in professional streaming since 1998. It’s a powerful, customizable, live video streaming and production tool for Mac and Windows.
Basic Functionality:
Wirecast is a software-based video switcher that enables real-time transitions between multiple video sources while offering RTMP encoding software capabilities. It’s particularly suited for professional broadcasters, corporate webinars, and sports productions.
Key Features:
- Supports cameras, webcams, IP cameras, capture cards, microphones, and screen capture
- Instant replays, scoreboards, clocks, and timers for professional coverage
- Use iOS devices as remote cameras for additional video sources
- Easily integrate with NDI-enabled cameras and devices
- Built-in graphics editor for overlays, text, and real-time captions
- Manage up to 8 audio tracks, including noise suppression and EQ tools
- Simultaneously stream to Facebook Live, YouTube, Twitch, LinkedIn Live, and RTMP servers
- Deliver high-quality 4K RTMP streams with adaptive bitrate settings
- Ideal for advanced streamers who require customizable control surfaces
- Supports local recording while broadcasting live
- Native support for comments, overlays, and social engagement tracking
- Send a live program feed to an external monitor or projection system
Pros:
- Compatibility with Mac and Windows
- Feature-rich and highly customizable
- Multi-streaming capabilities
- Great customer support
- Regular system updates
Cons:
- High price point
- Requires a powerful CPU and GPU
- Slightly complicated
Pricing:
Wirecast is a premium RTMP stream encoder that is available in two plans:
- Wirecast Studio for enhanced live production & streaming: pricing is $29.02 per month, billed annually
- Wirecast Pro for advanced live production and streaming: pricing is $37.42 per month, billed annually
It’s a bit expensive for encoding software, but it’s tailored to advanced streamers. They offer a free 14-day trial if you want to try it before you buy.
Additional Wirecast upgrades are available, including:
- Wirecast support comes in 2 levels: Insider Access: $199/yr; Premium Access: $299/yr
- NewBlueFX Titler Live (for creation of animated graphics and titles): $245 Standard version, $445 Advance version, $945 Ultimate version
- Virtualsetworks (pre-made virtual sets for green screen use): $329
Best Use Case:
Wirecast is best suited for professional broadcasters, including corporate webinars, sports productions, hybrid events, and large-scale streaming projects. If you need multi-bitrate RTMP streaming, 4K support, and advanced scene switching, Wirecast is one of the best RTMP encoding software solutions available. However, it requires a powerful computer setup to handle high-quality video streams efficiently.
3. VidBlasterX
VidBlasterX is a live-streaming encoder that focuses on video production. The latest version, VidBlasterX6, is a live-streaming encoder that focuses on video production. It operates on a subscription-based model with local installation. VidBlasterX6 is available in three editions: Trial, Studio, and Broadcast 4K. Each edition offers varying features and module capacities.
Basic Functionality:
VidBlasterX6 Studio supports up to 25 modules per profile and is suitable for studio production of live videos. The VidBlasterX6 Broadcast 4K supports up to 100 modules per profile and includes UHD & 4K video output resolutions.
Key Features:
- Modular user interface
- Customizable layout
- Audio mixer
- MultiView support
- Macro and scripting functionality to automate or hot-key actions
- Supports overlays and lower thirds
- Chroma key support
- Live-streaming and recording up to 4K resolution
- Compatible with most OVPs, including Dacast, with a direct integration
Pros:
- Offers free trial version
- Has pricing plans for every budget
- Supports multiple streams
- It’s easy to setup
- Audio mixing and video editing
Cons:
- Branding limitations on the free version
- Only works on Windows OS
Pricing:
VidBlasterX is available in three versions. The first plan is a free one called VidBlaster X that enables you to try out this platform for free. Each option is priced with an annual subscription model:
- The Studio version ($99/year) supports 25 modules.
- The Broadcast version ($999/year) supports 100 modules. This version also supports multiple recorder & streamer modules in a single profile.
First, the difference between the versions is the number of simultaneously active modules you can have. The Studio edition supports up to 25 modules, and the Broadcast edition supports 50. These higher limits allow professional users with multiple monitors to set up and oversee complex workflows.
The Broadcast edition also supports UDP streaming, multiple streaming sources, and recorder modules in a single profile and includes priority support.
Best Use Case:
VidBlasterX6 caters to a wide range of uses, focusing on encoding tools. It integrates well with professional OVPs such as Dacast. Here is a tutorial on how to stream on Dacast with VidBlasterX. However, it is important to note that VidBlasterX6 is only compatible with Windows PCs.
4. vMix
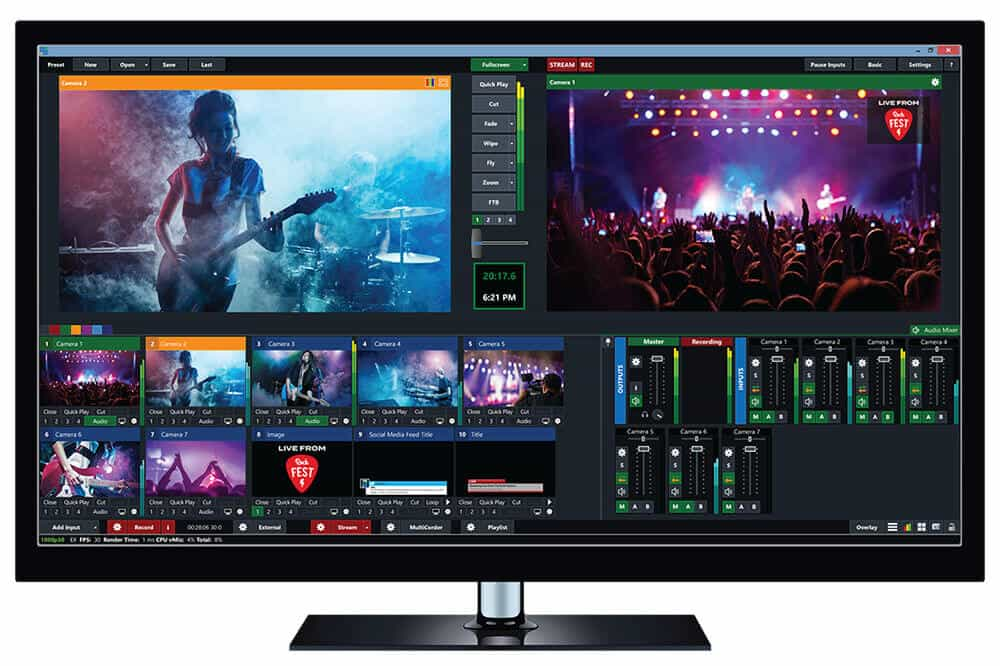
vMix is a comprehensive live video production and streaming software developed by StudioCoast, designed exclusively for Windows operating systems. It enables users to mix, switch, record, and live stream video content in resolutions up to 4K.
As of October 27, 2025, the latest major release is vMix 29. This update introduced Open Media Transport (OMT) support, a new open-source protocol for high-quality audio and video over gigabit LAN with full 4K and high frame rate support, along with improvements to Instant Replay and continued compatibility with Windows 10 and 11.
Basic Functionality:
vMix offers an array of video streaming tool plans. They offer a wide range of features at different price points, so there are options for broadcasters of every level of expertise. vMix offers powerful encoding services.
The platform helps you easily add transitions into your videos in the form of slow motion and instant replays. You can also include scoreboards, which makes it perfect for sports broadcasters who want to use TCP-based RTMP live streaming. You can also input streams using UDP.
Key Features:
- Support for a wide range of inputs including webcams, cameras, capture cards, DVDs, sound cards, playlists, photos, PPT presentations, and more
- NDI support
- Chroma key and virtual sets
- Built-in titling tool that supports animation via XAML
- Live-streaming platform integrations (including with the Dacast streaming platform)
- vMix Social allows you to pull and display content from popular social media platforms
- Instant replay, slow motion, and scoreboards
- Training videos available
- vMix “reference systems” ease the difficulty of building a custom live production system
Pros:
- Many powerful features
- Reliable customer support
- Professional platform
- High-quality encoding
- Streaming capabilities
Cons:
- A high price point for most inclusive plans
- Only works with Windows
- A bit tricky to use
Pricing:
vMix is available for Windows computers only, and it comes in five different lifetime license editions. 4 of them never expire, while the subscription license is month-to-month. Each purchase includes 12 months of free updates. Post this period, updates can be purchased for an additional fee. The subscription license includes free updates during the subscription period.
- Basic HD ($60): Supports 4 inputs (up to 3 camera/NDI) and video up to Full HD 1920×1080 resolution
- HD ($350): Supports 1,000 inputs, adds vMix call functionality, four overlay channels, and supports full HD video in 1920 x 1080 resolution
- 4K ($700): Supports 1,000 inputs, 4K resolution video (4096 x 2160), PTZ control, two recorders, instant replay, 4 SRT outputs, and much more
- Pro ($1200): Supports 1,000 inputs, includes all 4K features and two records, plus up to 8 callers, up to 8 cameras for instant replay, and 4 SRT outputs
The monthly subscription license includes the following:
- MAX ($50/month): Supports 1,000 inputs, 1,000 NDI inputs, and includes all 4K resolution video (4096 x 2160), PTZ control, two recorders, instant replay, 4 SRT outputs
Best Use Case:
vMix is ideal for professional broadcasters and production studios seeking a robust live production solution with advanced features. Its extensive input support, real-time streaming capabilities, and integration with various platforms make it suitable for complex broadcasting environments. However, its exclusivity to Windows OS should be considered when planning cross-platform productions.
5. TriCaster

TriCaster offers high-end RTMP encoder hardware from NewTek for advanced broadcasters. Developed by Vizrt, it is a software-driven live production system offering professional-grade tools for encoding and video production. It integrates various media production capabilities, enabling users to create high-quality content with efficiency and consistency. TriCaster has four core products: Mini 4K, TC410 Plus, TC1, and the flagship 2 Elite.
Basic Functionality:
The TriCaster encoding tools are designed to aid broadcasters in live-streaming by encoding in real-time. With its advanced mixing tools, you can easily merge various live streams to take your professional event online. It’s also possible to easily record to DDR if you want to relaunch your stream as an on-demand one.
Key Features:
- Expensive hardware
- Built-in mixing tools
- Real-time encoding
- Recording capabilities
- Support from moving graphics
Pros:
- Offers a wide range of tools suitable for professional broadcasting
- Caters to various production sizes, from small streams to large-scale broadcasts
Cons:
- High price tag
- Requires additional paid tools to use
- Complicated setup
Top Products:
NewTek offers several different products in the TriCaster line, including:
- TriCaster 2 Elite: A flagship model designed for advanced, television-grade broadcasting. It supports high-end live production features suitable for professional studios.
- TriCaster TC1 Pro: Offers comprehensive tools for end-to-end video production, supporting up to 4K UHD resolution.
- TriCaster TC410 Plus: Tailored for mid-sized productions, providing a balance between functionality and affordability.
- TriCaster Mini 4K: A portable desktop encoder that delivers 4K UHD video production capabilities in a compact form factor.
- TriCaster Mini Go: An entry-level solution aimed at streamers and content creators seeking broadcast-quality functionality. It includes USB, NDI, and SRT connectivity, supporting HD resolution.
- TriCaster Mini S: A software-only solution designed for content creators and smaller productions, supporting up to UHD 4K60 video. It requires compatible hardware meeting specific system requirements.
- TriCaster Vectar: A cloud-based live video production system designed for real-time switching, mixing, and streaming of multiple video sources. It supports distributed teams and enables production control from any location with internet connectivity.
Pricing:
TriCaster models vary in price based on their features and capabilities. However, since the prices for each are not displayed on their website, you will need to contact the sales team to get the exact price.
Best Use Case:
Tricaster is a good choice for those with a budget and searching for a high-ticket hardware encoder. Tricaster’s encoding devices are best suited for advanced, professional broadcasters such as those who will be live streaming on TV. Consider that there’s a high learning curve, but it’s worth learning because of all its powerful capabilities.
6. TeraDek

TeraDek provides a range of professional-grade video and encoding solutions, widely utilized by both professional and amateur broadcasters globally for capturing and sharing content. Their product lineup includes hardware encoders designed for mobile broadcasting, catering to advanced broadcasting needs.
Basic Functionality:
Teradek’s hardware encoders are engineered for real-time encoding, facilitating live streaming with high-quality video output. Their compact and portable designs enable broadcasters to stream beyond traditional studio settings. Additionally, Teradek offers Core, a cloud-based streaming management platform that enhances and supports live streaming capabilities across its product line. This service leverages cloud technology, allowing users worldwide to access the platform through Teradek hardware products.
Key Features:
- Compact and portable designs for on-the-go broadcasting
- Integration with Core for cloud-based stream management
- High-quality video output, including 4K capabilities
Pros:
- Designed specifically for live streaming applications
- Superior video quality suitable for professional use
- Portable and user-friendly designs
Cons:
- Premium pricing may be prohibitive for smaller broadcasters
Top Products:
Teradek offers a wide range of encoding devices for professional broadcasting. Some of their top products include:
- Bolt: A potent compact solution for on-the-go 4K HD cinema-quality video with zero latency
- VidiU Go: Live-streaming encoder that can be used for broadcasting on the go
- Bond: Backpack encoder for broadcasting on the go
- Prism: Provides 4K encoding and decoding capabilities, suitable for mission-critical IP video workflows
- Cube: Designed to support IP video, offering both encoding and decoding functionalities in a compact form factor
- Ranger: Encoder for wireless connection to OVP from television-grade capture equipment
Pricing:
Teradek’s product pricing varies based on the model and features:
- Bolt Series: Prices range from approximately $1,090 for the Bolt 4K LT HDMI 750 TX to $16,390 for the Bolt 4K 12G-SDI MAX Deluxe Kit
- VidiU Go: Available starting at around $1,690
- Prism: Pricing details are available upon request from Teradek’s official website
- Cube: Starts at approximately $1,890
For the most current and detailed pricing information, please refer to Teradek’s official product page.
Best Use Case:
Teradek’s hardware encoders are ideally suited for advanced professional broadcasters who require high-quality, reliable encoding solutions with the flexibility of mobile use. Their products are particularly beneficial for live event coverage, field reporting, and other scenarios where portability and performance are critical.
7. Niagara Video

Niagara Video has been a pioneer in the broadcasting industry for nearly two decades, offering a comprehensive range of hardware and software solutions tailored to various sectors, including sports broadcasting, corporate enterprises, houses of worship, government agencies, and educational institutions. Their product lineup encompasses video encoding, transcoding, and decoding solutions designed to meet the diverse needs of broadcasters at different experience levels.
Basic Functionality:
Niagara Video’s tools are engineered to facilitate the encoding and transcoding of video content, enabling seamless live streaming and on-demand delivery across multiple platforms.
Key Features:
- A wide array of hardware and software-based encoding tools to cater to various broadcasting requirements
- Provides web SDKs for tailored customizations and seamless integrations with existing systems
- Certain models support delivering multiple simultaneous streams, enhancing broadcasting flexibility
- Accommodates various input types, including SDI, HDMI, DVI-I, Component, Composite, and S-Video, ensuring compatibility with different source formats
Pros:
- Offers a whole range of hardware and software encoding choices
- Has an established innovator reputation in the industry
Cons:
- There is no detailed pricing information readily available on their official website
Top Products:
The new Niagara 9300 Series is a 1U rack-mount unit that supports HD and/or SD SDI inputs with up to 8 stereo pairs (16 channels) of embedded audio. The 9300 allows you to deliver multiple simultaneous streams. It also includes a web SDK to enable customizations and integrations. Additionally, it supports the new SCX Linux software or SCX+ software.
The GoStream Digital and Analog encoders are powerful, compact two-channel streaming encoders with integrated solid-state drives. They’re available in SDI or DVI-I versions, as well as versions that support Component/Composite/S-Video and HDMI/DVI VGA. Additionally, they support Transport Stream (UDP/RTP), Adobe Flash (RTMP), Windows Media, and Apple’s HLS protocol.
The GoStream B264 encoder is designed for hard use in broadcast and streaming applications. This small unit (3 fits in 1 RU) features two SDI inputs, two ASI outputs, four Gigabit Ethernet ports, and various other connectivity options.
Finally, the GoStream Mini 200 is a flexible, affordable encoder with low power consumption and support for common consumer and prosumer video formats such as AVC / HEVC, H.264 / H.265. The device includes inputs for SDI, HDMI, component, composite, DVI/VGA, and unbalanced audio. Additionally, it also can record a file as MP4 while streaming live.
Pricing:
Niagara Video does not publicly disclose pricing information on its official website. For detailed pricing and to obtain quotes tailored to specific products or solutions, it is recommended to contact Niagara Video directly through their official page.
Best Use Case:
Given the extensive range of products and solutions offered by Niagara Video, their tools are best suited for organizations seeking reliable encoding and transcoding solutions for live video content. Whether for live sports events, corporate communications, religious services, governmental broadcasts, or educational content delivery, Niagara Video provides tailored solutions to meet diverse broadcasting needs.
8. NVIDIA Maxine
NVIDIA Maxine is a suite of AI-powered SDKs designed to enhance video conferencing, streaming, and content creation through real-time AI-driven video, audio, and conversational features. Built on NVIDIA’s accelerated computing platform, Maxine utilizes deep learning models to improve video quality, reduce bandwidth usage, and enable AI-powered effects such as background replacement, face tracking, and super-resolution. It is primarily targeted at developers and businesses looking to integrate AI-powered video enhancements into their applications.
Basic Functionality:
NVIDIA Maxine provides AI-powered video and audio enhancement features, helping users optimize video quality, reduce bandwidth usage, and improve real-time communication. It works as a cloud-based service, reducing the computational load on local devices and allowing for seamless integration into existing platforms. Developers can access Maxine’s AI models through APIs and SDKs. This makes it easy to incorporate features such as real-time translation, facial tracking, and virtual avatars into video applications.
Key Features:
- AI audio processing and enhancement
- AI-powered video enhancement
- Real-time video compression
- AI face and body tracking
- Background replacement
- Gesture and gaze estimation
- Efficient bandwidth usage
- AR effects and virtual avatars
- Cloud and edge processing
- Integration with NVIDIA GPUs
Pros:
- Reduces local device processing demands
- Useful for conferencing, gaming, and streaming applications
- Improves video and audio quality in real-time
- APIs and SDKs enable easy integration
- AI-based compression minimizes bandwidth usage
Cons:
- Requires NVIDIA Hardware
- Cloud reliance and integration complexity
- Limited free access
Top Products:
- Maxine Video SDK: Enhances video quality using AI-driven super-resolution, denoising, and upscaling
- Maxine Audio SDK: Features AI-powered noise suppression, echo cancellation, and speech clarity enhancements
- Maxine AR SDK: Provides face tracking, gesture recognition, and avatar-based interactions
- Maxine Live Streaming SDK: Optimizes bandwidth efficiency while maintaining high video quality
Pricing:
NVIDIA Maxine’s pricing is not publicly listed. Developers and businesses can contact NVIDIA for licensing options and enterprise pricing. Some features may require an NVIDIA developer account and access to NVIDIA AI Enterprise services. For up-to-date pricing details, visit the official page.
Best Use Case:
NVIDIA Maxine is ideal for companies and developers looking to integrate AI-powered video and audio enhancements into applications. It is particularly useful for video conferencing platforms to enhance the communication quality with AI-driven features. It helps to reduce bandwidth usage and improve video resolution in real-time. AI-powered avatars and interactive video communication are enabled for customer support.
9. LiveU 360° AI Studio
LiveU 360° is an all-inclusive live video subscription service designed to meet the evolving needs of content creators, broadcasters, and organizations seeking comprehensive live video solutions. Launched by LiveU, a leader in live video streaming and remote production solutions, LiveU 360° offers a unified platform. It is known to integrate hardware, software, and cloud services to facilitate seamless live video production and distribution.
Basic Functionality:
LiveU 360° provides users with a complete ecosystem for live video production. LiveU Studio is a cloud-native live video production platform that supports live switching, audio mixing, graphics overlays, remote guest management, and multi-destination streaming directly from a web browser. You can access LiveU’s portable IP video encoders, such as the LU300S and LU800, enabling high-quality video capture and transmission from any location.
Key Features:
- Supports production of small-scale events to large broadcasts
- End-to-end solutions that combine software, hardware, and cloud services
- Remote production reduces the need for on-site personnel and equipment
- Possibility for multi-platform distribution and expanding audience reach
Pros:
- Accommodates different production needs and budgets through various subscription options
- Comprehensive integration that simplifies the live production workflow
- Provides professional-grade tools suitable for high-quality live productions
Cons:
- Advanced features may necessitate a period of adaptation for new users
- Specific pricing details are not readily available
Top Products:
- LU300S: A compact, reliable field unit offering high-quality video transmission for on-the-go broadcasting.
- LU800: A multi-camera production-level field unit designed for complex live productions, supporting up to four fully synchronized feeds.
- LiveU Studio: A cloud-native platform for live video production, enabling functionalities such as live switching, audio mixing, and graphics integration
Pricing:
LiveU 360° offers flexible subscription plans, including Pay-As-You-Go options, to cater to various production budgets. Specific pricing details are not publicly disclosed and can be obtained by contacting LiveU directly.
Best Use Case:
LiveU 360° is ideal for broadcasters, media organizations, event producers, and content creators seeking a comprehensive, scalable, and flexible solution for live video production and streaming. Its integrated approach is particularly beneficial for remote productions and scenarios requiring multi-platform distribution.
Enhanced RTMP: What It Is and Why It Matters in 2026
Enhanced RTMP, sometimes called RTMP 2.0, is an extended version of the RTMP specification that adds support for modern video codecs and production features that the original standard never anticipated. Where standard RTMP supports H.264 video and AAC audio, Enhanced RTMP adds:
- HEVC (H.265) and AV1 video codec output, enabling lower bandwidth at equivalent quality
- HDR (High Dynamic Range) metadata passthrough
- Multi-track audio
- Enriched stream metadata for monitoring and analytics
In practice, this means that if you are using OBS Studio 30 or newer, or vMix 28 or newer, you can now push an HEVC or AV1 stream to platforms that support Enhanced RTMP ingest — reducing your required upload bandwidth by 30-50% compared to H.264 at the same visual quality. This is particularly valuable for 4K streaming, remote event coverage over 5G, and any workflow where bandwidth is constrained.
Standard RTMP (H.264 + AAC) remains the right default for most broadcasters in 2026. It is universally compatible and requires no special platform support. Switch to Enhanced RTMP when you need HEVC or AV1 output and your platform confirms support. Verify Dacast’s current Enhanced RTMP support status on the Dacast latest features page before configuring.
Factors to Consider When Choosing an RTMP Encoder
Choosing the right RTMP live encoder depends on your specific needs, budget, and technical expertise. There are both software-based RTMP encoders and hardware RTMP streaming encoders, each with its own advantages.
Pricing
If you’re looking for a budget-friendly option, RTMP encoder software like OBS Studio is a powerful free choice. On the other hand, RTMP encoder hardware solutions, such as TriCaster or Teradek, offer advanced features but come at a higher price. If you manage large-scale productions or need RTMP live streaming with professional-grade quality, investing in high-end encoding hardware might be worth it.
Technical Knowledge
Technical knowledge also plays a crucial role in your choice of RTMP streaming encoder. Software-based options are generally easier to set up, but their complexity varies. Some encoders offer extensive plugins that simplify RTMP setup and enhance production quality, while others have a steeper learning curve. Additionally, the level of community support or customer service available can make a difference, especially if you’re new to RTMP live streaming and need guidance on how to use RTMP effectively.
Portability
Portability is another key factor to consider. Many RTMP encoding hardware solutions are bulky and best suited for studio-based setups. However, Teradek stands out as a lightweight RTMP broadcaster, making it ideal for those who need mobility. If you frequently stream from different locations, a software RTMP streaming encoder on a laptop or a compact hardware solution like Teradek may be the best fit.
System Requirements
It’s also important to check system requirements. Some RTMP encoding software supports all major operating systems, while others are platform-specific. Additionally, certain encoders require more processing power. For instance, Wirecast demands a higher-performance CPU and GPU compared to OBS Studio, which runs efficiently even on mid-range setups. If you plan to stream a live RTMP stream with multiple cameras or overlays, ensuring your system meets the necessary specifications is essential.
Production Complexity
Finally, consider the complexity of your production. If you manage large-scale broadcasts, a professional RTMP live encoder with advanced features may be necessary. However, for most users, RTMP streaming software like OBS Studio can handle even high-quality productions with the right configuration.
AI-Optimized Video Compression and Bandwidth Management
AI-based video encoding revolutionizes the way video content is compressed and delivered. Traditional encoding methods often struggle to balance quality and bandwidth efficiency, but AI-driven solutions, such as AV1 and HEVC (H.265), are now significantly reducing bandwidth costs while maintaining or even improving video quality. These AI-optimized codecs use machine learning algorithms to analyze video content in real time, applying more efficient compression techniques that reduce file sizes without compromising visual fidelity.
On the other hand, cloud-based transcoding services are also leveraging AI to enhance bandwidth management dynamically. These systems analyze network congestion and viewer conditions in real time, automatically adjusting the video bitrate and resolution to ensure smooth streaming without buffering. This adaptive AI-driven encoding is particularly beneficial for live streaming, where network conditions can fluctuate unpredictably. These technologies help content creators, broadcasters, and businesses to reduce operational costs by optimizing data flow.
We can expect greater efficiency in RTMP streaming, content delivery networks (CDNs), and cloud-based broadcasting solutions. AI-driven video compression and bandwidth management are set to redefine the future of streaming, making high-quality video accessible even in bandwidth-limited environments.
2026-Specific RTMP Trends and Forecasts
Moving forward in 2026, RTMP usage is undergoing notable shifts. While it has long been the standard for live video streaming, particularly for RTMP ingest and delivery to platforms like YouTube and Facebook, industry trends indicate a gradual evolution of the protocol.
RTMP’s role as the go-to streaming protocol is being challenged as newer protocols like SRT and HLS gain traction. These newer protocols address some of RTMP’s limitations, such as lower latency and enhanced reliability over unreliable networks.
However, RTMP is not going away entirely. Many legacy systems and platforms still rely on RTMP for real-time video streaming. The rise of more robust protocols does not necessarily mean RTMP will disappear, but it is evolving and will likely coexist with other protocols in the coming years.
Cloud-based streaming services are increasingly adopting multi-protocol delivery, allowing content creators and broadcasters to stream across multiple platforms and networks simultaneously. This means RTMP ingest is often converted and transcoded in real-time to other protocols, such as HLS, DASH, or SRT, for broader compatibility and delivery to various devices.
In 2026, the ability of cloud providers to seamlessly convert RTMP streams into other formats will become more refined. It will be easier for businesses and content creators to distribute their content without worrying about protocol compatibility.
Looking ahead to 2027, predictions suggest that SRT and HLS will increasingly take the lead in live streaming ingest, surpassing RTMP in many scenarios. While RTMP will still be relevant, especially for specific applications like low-latency broadcasts, SRT’s ability to handle poor network conditions with secure and reliable transport makes it a strong contender. Additionally, HLS’s flexibility and widespread support across modern browsers and devices are pushing it to the forefront for larger-scale video streaming.
The transition towards SRT and HLS is already evident in newer RTMP streaming encoders and video delivery networks, with HLS ingest already dominating in most OTT and broadcast environments. By 2026, RTMP ingest is expected to become less dominant for new streaming platforms and large-scale productions, though it will likely remain a staple in certain broadcast applications and smaller-scale live streams.
The Future of RTMP
RTMP continues to play a significant role, primarily due to RTMP ingest. This means that RTMP remains one of the most commonly used protocols for transporting video content from encoders to online video platforms. RTMP has established itself as the industry standard for live-streaming video, particularly for RTMP live stream ingestion. It remains the most popular choice for broadcasters when ingesting video content, although there are emerging alternatives that may eventually rival its position.
While HLS (HTTP Live Streaming) has surpassed RTMP for streaming, it has not yet reached the same level of popularity in terms of ingest. As a result, RTMP encoders still dominate the market and will continue to do so for the foreseeable future. However, HLS and other newer technologies present competition worth noting as they continue to develop and gain traction.
One reason for the limited availability of HLS-compatible encoders is that HLS ingest is relatively new compared to RTMP. Consequently, streamers using HLS ingest are more likely to encounter compatibility issues than those using RTMP ingest. Moreover, while HLS has become the go-to for streaming, it still faces significant challenges, particularly when it comes to latency.
RTMP maintains a competitive edge in terms of low latency, which is essential for real-time streaming. Although HLS has some latency issues, Apple has been working to address this with low-latency HLS (LL-HLS), which is an encouraging development in the space.
Despite the latency hurdles, HLS has proven itself as a powerful streaming protocol, and with Apple backing it, it’s expected to improve rapidly. As HLS-compatible encoders continue to evolve, we can expect them to play an increasingly important role in live streaming workflows.
RTMP Alternatives and Emerging Trends
Alongside HLS, several other protocols are gaining attention as potential RTMP alternatives, each offering unique advantages:
- Secure Reliable Transport (SRT): SRT is a growing alternative to RTMP, particularly because of its enhanced security, error correction, and reliability over unstable networks. SRT enables secure, low-latency streaming even over unreliable internet connections, making it an ideal choice for professional broadcasters and content creators working in challenging network environments.
- WebRTC (Web Real-Time Communication): WebRTC is another emerging protocol that is gaining traction, especially for applications that demand ultra-low latency, such as live auctions and real-time gaming. WebRTC is designed to support real-time, peer-to-peer communication with very low delays, which is why it’s quickly becoming the preferred choice for interactive, real-time applications.
- Low Latency HLS (LL-HLS): As an extension of HLS, LL-HLS has been developed to reduce latency, making it a strong candidate to replace traditional RTMP streaming in many use cases. LL-HLS improves the playback quality and latency, bringing it closer to real-time performance while maintaining the advantages of HLS’s widespread device compatibility.
AI-Powered Streaming Enhancements
The future of streaming is also being shaped by the integration of AI and machine learning technologies. Some key AI-driven advancements include AI-driven adaptive bitrate streaming. By dynamically adjusting the stream quality based on network conditions, AI-powered streaming ensures a smoother viewing experience. It reduces buffering and ensures consistent video quality, even during periods of poor network performance.
AI-powered real-time captions and translations are technologies that offer accessibility to a wider audience. They automatically generate captions and translations in real-time, enabling live streams to reach viewers who speak different languages or have hearing impairments.
Another key advancement is machine learning for content moderation. AI can automatically detect and filter inappropriate content in live streams. This makes it easier for platforms to maintain community standards without relying on manual intervention.
RTMP’s Role in Hybrid Streaming Workflows
Despite the rise of newer protocols, RTMP continues to play a crucial role in hybrid streaming workflows. Specifically, RTMP remains essential for first-mile delivery, where it is used to transport video content from encoders to streaming platforms. From there, cloud-based workflows typically convert RTMP streams into more scalable formats like HLS or DASH, ensuring compatibility with a wide range of devices.
As the demand for multi-platform streaming continues to grow, RTMP is often used alongside CDN-based multi-protocol streaming to support diverse device compatibility.
FAQs
1. What is an RTMP encoder?
An RTMP encoder is a device or software that converts live video and audio content into a digital stream using the Real-Time Messaging Protocol (RTMP). This process involves encoding the raw video signals from cameras or other sources into a compressed digital format for efficient, low-latency delivery to streaming platforms, content delivery networks (CDNs), or other online video platforms.
2. Is RTMP outdated?
While RTMP was originally developed for Adobe Flash more than two decades ago, it is still widely used today for certain types of live video transmission, particularly RTMP ingest. Although newer protocols like HLS (HTTP Live Streaming) and SRT (Secure Reliable Transport) have gained popularity due to their compatibility with modern devices and improved features, RTMP remains an essential protocol for live video ingestion in many workflows. Its ability to provide low-latency streaming makes it ideal for initial video delivery from encoders to video platforms, and many streaming services continue to rely on RTMP for this purpose.
3. How do I create an RTMP URL?
To get your RTMP URL and stream key in Dacast: (1) Log in to your Dacast account. (2) Click Live Channels in the left sidebar, then Create. (3) Enter a title and click the Encoder Setup tab. (4) Select your encoder type (or ‘Other RTMP Encoder’). (5) Copy the RTMP ingest URL and stream key shown. Paste these into your encoder’s stream settings. For platform-specific RTMP URL formats, your streaming platform will always provide the exact URL in the channel or stream settings area.
4. Is RTMP better than HLS?
RTMP and HLS each have their strengths, but they serve different purposes in live streaming. RTMP is historically known for its low-latency, making it ideal for live-streaming scenarios where real-time interaction is key (such as live events or gaming). However, HLS has become the dominant streaming protocol due to its broader compatibility with modern web browsers and mobile devices. While HLS provides higher reliability and adaptive bitrate streaming, it introduces higher latency. RTMP is still used for video ingestion to platforms, but for actual video delivery to end-users, HLS is typically the preferred choice due to its universal support.
5. What is an encoder in live streaming?
In simple terms, an encoder is a device or software that converts analog video signals into digital ones. This is done to enable the transmission of these signals from your server to a CDN from where your stream can then be sent to the viewers’ devices for playback. There’s a decoder on the viewers’ devices that can then convert the signals back into video.
Conclusion
Video encoding is an ever-evolving concept with many moving parts. Configuring an RTMP encoder requires several steps. However, as we’ve outlined, it doesn’t have to be confusing or complicated. Using our guide and the right tools, you can configure an RTMP encoder that’s perfect for creating high-quality live broadcasts your audience will enjoy.
Fortunately, end-to-end live streaming doesn’t have to be as complicated. With Dacast’s video platform solution, you can host professional live streams. With Dacast, you can host, monetize, and broadcast your content in the highest possible quality.
You can try Dacast and all its features free for 14 days starting today.
What’s been your experience with RTMP encoders? Let us know by leaving a comment below. We have experience with most kinds of live video streaming encoders, so we can probably help no matter what issues you’re experiencing. For exclusive offers and regular live-streaming tips, join our LinkedIn group.
Thanks for reading and happy streaming!