


Live Camera Streaming: How to Set Up a Live Camera Feed and Webcam Stream in 9 Steps (2026 Update)

Live camera streaming is only growing in 2026, and it’s become one of the most engaging ways to connect with an audience. Whether you’re hosting an event, sharing behind-the-scenes moments, or broadcasting 24/7 views, live streams bring a level of authenticity that pre-recorded content just can’t match. No surprise that more than half of marketers now consider it a key part of their strategy.
The live streaming market is expanding rapidly, with the U.S. live streaming industry projected to grow from $17 billion in 2022 to $55 billion by 2026. Digital streaming platforms now reach audiences in the millions, with average viewership surpassing 1 million in recent years.
This guide will walk you through the basics of setting up a live webcam stream, from picking the right equipment to choosing a reliable video hosting platform. Companies across industries are leveraging live camera streaming as a core part of their digital strategy. If you’re looking for a professional, secure way to stream, we’ll also show you how a platform like Dacast can make the process smoother, whether you’re new to streaming or ready to level up.
TL;DR: To set up a live camera feed / webcam stream, choose an online video platform (OVP), connect your camera (USB webcam, DSLR via capture card, or IP cam), confirm stable upload speed, configure your live channel + player embed, then test and go live. For pro results, add proper lighting/audio, secure the stream (password/geo/domain restrictions), and use WebRTC for ultra-low latency or RTMP for broad encoder compatibility. After the stream, review analytics, repurpose clips, and optimize titles/thumbnails for replay views.
Table of Contents:
- Why Use a Live Camera Feed? Use Cases + Mobile Streaming Tips
- Webcam Streaming Equipment Checklist (Camera, Mic, Lighting, Internet)
- How to Set Up a Live Camera Feed & Webcam Livestream (9-Step Guide)
- How to Improve Engagement on Live Camera Streams (Chat, Overlays, Polls)
- How to Monetize Live Webcam Streams (Ads, PPV, Subscriptions, Donations)
- Legal, Privacy, and Consent Rules for Live Camera Streaming
- Post-Stream Optimization: Analytics, Clips, Replays, and SEO
- AI Tools for Webcam Streaming (Captions, Noise Removal, Auto-Framing)
- WebRTC in 2026: Ultra-Low-Latency Streaming Without the Lag
- Edge Computing for Ultra-Low-Latency Live Camera Feeds
- Remote Control Streaming Setups (PTZ, 360°, Offsite Management)
- Energy-Efficient 24/7 Streaming Hardware (Low-Power, Solar, Fanless)
- Live Camera Streaming Use Cases in 2026 (Work, Learning, Support)
- FAQs: Live Camera Feed and Webcam Streaming Setup
- Conclusion : Launch Your Live Camera Feed with a Pro Platform
Why Use a Live Camera Feed? Use Cases + Mobile Streaming Tips
A live webcam feed gives you the power to connect with your audience in real time, offering a window into a specific place, activity, or event. Live camera streaming delivers live content as it is created, which sets it apart from pre-recorded content by allowing viewers to experience events as they happen.
Whether you’re sharing natural landscapes, public spaces, creative projects, or connecting people in houses of worship and homes, a live stream from a webcam helps engage viewers with immersive, always-on content. Live streaming fosters instant connections between audiences and events, enabling real-time interaction and engagement.
Unlike traditional cameras that often require encoding hardware, most webcams are digital and can capture and stream content directly. This makes the setup simpler and more accessible for both beginners and professionals. And for even greater flexibility, mobile devices can double as portable live-streaming tools, with a few smart precautions.
Let’s explore the most common use cases for webcam feeds and how to enhance them with mobile streaming when needed.
Nature Cams and Outdoor Landscapes
One of the most popular uses of a webcam stream is to share stunning outdoor environments. From mountain vistas to beach scenes to wildlife habitats, these feeds let viewers experience the natural world from anywhere.
Mobile Tips
Mobile devices make it easier to stream from remote or rugged locations. For best results:
- Use a tripod or gimbal to stabilize the footage.
- Conserve battery life with a portable charger and lower screen brightness.
- Weatherproof your device and ensure a stable 4G/5G or WiFi connection before going live.
City Cams and Public Spaces
City-based webcam streams offer a constant view of landmarks, intersections, or cultural events, often used for tourism, monitoring, or entertainment. These feeds give viewers a real-time feel of the city’s energy.
Mobile Tips
If you’re walking through busy streets or capturing movement:
- Gimbals can smooth out shaky footage during walking tours.
- Stream over a strong 4G/5G connection, but always run a speed test to verify upload speeds.
- Reduce stream resolution to 720p if data usage is a concern.
Animal Cams: Zoos, Aquariums, and Pet Streams
Livestreaming animals is a fan favorite. Whether it’s a penguin cam at an aquarium or a livestream of your pet rabbit, these streams create delightful, ongoing engagement.
These setups are usually stationary and indoors, making them perfect for traditional broadcast webcam hardware. However, mobile devices are handy for quick behind-the-scenes views or temporary enclosures.
Mobile Tips
Use mobile apps like Streamlabs Mobile or Larix Broadcaster to go live directly from your phone. Just make sure you stabilize the shot and monitor your phone’s battery if streaming for long periods.
Creative Studios and Live Demonstrations
Artists, musicians, chefs, and makers of all kinds can use webcams to showcase their craft. Whether it’s glassblowing, painting, or baking, real-time demonstrations bring your process to life and attract an engaged audience.
Mobile Tips
A mobile setup offers flexibility to move around the space or capture alternate angles. Use a portable tripod or overhead mount, and choose a streaming app that lets you add overlays or adjust quality on the fly.
Educational or Private Feeds (Schools, Daycares, Facilities)
Live webcam feeds aren’t just for public audiences. Many institutions use them for private streaming, such as schools and daycare centers, providing parents with secure, real-time access to their children’s environment.
These feeds are usually fixed and indoors, but mobile setups may be helpful during events or emergencies.
Mobile Tips
When privacy is essential, choose a mobile app that supports encrypted RTMP streaming. Always secure the stream with password protection or limited access links, especially when involving children or private spaces.
Webcam Streaming Equipment Checklist (Camera, Mic, Lighting, Internet)
A camera records raw video and audio, which is then processed by an encoder—technology that compresses this data into smaller digital packets using codecs for efficient live camera streaming.
Getting started with live webcam streaming doesn’t require high-end gear, but a few well-chosen tools can drastically improve your stream’s quality. Below is a checklist of essential equipment, complete with tiered recommendations based on your budget and goals.
Basic Equipment Checklist
- Camera: Built-in laptop/phone camera or external webcam
- Microphone: External USB/XLR mic for clearer audio
- Lighting: Ring light or LED panel (natural light if indoors)
- Tripod/Mount: Keeps the camera stable and positioned correctly
- Internet Connection: Minimum 5 Mbps upload speed
- Streaming Platform: An online video platform for streaming packed with secure delivery, analytics, and monetization tools, like Dacast.
Camera Recommendations
Below, we provide you with camera recommendations you can use for your live stream.
1. Entry-Level
- Logitech C920: Affordable and reliable, offering 1080p video quality.
- Microsoft LifeCam HD-3000: A budget-friendly option for basic streaming needs.
2. Mid-Range
- Razer Kiyo: Features built-in adjustable ring lighting, ideal for dim environments.
- Elgato Facecam: Optimized for streaming with excellent color accuracy and 1080p at 60fps.
3. Professional
- Sony Alpha a6100 (paired with a capture card like Elgato Cam Link 4K): Exceptional image quality with the flexibility of interchangeable lenses.
- Logitech BRIO Ultra HD: Supports 4K streaming and HDR for professional-grade quality.
Microphone Recommendations
Now, let’s take a look at some microphone recommendations you can find useful.
1. Entry-Level
- FIFINE K669B USB Microphone: Plug-and-play USB connection, a cardioid pickup pattern, and a compact design.
- Samson Go Mic Portable USB Microphone: Ultra-portable, dual pickup patterns (cardioid and omnidirectional), and plug-and-play compatibility.
2. Mid-Range
- Blue Yeti USB Microphone: Multiple polar patterns (cardioid, omnidirectional, bidirectional, stereo), onboard gain control, and high-quality sound capture
- Rode NT-USB Mini Microphone: Compact size, built-in pop filter, and USB connectivity.
3. Professional
- Shure MV7 USB/XLR Microphone: USB and XLR connectivity, touch panel controls, and excellent noise rejection
- Audio-Technica AT2020 XLR Microphone: High SPL handling, excellent sound quality, and robust build.
Lighting Recommendations
Here are several lighting recommendations to help you with the selection.
1. Entry-Level
- Neewer Ring Light Kit: Affordable and easy to set up for consistent lighting.
- Desk Lamps with Adjustable Brightness: Paired with natural light for basic streams.
2. Mid-Range
- Elgato Key Light Air: Compact and adjustable, perfect for streaming setups.
- GVM LED Light Panels: Offer great customization for color and brightness.
3. Professional
- Aputure LS C300D II: High-end lighting with exceptional power and control.
- Godox VL150: A professional-grade light for cinematic results.
Audio Tips for Clearer Sound
- Avoid using your webcam’s built-in mic unless necessary.
- Use a directional or cardioid mic to reduce background noise.
- For outdoor streams, consider a windshield or lapel mic.
- Always test your audio levels before going live.
Lighting & Setup Best Practices
- Use a three-point lighting setup if possible for professional results.
- Natural light + ring light is a good budget combo.
- Adjust lighting throughout the day if you’re doing long or 24/7 streams.
- Mount your webcam securely on a tripod or clip to avoid shaking.
- Run a speed test before going live to verify upload bandwidth.
How to Set Up a Live Camera Feed & Webcam Livestream (9-Step Guide)
Let’s browse through the steps on how to set up a live webcam feed by yourself.
1. Choose an Online Video Platform
Your streaming platform is the backbone of your live broadcast. Leading social media platforms like YouTube Live, Twitch, Facebook Live, and Instagram Live are popular choices for live camera streaming, offering broad audience reach and engagement. The right online video platform (OVP) ensures stability, high-quality playback, and features tailored to your streaming goals. Partnerships between platforms, creators, and companies play a key role in expanding features and reach within the live streaming industry. In 2026, Twitch, YouTube Live, and TikTok Live are the dominant platforms in the live streaming landscape.
Why the Right OVP Matters?
The platform you choose affects everything, from stream quality to viewer engagement. For long-running webcam feeds or continuous live cams, you’ll need a platform that supports:
- Uninterrupted 24/7 streaming
- Web browser-based broadcasting (WebRTC)
This lets you stream directly from your browser without downloading extra software, which is perfect for quick, accessible setups.
With Dacast, you can launch a stream right from your browser. Just log in, choose the “live stream” option, configure your camera and audio, and you’re ready to go.
Must-Have OVP Features
The best webcam live streaming platform for business or other purposes should include these key features:
- HTML5 video player – universal compatibility and mobile-friendly
- User-friendly dashboard – simple to set up, even for beginners
- Powerful video CMS – organize and manage your content easily
- Privacy & security tools – control access and protect your content
- API access – for developers and advanced stream customization
- White-label streaming – keep your own branding front and center
- 24/7 tech support – get help when you need it
CDN and Global Reach
A high-performance content delivery network (CDN) is also critical. It ensures smooth playback for viewers around the world and prevents server overload or buffering.
Dacast uses trusted CDN partners such as Akamai to deliver videos quickly and reliably across the globe.
Want to Compare Platforms?
If you’re exploring your options, check out our comparison guide to see how Dacast stacks up. And with a free 14-day trial, you can test it yourself before committing.
To give you a better overview of the best platforms in 2026, below you will find a comparison table that highlights their best features.
| Feature | Dacast | OBS Studio | Streamlabs | Twitch Studio |
| Ease of Use | Moderate to advanced, requires setup knowledge. | Moderate learning curve; ideal for advanced users. | User-friendly interface with pre-made overlays. | Beginner-friendly, tailored for Twitch streamers. |
| Compatibility with webcams | Compatible but requires integration during setup. | Fully compatible with most webcams (plug-and-play). | Fully compatible with webcam integration and overlays. | Designed for easy webcam integration. |
| Customizability | Limited: Primarily for hosting and streaming content. | High: Supports plugins, advanced settings, and scripting. | High: Built-in overlays, alerts, and widgets. | Moderate: Limited customization but optimized for Twitch. |
| Streaming platforms | Multi-platform with a focus on professional hosting. | Supports streaming to all major platforms (Twitch, YouTube, Facebook, etc.). | Supports multiple platforms with premium options. | Exclusive to Twitch. |
| Pricing | Pricing starts at $39/month (for basic plans). | Free and open-source | Free (basic); premium plans starting at $19/month. | Free |
| Advanced Features | Advanced hosting, analytics, and password protection. | Scene transitions, virtual camera, audio mixer. | Integrated alerts, donations, cloud backup. | Optimized Twitch overlays, chat integration. |
| Target Audience | Businesses, professionals, and educators. | Advanced users, professionals, and developers. | Intermediate users and creators seeking polished streams. | Beginner streamers on Twitch. |
| Support/ Documentation | Premium customer support and detailed guides. | Extensive community and documentation. | Comprehensive tutorials and customer support. | Simplified guides for beginners. |
| Ideal Use Case | Professional live events, webinars, and pay-per-view. | Complex setups with multiple cameras, scenes, and custom configurations. | Polished gaming streams, monetization, and branding. | Easy-to-start Twitch streams for new creators. |
2. Learn How to Set Up a Live Webcam
So, what do you need to live stream with a webcam? The requirements and the whole process are simpler than they sound. Whether you’re streaming from indoors or outdoors, the key steps remain the same: choose your camera, prepare your setup, and connect to your streaming platform.
Indoor Webcam Setup
Streaming video from a USB camera or built-in laptop cameras is often sufficient for indoor settings, especially for casual or entry-level use. If you’re aiming for a more polished look, consider upgrading to a professional DSLR or mirrorless camera paired with a capture card like the Elgato Cam Link 4K.
You may also want to enhance your stream’s audio with an external microphone, though it’s not always necessary, especially for silent surveillance-style feeds.
Outdoor Webcam Setup
So, how to live stream an outdoor webcam? Outdoor streaming setups often use IP cameras or security cams, which offer flexible positioning and durability in various weather conditions. Setting these up typically involves configuring the IP camera to work with your online video platform (OVP). If you’re using Dacast, our IP camera streaming guide walks you through everything you need to know about how to set up a live outdoor webcam.
When selecting outdoor cameras, make sure they’re:
- Compatible with your streaming platform
- Supported by your operating system
- Properly weatherproofed and securely mounted for 24/7 stability
Connect to a Streaming Platform
Once your camera is in place, you’ll need to connect it to a broadcasting platform. This usually involves selecting your video source (e.g., webcam, capture card, or IP feed) and linking it to your chosen platform.
If you’re using Dacast:
- Log in to your account and create a live channel
- Add your video source as a stream input
- Choose settings such as resolution and bitrate
- Start streaming directly through the platform or via an encoder
- For 24/7 or unattended streams, ensure your camera and equipment are stable, securely powered, and protected from the elements.
3. Secure an Internet Connection
The live-streaming industry is very competitive, which is why a stable and reliable internet connection is crucial. A poor connection can result in buffering, blackouts, or blank screens, which are some of the worst experiences for your viewers.
Here are the best internet connection options for live streaming:
- Tethered Ethernet: The gold standard for reliability, offering consistent speed and minimal disruptions.
- WiFi: Convenient and effective, assuming you have a strong and stable signal.
- 5G Wireless Internet: A great choice for mobile or remote streaming when wired connections aren’t available.
How Much Upload Speed Do You Need?
Your upload speed should ideally be at least twice the bitrate you plan to stream with. This gives your stream breathing room and helps avoid instability, especially during spikes in activity. For example:
- If your upload speed is 1,000 kbps, aim for a stream bitrate between 500 and 800 kbps.
- You can use up to 80% of your upload capacity, but staying closer to 50% is a safer bet for smooth streaming.
You can easily check your upload speed by typing “speed test” into Google and running the built-in tool right from the search results.
Tip: If you’re broadcasting from a remote location without Ethernet or strong WiFi, check out our remote streaming guide for solutions to keep your stream stable no matter where you are.
4. Set Up a Live Channel
Once your internet and equipment are ready, it’s time to set up your live channel. This process will vary depending on your online video platform. If you’re streaming on Dacast, you can refer to our detailed live stream setup guide, which includes step-by-step instructions and images.
No matter which streaming platform you use, you’ll be prompted to configure your live channel. This typically involves naming your live channel, adding a description, and ensuring it is set to “Online” to be ready for streaming.
Here are some tips for writing an effective channel description that will help viewers understand what your channel is about and improve its visibility in search engine results.
1. Complete Keyword Research
Conduct thorough keyword research to understand what your target audience is searching for. Identify trending keywords in your industry with high search potential and incorporate them in your live broadcast’s description. This will improve the chances of your stream showing up in relevant search feeds. Use these keywords when promoting your broadcast to help boost its ranking.
2. Be Specific:
In the digital world, niche content is king. Focus on specific keywords that align with the content you’re streaming. Long-tail keywords can help you attract a more targeted audience. The more specific you are, the better you can reach viewers in your particular niche
3. Include a Value Proposition:
Clearly explain why your content is valuable. Treat your live stream like a product—sell the benefits. What will your viewers learn or gain from your broadcast? How will your content add value to their lives? Answer these questions in your description to drive more interest and engagement.
4. Focus on the Top 150 Characters:
Keep in mind that viewers tend to have short attention spans, so the first 100-150 characters of your description are crucial. These are the characters that will appear in search results and previews, so make sure they succinctly describe your channel and what it offers.
5. Add a Call to Action:
A well-crafted CTA can guide your viewers to take the next step. Whether you want them to visit your blog, purchase a product, or follow you on social media, include a CTA that aligns with your goals. Make it clear and actionable to maximize engagement.
5. Embed Your Video Player
Once your live channel is set up, the next step is to embed your HTML5 video player for easy viewing on your website or app. When your live channel is active, you can generate an embed code and share a link. The embed code allows you to integrate your video player into your site or application.
There are two types of embed codes available:
1. JS Embed Code:
We recommend using the JS embed code because it’s more universally compatible, especially with the full-screen feature. It is also required for the URL referral restriction feature, which limits content access to specific websites.
2. iframe Embed Code:
The iframe embed code is compatible with various platforms, including WordPress and WIX. While the JS code is generally more versatile, the iframe code may be necessary in certain situations.
Once you’ve chosen your preferred embed code, simply copy and paste it into the HTML of your website or app. For more detailed instructions on embedding, check out our video player embedding tutorial.
With this step, you’re ready to go live with your webcam stream.
6. Promote Your Live Stream
Once your live webcam broadcasting setup is ready to go, don’t let your stream sit in silence – get the word out. Promotion plays a big role in building your audience and ensuring people actually show up. Here are some of the most effective ways to get eyes on your stream in 2026:
- Stick to a schedule: Random streams can be fun, but scheduled ones consistently perform better. When your audience knows exactly when you’ll be live, they’re more likely to show up, especially since most streams aren’t available on demand. Don’t forget to enable “Notify Me” features on your streaming platform so viewers can set reminders.
- Leverage Meta’s ecosystem: Facebook is still powerful for reach, but don’t stop there. Promote your stream on Instagram Stories or even Threads if you’ve built a following there. And if your stream fits, simulcast to Facebook Live for broader exposure without asking viewers to switch platforms.
- Post on X (formerly Twitter): X remains a valuable tool for real-time updates. Share your stream link with targeted hashtags and consider creating a unique hashtag for your channel or series. This makes it easier for viewers to find and share your content, especially during live Q&A or chat sessions.
- Use short-form platforms: Repurpose snippets from your live stream into TikToks, YouTube Shorts, or Instagram Reels. A 30-second teaser with a hook can go a long way toward driving new traffic to your full broadcast.
- Design a compelling thumbnail: Your thumbnail is often your first impression. Use a striking image, bold text, and a clear message about what your stream is about. AI tools can help generate quick variations if you’re testing multiple styles.
- Tap into your communities: Whether it’s Discord, WhatsApp, Telegram, or Slack, share your stream with digital groups that care about your topic. Include the date, time, link, and a quick sentence on why they should care. Don’t forget to pin or highlight the message when possible.
- Consider email or calendar reminders: If you have a newsletter list or an active LinkedIn following, let your audience know ahead of time. You can even set up events on LinkedIn or invite users directly to add your stream to their calendar.
Need more tips? Check out our post on increasing live viewership by 800% and getting more people to watch your stream.
7. Test Your Webcam Setup
Before going live for real, it’s crucial to do a thorough test run to catch any hiccups early and make sure everything runs smoothly.
- Match your test to your stream schedule: If your live stream is only for a few hours, test at the same time of day to replicate lighting and environmental conditions. Keep a ring light or other lighting tools handy to address any issues.
- For 24/7 streams, go big: A continuous broadcast demands a longer, more comprehensive test. Run your stream for 24 hours straight and check in regularly to monitor video and audio quality, ensuring nothing slips through the cracks.
- Check lighting and sound: Pay close attention to how your lighting holds up and how clear your audio sounds. Adjust as needed since lighting can change dramatically throughout the day, especially with natural light.
- Test your internet connection: Run speed tests during your trial and, if possible, set up a backup internet source to keep your stream live if your primary connection falters.
- Identify and fix weak points: Use the test to find any equipment or setup issues. Decide if a quick fix or a full replacement is the best way to avoid problems during your actual stream.
A solid test run not only boosts your confidence but also saves you from frustrating interruptions when your viewers are watching.
8. Start Streaming
Once everything is set and tested, the hard work is done. It’s time to start streaming. On most live streaming platforms, you simply need to click “Start Streaming” to go live.
If you run into any issues getting started, double-check your setup and configurations to ensure everything is properly in place. Once everything is good to go, enjoy broadcasting your live stream.
9. Troubleshooting Common Issues and Solutions
Even with the best preparation, live streaming can sometimes present technical challenges. Here are some common issues you might face and address to ensure a high-quality and professional live-streaming experience for your audience. We also provide practical solutions to resolve them quickly.
Blurry Video
Blurry video can ruin the viewing experience for your audience, but it’s usually easy to fix.
- Check Your Lighting: Poor lighting can significantly affect video clarity. Ensure your streaming area is well-lit with natural light, or use artificial lighting, such as ring lights or softboxes, for consistent brightness.
- Adjust Camera Resolution Settings: Many webcams or cameras automatically lower resolution in certain conditions to save bandwidth. Check your camera settings to ensure you’re streaming in HD or the highest resolution supported by your camera and platform.
Audio Issues
Audio is a key component of live streaming, and poor sound quality can drive viewers away. Here’s how to address common audio problems:
- Ensure the Correct Microphone Input Is Selected: Verify that your streaming software or platform is using the right microphone input. Many systems default to built-in microphones, which may deliver subpar audio quality. Select your external microphone in the input settings for better sound.
- Eliminate Background Noise: If you’re streaming in a noisy environment, use noise suppression software like Krisp to filter out unwanted sounds. Alternatively, invest in a noise-canceling microphone for more professional audio quality.
Lag or Buffering
Lag or buffering can disrupt your livestream and frustrate viewers. Here are some steps to improve streaming performance:
- Use a Wired Internet Connection: Ethernet connections are more reliable than Wi-Fi and offer greater stability for live streaming. If possible, connect your setup directly to the router.
- Adjust Bitrate Settings: High bitrate settings can cause lag if your internet connection cannot handle the bandwidth. Lower the bitrate slightly in your streaming software to match your upload speed. For example, if your connection supports 3 Mbps upload, set your bitrate to around 2 Mbps for a smooth stream.
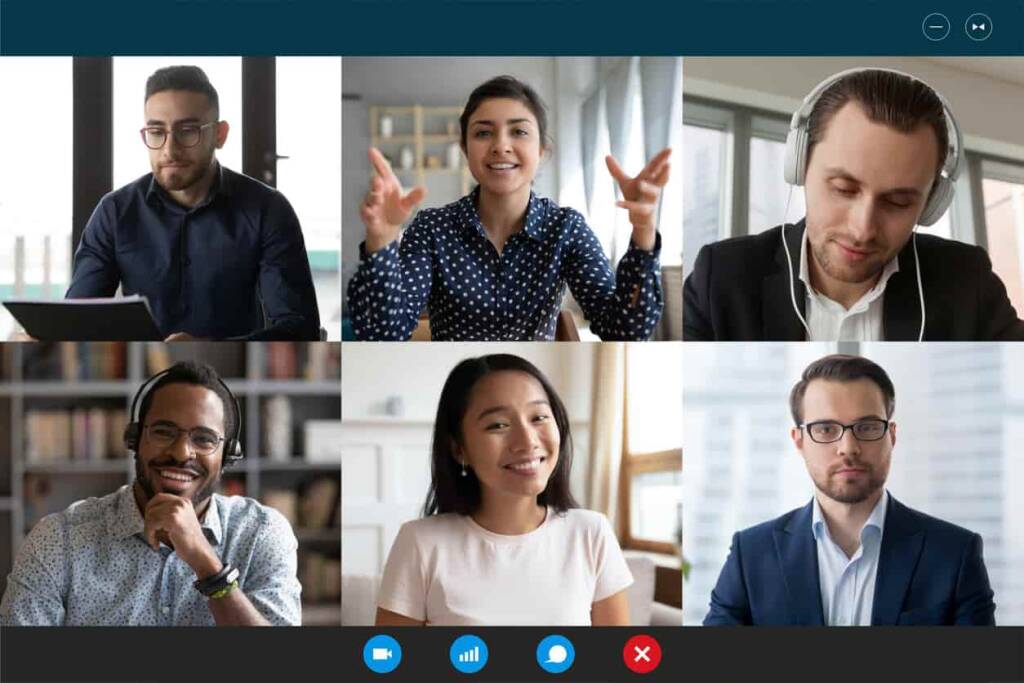
How to Improve Engagement on Live Camera Streams (Chat, Overlays, Polls)
Enhancing viewer interaction is a key element of a successful live stream. Live media can include coverage of events like concerts or live news, which viewers can watch using a web browser or apps. Advanced engagement features keep your audience entertained and help build a loyal community around your content. We provide some tools and tips to boost viewer engagement during your live streams.
- Invite guests to join your live stream for interviews or collaborations, adding new perspectives and increasing interactivity.
- Use lower thirds to display branded elements, names, or important information on the stream, enhancing professionalism and brand recognition.
- Enable viewers to share their reactions during the broadcast, such as emojis or overlay responses, to foster real-time interaction.
- Loop recorded videos or segments during your live stream to maintain constant viewer engagement and fill gaps between live content.
1. Live Chat Integration and Moderation
- Enable Interactive Chat: Most major platforms like Twitch, YouTube Live, Facebook Live, Kick, and Dacast (integrated with RumbleTalk) support real-time chat, allowing viewers to connect with you and one another.
- Moderate with Automation: Keep the chat positive using built-in filters and moderation bots like Nightbot, StreamElements, or AutoMod AI (for Twitch). Assign trusted community members as moderators.
- Be Present in Chat: Take time to respond directly to comments or questions on-stream. It makes the experience personal and shows viewers they’re valued.
2. On-Screen Alerts & Overlays
- Use Dynamic Overlays: Tools like Streamlabs, StreamElements, or OBS.Live, let you add alerts for tips, new followers, or subscribers. These create excitement and reward viewer participation.
- Customize Your Look: Design overlays to match your branding with colors, fonts, and logos to maintain a professional and recognizable appearance.
- AI-Driven Alerts: In 2026, some overlays now respond contextually (e.g., cheering when a milestone is hit). Consider experimenting with these for added flair.
3. Polls, Q&As, and Interactive Segments
- Run Live Polls: Use built-in poll tools or third-party apps like Slido, Streamlabs Polls, or even Twitch Extensions to gather viewer opinions on topics, game choices, or future content.
- Host Live Q&As: Schedule Q&A sessions and gather questions via tools like Chatbot collectors or Google Forms, so you can answer them on stream in a structured way.
4. Gamify Viewer Interaction
- Incorporate Loyalty Programs: Many platforms let you implement loyalty systems where viewers earn points for watching your stream. These points can be redeemed for perks like shoutouts or special content. Tools like Streamlabs Loyalty or StreamElements Points make this easy to set up.
- Use Interactive Widgets: Features like spin-the-wheel widgets or mini-games can encourage viewers to interact with your stream and stay longer.
5. Promote Engagement Outside the Stream
- Social Media Strategy: Promote your streams on X (formerly Twitter), Instagram, and TikTok. Use interactive posts, countdowns, and polls to build hype.
- Build a Community Hub: Platforms like Discord or Guilded are perfect for ongoing interaction, sneak peeks, or just hanging out with fans between broadcasts.
- Multistream for Reach: Use tools like Dacast to simultaneously stream to multiple platforms and maximize visibility.
6. Making Streams Accessible for Inclusivity
- Captions & Transcripts: Use auto-captioning tools powered by AI, like YouTube Live’s captions, Otter.ai, or Dacast’s closed captioning, to support viewers who are deaf or hard of hearing. Provide downloadable transcripts for post-stream access.
- Sign Language Interpretation: For high-accessibility content, include a live interpreter on-screen. This is especially useful for webinars or official events.
- Language Support: Consider real-time translation tools or multilingual chat mods to accommodate a global audience.
How to Monetize Live Webcam Streams (Ads, PPV, Subscriptions, Donations)
Live webcam streaming is a great way to share content with your audience and an excellent opportunity to generate income. Many businesses and creators now use live camera streaming to create online store experiences, integrating live commerce features that allow viewers to shop and interact with products in real time, similar to an in-store environment. Whether you’re streaming for a hobby or building a professional channel, choosing the right monetization strategies can turn your broadcasts into a sustainable income stream. Livestreaming has also become a financially viable market, especially in sectors like esports, where significant revenue is generated through sponsorships, advertising, and fan engagement.
1. Integrate Ads and Sponsorships
One of the most straightforward ways to monetize your livestream is by partnering with brands and running ads.
- Ad Insertion: Platforms like Dacast support VAST ad integration, enabling you to run pre-roll, mid-roll, or post-roll video ads within your stream, which is ideal for monetizing high-traffic broadcasts.
- Brand Sponsorships: Partner with companies that align with your niche. For example, if you run a nature webcam, collaborate with outdoor gear brands, and offer on-stream shout-outs or branded overlays.
Dacast’s white-label player allows you to maintain control over your branding while inserting sponsorship banners or visuals directly into the stream.
2. Offer Pay-Per-View Live Streams or Memberships
Exclusive content can be a powerful way to monetize your live webcam streams:
- Pay-Per-View (PPV): Use a platform like Dacast, which offers a secure paywall and built-in monetization tools to charge viewers for special events like virtual tours, concerts, or educational live sessions.
- Subscription Models: With Dacast, you can also create recurring subscriptions, granting subscribers access to exclusive webcam feeds or bonus content. Alternatively, platforms like Vimeo OTT or YouTube Memberships offer similar functionality.
Offering tiered pricing allows you to cater to both casual viewers and devoted fans.
3. Accept Donations from Viewers
Many viewers are willing to support their favorite creators through donations. Make it easy for them to contribute:
- Patreon: Set up a Patreon account to offer various perks in exchange for monthly contributions. This is ideal for building a community of supporters who appreciate your work.
- Buy Me a Coffee: A simple and user-friendly platform where viewers can send one-time donations to support their streaming efforts.
- Twitch or YouTube Donations: Use popular platforms’ built-in donation tools. For example, YouTube’s “Super Chat” feature allows viewers to pay to highlight their messages during a live stream.
Though Dacast doesn’t offer native tipping, you can embed donation buttons on your website or landing page alongside the Dacast player.
4. Sell Merchandise and Digital Products
If your brand has a following, consider offering tangible or downloadable goods.
- Branded Merchandise: Platforms like Teespring, Printful, or Redbubble let you sell custom t-shirts, mugs, or stickers without upfront inventory costs.
- Digital Downloads: Offer eBooks, exclusive video replays, photo packs, or guided content that complements your webcam stream. These can be sold through Gumroad or integrated into a Dacast paywall for exclusive access.
Legal, Privacy, and Consent Rules for Live Camera Streaming
Before you go live, take a moment to address some essential legal and privacy matters. Failing to do so could result in more than just bad press – in some cases, it could lead to fines or legal action.
Here are a few best practices to keep in mind:
- Get Consent: If you’re filming in public or private spaces where people are identifiable, clearly notify them with signs or disclaimers. When featuring individuals directly, consider using release forms.
- Mind Privacy Laws: Regulations like GDPR (in the EU) and similar privacy laws elsewhere require you to inform users how you collect and use their data, get consent, and give people the ability to opt out or delete their info.
- Use Disclaimers: For 24/7 or public live cams, explain the stream’s purpose and make viewers aware that footage may be recorded.
- Avoid Copyright Violations: Use royalty-free media and avoid broadcasting copyrighted logos, music, or third-party visuals without permission.
- Secure Your Stream: Features like password protection, geofencing, and watermarking can help protect your content from unauthorized use.
- Be Ethical: Don’t stream in sensitive areas (e.g., hospitals or private homes) without proper consent. Transparency builds trust.
Live streaming laws vary by country and region. When in doubt, consult a legal expert familiar with your location and streaming use case.
Post-Stream Optimization: Analytics, Clips, Replays, and SEO
Your livestream may be over, but your work isn’t. What you do next can dramatically improve future broadcasts and extend the life of your content. Here’s how to make the most of your post-stream phase:
You can record your live streams and, with just a few clicks, download them for later use or repurposing. Platforms like OneStream Live allow users to record and download their live streams for later use. Additionally, you can export audio from your live streams to create podcasts, helping you reach a broader audience and maximize the value of your content.
1. Review Stream Analytics
Start with the data your streaming platform provides. Whether you use Dacast, YouTube, or another provider, look for metrics such as:
- Total viewers
- Peak live viewers
- Average watch time
- Drop-off points
- Chat or comment activity
These numbers help you understand what worked, what didn’t, and where you lost your audience. Use this data to improve your pacing, segment structure, and content relevance next time.
2. Repurpose the Content
Don’t let your stream gather digital dust. Re-edit your livestream into:
- Short clips or highlight reels
- Tutorial snippets
- Behind-the-scenes or blooper moments
These are perfect for platforms like Instagram Reels, TikTok, and YouTube Shorts, and can drive traffic back to your channel or main site.
3. Share the Full Replay
Make sure the entire stream is accessible to those who couldn’t join live. Upload the full video to your streaming platform, embed it on your website, or email it to your subscribers. A clear title and timestamped chapters make it easier to navigate.
4. Create a Highlight Reel
Edit together the most exciting, insightful, or entertaining parts of your stream into a 1–3 minute recap. Use it to promote your brand or future streams. These are also great for use in paid ads or social media teasers.
5. Clip & Reuse Quotes or Moments
If your livestream had standout quotes, customer testimonials, or product demos, turn them into standalone assets with captions and eye-catching thumbnails. Use titles like “This One Tip Changed Everything” or “What Most People Get Wrong About [Topic]”
6. Ask for Viewer Feedback
Shortly after the stream, post a quick poll or question on social media or via email asking viewers:
- What did you enjoy most?
- What would you like to see next time?
Real feedback helps you adjust your content and format based on your audience’s preferences.
7. Organize & Archive Your Content
Create a central hub for past streams on your site or channel, sorted by topic, product, or date. This helps with:
- SEO
- User experience
- Long-term content value
You can also use these archives as a lead magnet or resource center for your audience.
8. Update Metadata & Thumbnails
Refresh your video title, tags, descriptions, and thumbnails to reflect what actually happened in the stream (especially if you went off-script). A strong title and compelling thumbnail can significantly boost replay views.
9. Document Lessons Learned
Finally, take a few minutes to jot down what went well and what didn’t – lighting issues, unexpected guest moments, lag problems, etc. Keeping a “post-stream log” helps you refine your process and avoid repeated mistakes.
AI Tools for Webcam Streaming (Captions, Noise Removal, Auto-Framing)
AI is quickly reshaping how live video content is created, enhanced, and delivered, which means less setup stress and more studio-quality results straight from a laptop. Whether you’re producing educational content, running a virtual event, or simply broadcasting from your home office, AI-powered tools are making it easier to show up professionally on camera, without the overhead.
Background Removal Without the Green Screen
AI-based background removal tools now let streamers blur or replace their environment in real-time, even with just a standard webcam. Whether you’re teaching from your living room or hosting a live Q&A in a shared workspace, this tech lets you keep the focus on you, not the clutter behind you.
For educators and solo creators, this means more flexibility in where and how they go live, so there’s no need for a polished studio space. Paired with Dacast-compatible encoders or virtual camera software, it’s now possible to deliver polished streams without a production crew.
Real-Time Captions for Accessibility and Reach
Auto-captioning is doing wonders for accessibility, engagement, and SEO. With AI-generated subtitles appearing live, your streams become instantly more inclusive to viewers with hearing impairments or those watching on mute (which is more common than you’d think).
Some platforms also allow exporting captions for repurposing content later, like turning webinars into searchable blog posts or tutorials. When paired with Dacast’s on-demand video hosting, captions can add long-term value to your entire content library.
Facial Tracking & Auto-Framing
If you tend to move while presenting, AI facial tracking and auto-framing ensure that you stay centered in the shot without manual camera adjustments. This is particularly helpful for educators, fitness instructors, or live sellers who need to stay dynamic without worrying about technical setup.
Combined with PTZ-compatible setups or software-based framing tools, this feature offers a more engaging and natural viewer experience, even in single-camera scenarios.
Clear Audio in Busy Environments
With AI-based noise suppression, your mic can now filter out distractions like typing, background chatter, or HVAC hum in real-time. So, if you work in shared spaces, cafés, or even outdoors, this tool can make the difference between an unwatchable stream and a professional one. It also reduces the need for pricey external mics or soundproofing, lowering the barrier to entry for high-quality broadcasts.
Why It Matters in 2026
The main benefit of these AI features is that they eliminate the need for specialized gear. Where once you needed lighting rigs, sound dampeners, camera operators, and live captioners, today, much of that can be handled by software.
This makes advanced streaming more accessible and scalable. Whether you’re broadcasting internally to your team or teaching hundreds of students around the globe, these tools help you show up consistently well, no matter where you’re streaming from.
Many streaming setups today combine AI-enhanced webcam software with platforms like Dacast for live delivery. With support for external encoders and browser-based tools, you can integrate features like live captioning or virtual backgrounds directly into your stream, without adding complex layers to your workflow.
WebRTC in 2026: Ultra-Low-Latency Streaming Without the Lag
As streaming expectations rise, so does the need for faster, smoother delivery. WebRTC has become a go-to protocol for real-time communication, and in 2026, its role in live streaming is bigger than ever. Unlike older protocols like RTMP, WebRTC is built for instant playback and direct browser access, which is a solid fit for both creators and audiences who want fast viewing.
Why WebRTC Outpaces RTMP
While RTMP has been around for years, it’s starting to show its age. WebRTC offers a few key advantages:
- Lower Latency: With WebRTC, there’s barely a delay between camera and screen. This is ideal for live feedback sessions, virtual events, or anything interactive.
- No Extra Plugins: It runs directly in modern browsers, so there’s no need for Flash, third-party players, or software installs.
- Better Mobile Experience: Viewers on phones or tablets can watch live streams instantly without clunky load times or compatibility issues.
Simple Setup and Quicker Start Times
WebRTC keeps things lightweight. Because it relies less on third-party infrastructure or bulky encoding steps, you can benefit from faster loading times and fewer moving parts during setup. For internal meetings, on-the-fly broadcasts, or hybrid events, this can cut your prep time dramatically.
Real-Time Streaming with Dacast
Platforms like Dacast now offer WebRTC-based solutions that are particularly useful for:
- Embedding ultra-low-latency players on websites or landing pages
- Hosting two-way sessions with real-time chat or Q&A
- Managing hybrid events, where both in-person and online audiences expect synchronized experiences
- Real-time collaboration where remote presenters and audiences can interact with minimal delay.
Built for AR/VR and the Next Wave of Interaction
Because it runs natively in browsers, WebRTC is also better suited for AR and VR streaming applications. No plugins or proprietary apps are needed, which helps keep immersive experiences seamless across devices. As more creators experiment with 360-degree video or interactive elements, having a protocol that plays well with emerging tech becomes more important.
Edge Computing for Ultra-Low-Latency Live Camera Feeds
Edge computing can make a big difference when streaming needs to be as close to real-time as possible. It basically reduces delays and keeps playback smooth by moving video processing and delivery to servers physically closer to the viewer.
Why the Edge Matters
Traditional streaming setups route data through centralized servers, often far from where it’s being viewed. This adds latency and increases the risk of buffering, particularly over spotty connections.
Edge computing changes that by distributing processing across local nodes. This results in shorter transmission paths, lower latency, and a much more responsive stream, even under less-than-perfect network conditions.
Ideal for Real-Time Monitoring
Edge delivery is especially important for streams that serve a practical, time-sensitive function. Think:
- Security camera feeds
- Wildlife monitoring in remote areas
- Smart city infrastructure with live video oversight
In these scenarios, a few seconds of delay can make the difference between helpful and too late. Edge computing helps keep these streams stable, quick to load, and reliably up-to-date.
Better Performance for 360° and Public Cams
High-resolution streams, like 360-degree public webcams in museums, parks, or scenic spots, benefit heavily from edge delivery. Viewers expect to pan, zoom, or navigate around the video fluidly. Edge-based infrastructure helps keep those interactions smooth and responsive, even when the camera is located far from the audience.
Behind the Scenes: Dacast’s Streaming Backbone
Dacast supports edge delivery via its global CDN, offering multi-bitrate streaming that adapts in real time to each viewer’s connection. This minimizes buffering, improves stream stability, and ensures that even under heavy load, the quality remains as consistent as possible.
Whether you’re managing a 24/7 webcam streaming setup or a location-based AR feed, edge computing keeps things running fast and close to home.
Remote Control Streaming Setups (PTZ, 360°, Offsite Management)
Remote control setups do the job when you can’t be behind the camera. Whether you’re covering a live show, hosting a church service, or managing a 24/7 stream, having control over your gear from a distance gives you a lot more flexibility and fewer people on-site.
PTZ Cameras Let You Follow the Action
PTZ stands for pan, tilt, and zoom. That means you can move the camera, adjust angles, and zoom in on the fly, all through software or a hardware controller. It’s especially useful in situations where things don’t stay still – stage performances, panel talks, worship services, and more.
Add Smart Mounts and Directional Mics
There are more devices you can control remotely besides cameras. Smart motorized mounts and directional microphones help you follow both the picture and the sound. This can really clean up your audio in big or echoey spaces without having to wire the whole room.
Going Further with 360° Control
If you’re using 360-degree cameras, remote setup lets you control what part of the scene gets highlighted, either automatically or through manual framing. Instead of relying on viewers to spin around themselves, you can direct attention where it matters, which is especially useful during guided virtual events or timed live segments.
Bringing It All Together with Encoders
Platforms like Dacast support encoder setups that make it easier to switch between multiple camera feeds, including PTZs. That’s handy when you want to mix wide shots with close-ups, or move between different parts of a venue, all without touching a single tripod.
In short, remote-controlled gear cuts down on crew, boosts your flexibility, and opens up streaming in places where manual camera work is not realistic.
Energy-Efficient 24/7 Streaming Hardware (Low-Power, Solar, Fanless)
Running a stream around the clock doesn’t mean maxing out your energy bill or dealing with constant equipment failures. So, if you’re unsure how to set up a live feed camera setup that runs efficiently, today’s low-power hardware options allow you to do that even in remote or rugged environments.
Smarter Hardware Choices
- Low-power webcams and encoders are designed to deliver stable output while consuming minimal electricity.
- Solar-powered camera setups make it possible to stream from off-grid locations like mountaintops, forests, or highway routes.
- Passive cooling and remote diagnostics reduce the need for on-site maintenance or frequent manual checks.
Smarter Gear = Smarter Energy Use
Choosing energy-efficient hardware isn’t just about going green, but also about reducing failure points in long-term streaming setups. Devices like fanless NVRs, ARM-based mini PCs, or dedicated H.264/H.265 hardware encoders draw far less power than traditional desktop-based systems, while still supporting HD or even 4K feeds. The ones that use passive cooling systems eliminate moving parts altogether, which is ideal for dusty, hot, or remote environments.
Paired with low-power IP cameras that offer adjustable frame rates and bitrate throttling, these setups can adapt to environmental needs in real time, avoiding unnecessary power use during low-activity periods (for example, when a wildlife cam isn’t detecting movement). This makes a big difference in solar-powered systems or battery-buffered installs.
These compact, efficient devices are easier to enclose in weatherproof casings and mount in unusual places like rooftops, tree lines, or street signs, without needing bulky ventilation or external cooling. Combine this with Dacast’s 24/7 streaming tools, and you get a resilient system that doesn’t need babysitting.
Practical Use Cases
These setups are ideal for:
- Wildlife cams and weather stations in national parks
- Smart city feeds, such as traffic intersections or public spaces
- Agricultural and environmental monitoring in rural zones
- Scientific research, like glacial monitoring or telescope livestreams
Why It Matters
Energy-efficient streaming isn’t just about power savings. Less heat and wear-and-tear also mean:
- Longer hardware lifespan
- Fewer site visits
- Lower environmental impact
In AR/VR installations, like virtual museum tours or outdoor 360° exhibits, streamlined hardware provides a seamless user experience without bulky infrastructure or constant resets.
Live Camera Streaming Use Cases in 2026 (Work, Learning, Support)
As streaming becomes more frictionless, webcams are finding new roles beyond public viewing or events.
Hybrid Workspaces
Live feeds in shared office spaces, like entryways, break rooms, or even whiteboards, help remote team members stay visually connected to the workplace. Beyond their surveillance role, they’re about presence and transparency, especially in hybrid-first companies that want to recreate office culture.
Remote Learning
In education, streaming can go way beyond live lectures. Classroom observation cams can let parents or administrators monitor early education settings without disruption. Proctoring cams offer real-time supervision for online exams, made more effective with features like live watermarking, timestamping, or integrated annotation tools.
Customer Service Cams
Retail and service businesses are embedding live feeds directly into support portals. Some good examples are queue cams for DMV offices or tech kiosks in malls. A customer can see how busy a location is or speak with a representative via a live stream embedded into a CRM or chatbot interface.
Also, interactive elements like AR callouts or clickable overlays can turn these streams into active service touchpoints. People are basically able to point their phone at a live kiosk feed to pull up real-time wait times or FAQs.
Platform Flexibility
Dacast’s white-label player makes it easy to embed these streams wherever they’re needed in an LMS, internal dashboard, or customer-facing app, without redirecting users or sacrificing UX.
FAQs: Live Camera Feed and Webcam Streaming Setup
1. How to stream a webcam with Dacast?
To stream your webcam using Dacast:
- Log into your Dacast account and create a new live stream.
- Choose WebRTC (for low latency) or RTMP (for compatibility) depending on your setup.
- Connect your webcam through a browser or streaming software like OBS.
- Embed the Dacast player into your site or portal.
- Test your stream before going live.
This setup works for anything from one-off streams to 24/7 feeds.
2. What does a camera need to livestream?
To livestream, a camera should support HD output and have:
- A stable internet connection
- Streaming software (OBS, vMix, etc.)
- HDMI or USB connectivity
- External mic support (if better audio is needed)
- Mounting options for stable positioning
Some webcams are plug-and-play; others (like DSLRs) may require capture cards.
3. What is the best camera for broadcasting?
It depends on your use case:
- Webcams like Logitech C920 or Razer Kiyo for desk setups
- Smartphones with apps for on-the-go streaming
- DSLR/mirrorless cameras for professional setups
- PTZ or IP cameras for facility or event coverage
Look for strong low-light performance, reliable autofocus, and high frame rates.
4. Can I use a webcam for live streaming?
Yes, and it’s often the fastest way to start. Connect your webcam to your computer, open your streaming platform, look into how to stream with OBS/Dacast, and select the webcam as your video input. Webcams are ideal for streaming interviews, tutorials, or behind-the-scenes feeds.
5. How do I connect my camera for live streaming?
- For webcams: Plug it in via USB and select it in your streaming software.
- For DSLRs or other external cameras: Use a capture card (HDMI to USB).
- Configure your software with the correct audio and video sources.
- Test before going live to ensure sync and quality.
6. What’s the best webcam for streaming 24/7?
For continuous broadcasting, go with webcams built for long runtimes and consistent performance. The Logitech Brio, AXIS network cams, or PTZOptics USB models are reliable options. Look for features like auto-restart after power loss, low-light performance, and UVC compliance for compatibility with most platforms.
7. Can I monetize a webcam stream with Dacast?
Yes, Dacast offers built-in monetization tools like pay-per-view, subscriptions, and ad insertion. You can also geo-lock streams or limit access by device, making it ideal for premium content like wildlife cams, niche community portals, or gated learning environments.
8. Is Dacast compatible with mobile streaming apps?
Dacast works well with third-party mobile streaming apps that support RTMP, such as Larix Broadcaster or Streamlabs Mobile. This makes it easy to go live from your phone or tablet while still using Dacast’s backend features like analytics, monetization, and embed controls.
9. What’s the difference between WebRTC and RTMP for webcam streaming?
WebRTC is browser-based, ultra-low latency (sub-second), and ideal for real-time interaction (Q&As, security feeds, etc.). RTMP requires encoding software but is more robust for long-term streams and supports a wider range of hardware and apps. Dacast supports both, letting you choose based on your stream’s goals.
Conclusion: Launch Your Live Camera Feed with a Pro Platform
Live camera streaming of personal broadcasts or live events is one of the most effective ways to connect with your audience. Whether you’re streaming on your website, YouTube, or other platforms, it can have a significant impact. By following our guide and setting up your stream properly, your webcam live streams can help you maximize your reach and engagement.
To optimize your camera live streams, you need a professional online video platform. One with secure video upload, customizable features, and private video hosting for video-on-demand. And that’s where Dacast comes in. With Dacast you can host, monetize, and broadcast end-to-end live streams in the highest quality.
You can try Dacast free for 14 days for free today.
Finally, for regular tips and exclusive offers for live streaming, you can join our LinkedIn group. Let us know your comments, questions, and feedback below.